LAST UPDATED: 11/29/2023 – Photography Planning for Mount Cook Aoraki
For those of who read my Art of Travel Photography series, you know that one of the most important tips for taking good travel photos is to understand what you will be photographing before you travel. This is important for a number of very good reasons. First and most importantly, if you aren’t familiar with what is at your destination, you might not even make time to see some of the amazing things you could have seen, let alone photographed them.
Even if you do have a good itinerary planned that covers all of the top things that you would like to see at your destination, understanding exactly how you are going to photograph these subjects or locations before you travel can save you valuable time. I like to know where the best spots that give you the best angles are before I arrive. That way I am not wasting valuable travel time trying to figure out where to take the best shots.
Finally, understanding what you want to photograph and how you want to photograph those subjects or landscapes before you travel will help you prepare what type of gear you will need to have with you. For instance, what time of day is best to photograph at these locations? Where are the best spots at these locations to capture sunrises or sunsets? What type of lens will be best for capturing the subjects or landscapes at these locations? These are just some of the questions that the proper advanced research can answer.
With about a month to go until our trip to Australia and New Zealand and the itinerary for our trip all set, I figured now was as good a time as any to start doing the photo prep for the trip. In this series, I am going to walk you thru my photography prep for each of our destinations in Australia and New Zealand. If you haven’t had a chance to review my planning process for our Australia and New Zealand trip, I have linked those articles for you to review below.
In the sixth installment of my photography planning for the trip, I am going to cover our sixth destination, which is Aoraki/Mount Cook National Park. I am going to outline the research I did on what the top photography locations in Aoraki/Mount Cook National Park are, where it is best to photograph in those locations, which time of day it would be best to photograph the locations, and what type of photography equipment I will need to get my desired shots.
- Part 1 – Photography Planning for Sydney, Australia
- Part 2 – Photography Planning for Cairns, Australia
- Part 3 – Photography Planning for Melbourne, Australia
- Part 4 – Photography Planning for the Great Ocean Road
- Part 5 – Photography Planning for Lake Tekapo, New Zealand
- Part 6 – Photography Planning for Mount Cook, New Zealand
- Part 7 – Photography Planning for Queenstown, New Zealand
- Part 8 – Photography Planning for Te Anau, New Zealand
- Part 9 – Photography Planning for Wanaka, New Zealand
- Part 10 – Photography Planning for Fox Glacier, New Zealand
Resources I Used
When doing photography planning for any trip, the first step I take is to do research on the location to see what there is to photograph, where the best places to photograph those subjects or landscapes are, and when and how to photograph them. When it came time to do my research on Aoraki/Mount Cook National Park, here are some of the best resources that I used to do my research.
- Destinationless Travel – Where to Take the Best Photos in Mount Cook NP
- Location Scout – Mount Cook National Park
- Young Adventuress – 10 Mindblowing Views at Mount Cook, New Zealand
- Nico Babot Photography – A photography guide to Mount Cook
- Stuff.co.nz – Photographing Aoraki Mt Cook
- Instagram Photos with the #MountCook Hashtag
- A Search of “Mount Cook New Zealand” on Pinterest
With these resources in hand, I sat down to start looking for places and things that I would like to photograph in the Aoraki/Mount Cook National Park area. By doing this research now, it will ensure that I don’t miss photographing anything spectacular when I arrive in Aoraki/Mount Cook National Park.
It will also help save me time trying to determine when and how to photograph the subjects and locations that I have identified. If you would like to learn more about the process I use when I do my photography research, I would suggest that you check out my Art of Travel Photography – Planning Your Shots guide.
| READ MORE: |
 |
| Planning Your Travel Photos |
Photo Spots I’ve Identified
After doing my research, I identified ten locations in Aoraki/Mount Cook National Park that I really want to take photographs at. I am going to cover each of these locations in greater detail, but as a summary, I have included a map and a list of all ten locations for you to review below.

 |
Tasman Glacier Viewpoint |
 |
The Road to Mount Cook |
 |
Peter’s Lookout |
 |
Sealy Tarns Viewpoint |
 |
Hooker Valley Walk |
Tasman Glacier Viewpoint
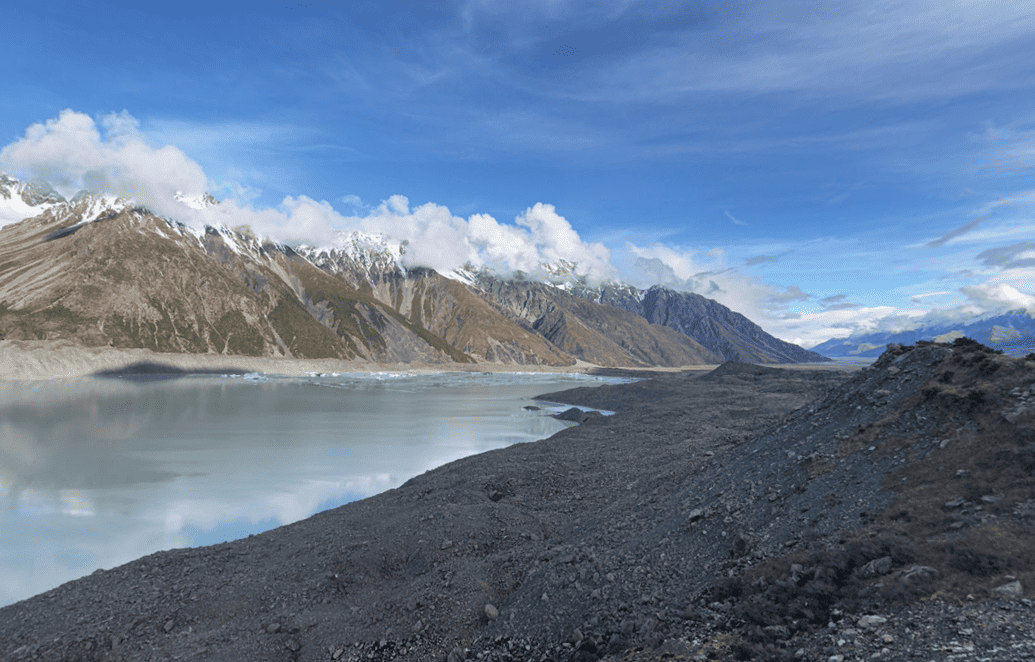
The first location that I would like to highlight in my photography research for Aoraki/Mount Cook National Park is one of the most imposing geological features within the national park. At a total size of roughly 101 square kilometers or roughly 39 square miles, the Tasman Glacier is the largest glacier in New Zealand. It is an awesome natural feature and beautiful to photograph.
To get the best shots of the glacier, you will need to take the Tasman Valley Road to the parking pull-off and then take a short hike to the Tasman Glacier Viewpoint. I have included a map below to assist you in locating this spot. I would recommend carrying a wide-angle lens with you to capture as much of the beautiful landscape as you can.

Lucky for me, when I will be visiting the Aoraki/Mount Cook National Park at the end of September this year the sun will be rising in the perfect location for me to get some really epic shots of the sun rising over the glacier. In fact, the glacier is so large that you can generally get some great sunrise shots of the glacier from the Tasman Glacier Viewpoint almost year-round. If you do decide to get some great sunrise shots from the viewpoint, make sure you bring a sturdy tripod with you.

The Road to Mount Cook
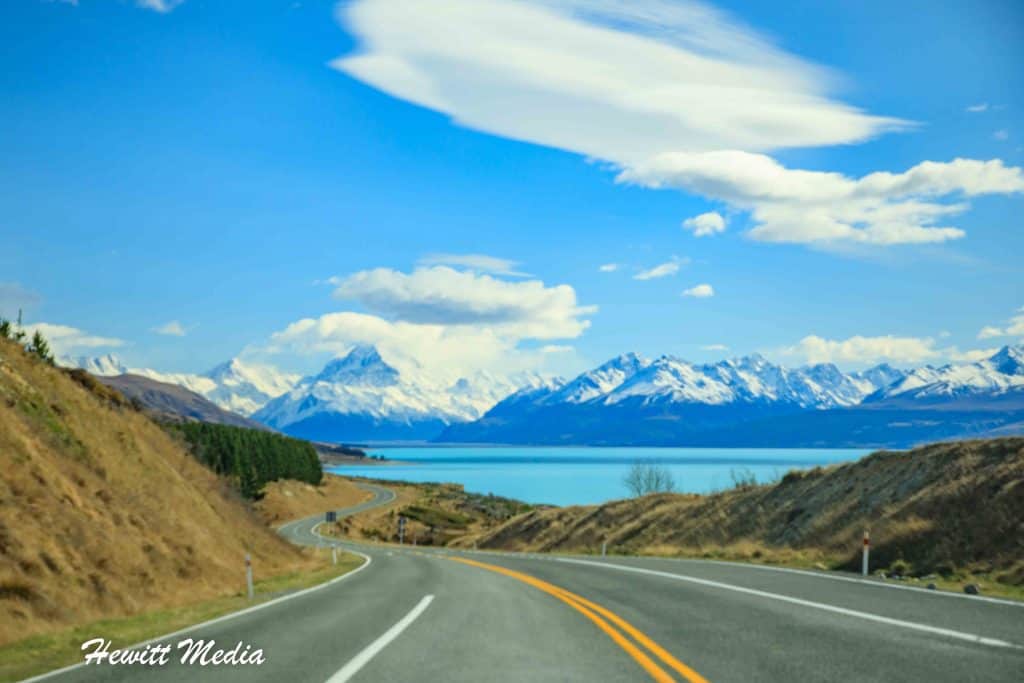
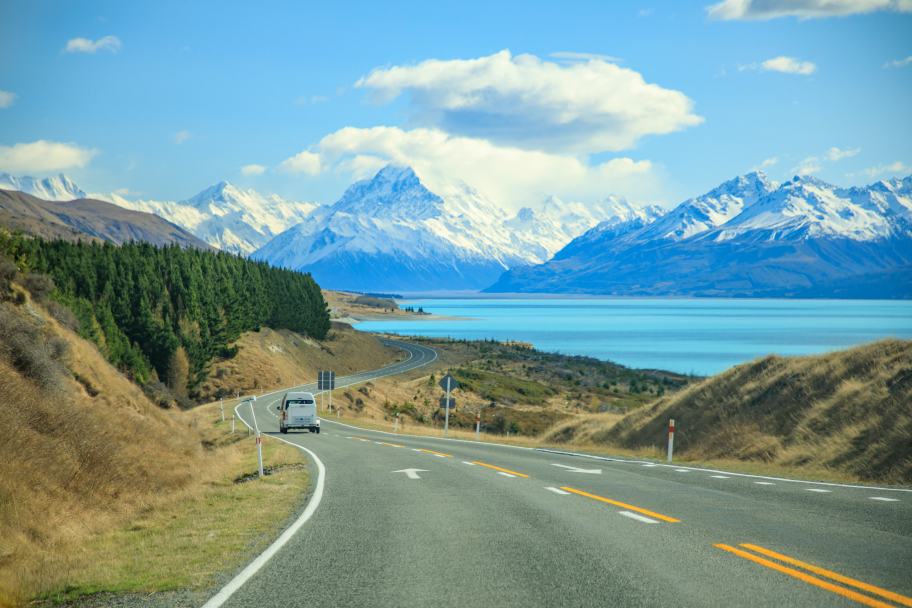
The second location that I would like to highlight in my photography research for Aoraki/Mount Cook National Park isn’t actually inside the park. Instead, it is along the road leading into the park. As you can see in the image above, you can get some truly spectacular shots of the long stretch of road leading into the park with Mount Cook and the surrounding mountain range as a beautiful backdrop.
If you would like to get this shot, I would recommend that you choose a safe stopping point along one of the many long stretches where the road is straight and Mount Cook is visible in the background. Remember, Mount Cook will get larger in your view the closer you get to the park. I would also recommend carrying a wide-angle lens with you because you are going to want to capture as much of the landscape as possible. To assist you in finding the right location to capture your shots of the road leading into Aoraki/Mount Cook National Park, I have included a map for you to review below.

Unfortunately, when I will be visiting the park in late September the sun will not be rising or setting in an ideal location for me to get either good sunrise or sunset shots of the road leading into Aoraki/Mount Cook National Park. As you can see in the map below, the sun will be rising to the east of the road and will set to the west of the road. I will still be able to get some great shots of the road and the mountains with great light during the Golden Hours, but I will not be able to get shots with the sun either rising or setting behind Mount Cook.
If you really want to get some spectacular sunrise or sunset shots from this location, I would recommend visiting during the winter months of June thru August. The sun won’t rise or set directly behind Mount Cook, but it will rise and set just to the side of the range and allow you to get some pretty incredible shots with a colorful sky. I would also recommend having a sturdy tripod with you if you are going to take shots at sunrise or sunset.

Peter’s Lookout
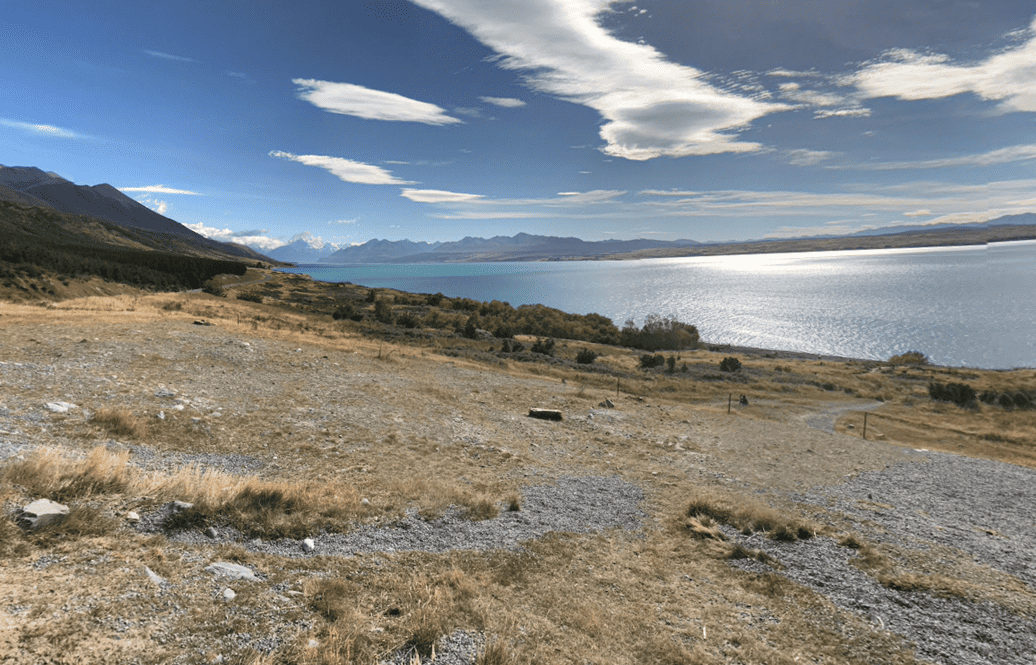
Another location that is outside of Aoraki/Mount Cook National Park that is definitely worth taking photographs at is a spot called Peter’s Lookout. This spot is located on the road to Mount Cook, but further out from the park than the spot I highlighted above. This spot sits along the western shore of Lake Pukaki and offers some absolutely breathtaking views of the lake with the mountain range as a backdrop.
If you take a look at this viewpoint on Google Streetview, you will be blown away by the beauty of the area. To give you an idea of where this viewpoint is in relation to Aoraki/Mount Cook National Park, I have included a map for you to review below. I would make sure to bring a wide-angle lens if you are going to shoot from this viewpoint as you will want to get as much landscape as you can in your shots.

The situation with the sunrise and sunset locations will be the same for me with Peter’s Lookout when I visit in late September as it will be with the road to Mount Cook in general. As I explained when I highlighted the road to Mount Cook above, the sun will be rising directly to the east of Mount Cook Road and setting directly to the west of Mount Cook Road when I visit. This is less than ideal if you would like to get shots with the sun either rising or setting behind Mount Cook.
However, all is not lost as I should still be able to find some great light and colorful skies during the morning and evening hours that I can use to enhance my shots from Peter’s Lookout. If you decide to visit and want to maximize the beauty of your sunrise or sunset shots from this viewpoint, I would try to visit during the winter months of June thru August and make sure you bring a sturdy tripod with you.

Sealy Tarns Viewpoint
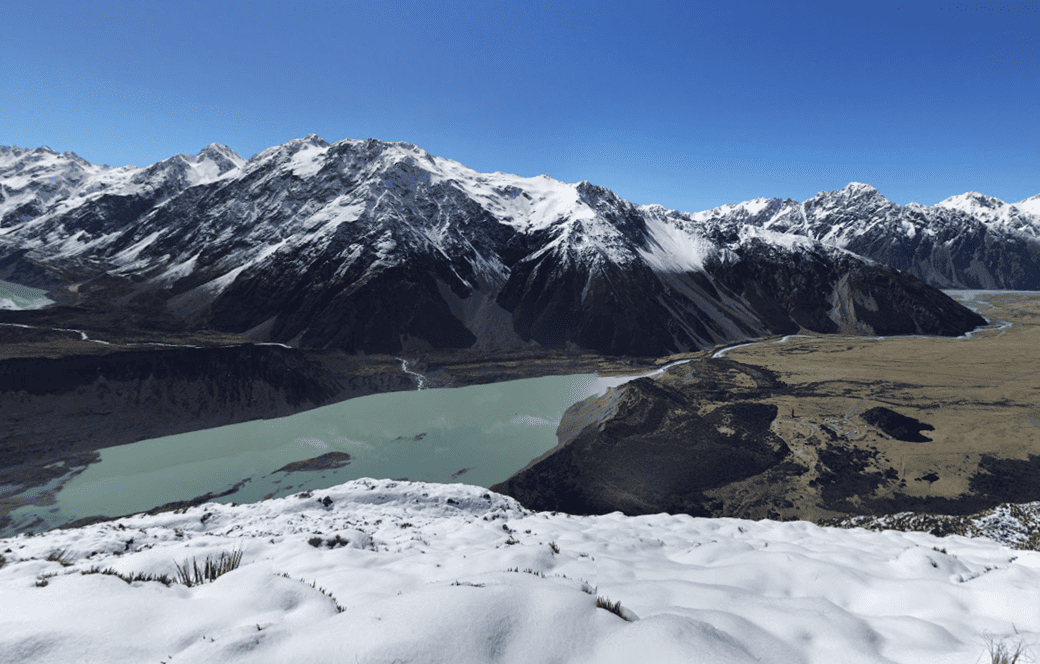
If you are up for doing some hiking while you visit Aoraki/Mount Cook National Park, then one of the best viewpoints that you can take pictures at within the park is the Sealy Tarns Viewpoint, which sits on the Sealy Tarns track. It’s only about a three-and-a-half mile hike from the White Horse Hill Campsite, where you can park your car, to the Sealy Tarns Viewpoint, but there is quite a bit of a climb in elevation to reach the viewpoint. In fact, you need to ascend almost 550km, or nearly 1,800 feet, before you reach the end of the hike. For more details on getting to the Sealy Tarns Viewpoint, I have included a map for you to review below.
If you are an advanced hiker, you can also continue on down the Mueller Hut Route to reach Mueller’s Hut, which is another amazing vantage point from which to photograph. Regardless of whether you decide to hike the entirety of either of these routes or just get a taste by hiking part of the track, you will want to make sure you have a wide-angle lens with you to capture as much of the beautiful landscape as possible.

When we will be visiting Aoraki/Mount Cook National Park in late September of this year, the sun will be rising in a great location for me to get some good sunrise shots from the Sealy Tarns Viewpoint. The issue is, I am not sure I want to make this difficult of a hike in the dark to be in a position to get sunrise shots from the viewpoint. I may end up trying to time my hike to arrive near the end of the Golden Hour in the morning instead of trying to get to the viewpoint before sunrise. That would be much safer. If you would like to get some good sunrise shots from the Sealy Tarns Viewpoint, I would recommend that you plan ahead to make sure you are prepared to hike safely and bring a sturdy tripod with you.

Hooker Valley Hike
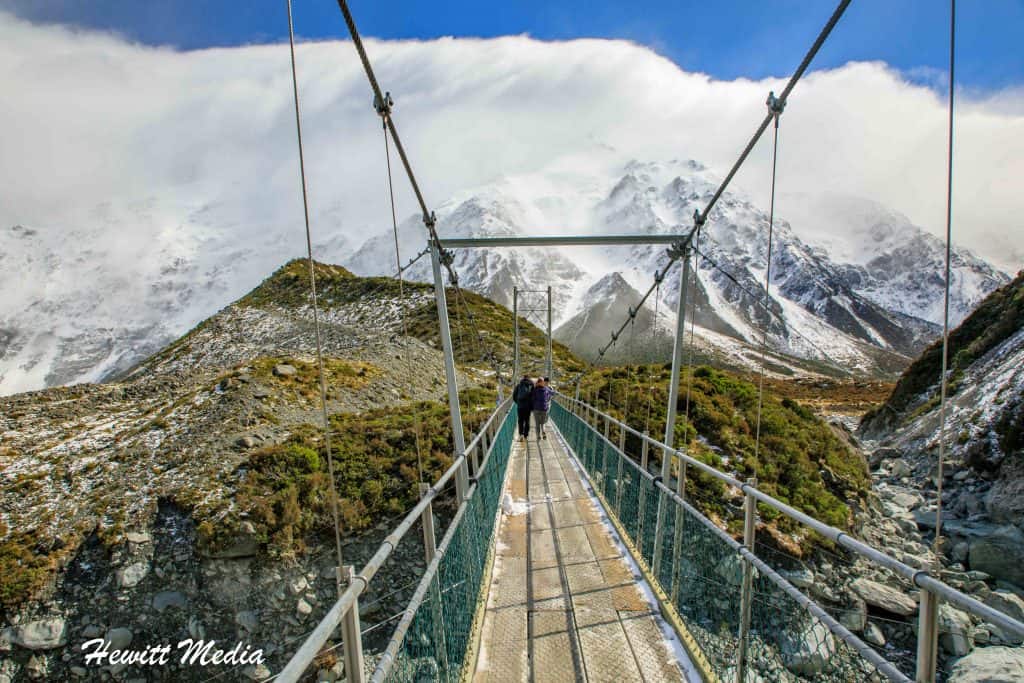
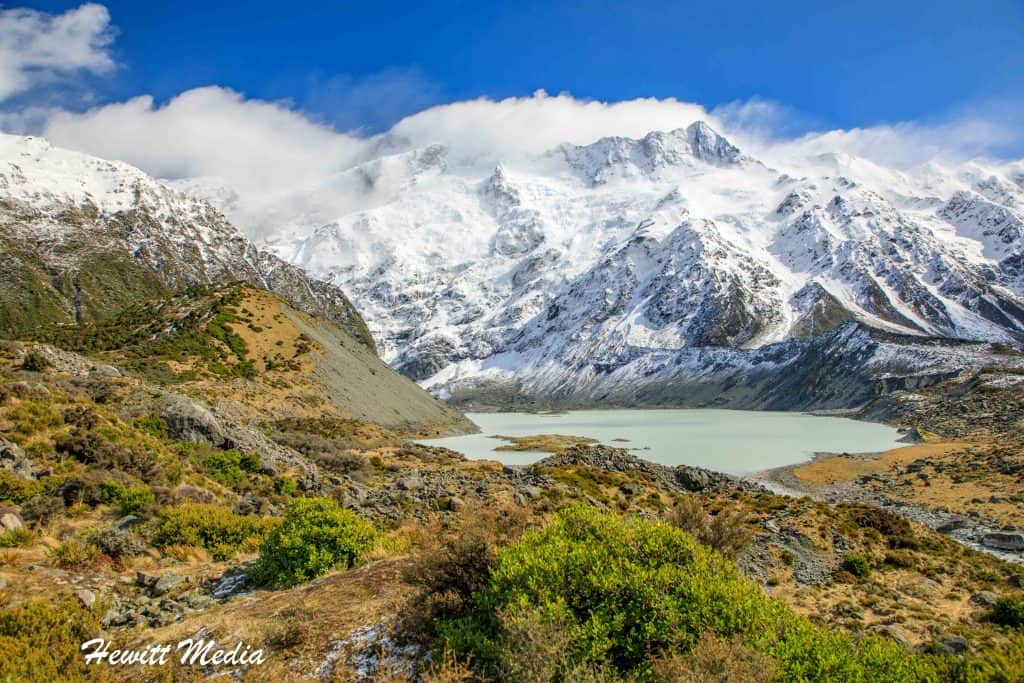
The last location that I would like to highlight in my photography research for Aoraki/Mount Cook National Park isn’t a single location but a series of locations along one of the park’s most popular tracks. The Hooker Valley Track is one of the most popular hikes in the Aoraki/Mount Cook National Park because it goes thru some absolutely stunning landscape, but it isn’t nearly as difficult as some of the other tracks in the park. At nearly 7-miles out-and-back, it isn’t a short hike, but it doesn’t involve nearly as much elevation change as some of the other popular tracks. This makes it one of the easier hikes for beginning hikers to enjoy.
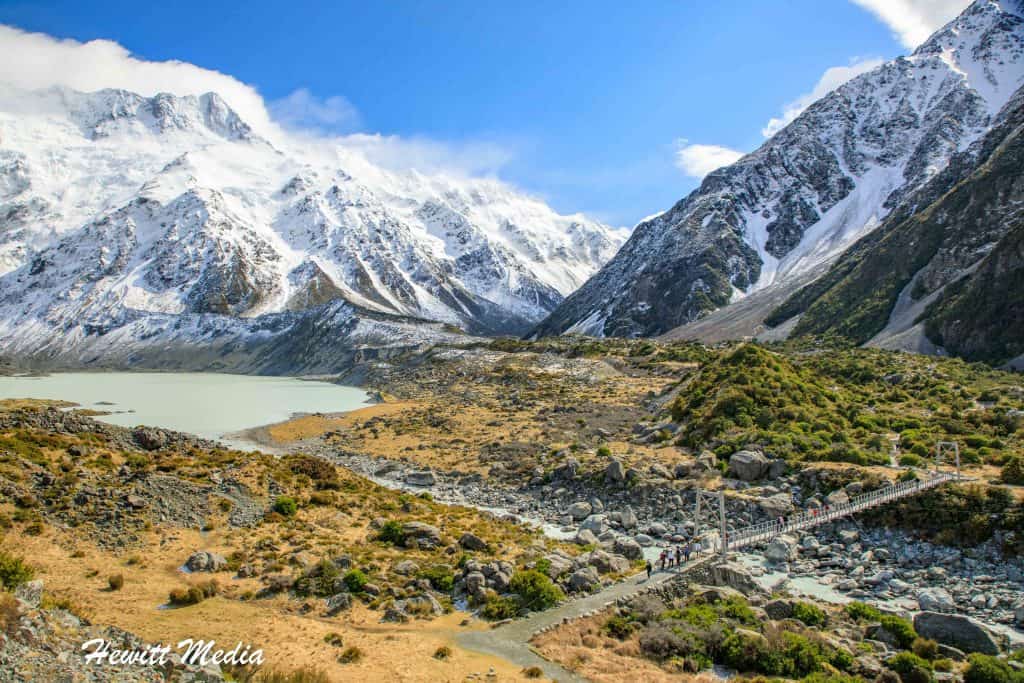
Not only does the track go thru some stunning landscape, but it also involves three river crossings with suspension rope bridges that make fairly interesting photography elements in their own right. If you would like to better understand the Hooker Valley Track and the points of interest for taking photographs along it, I have included a map for you to review below.

When I will be visiting Aoraki/Mount Cook National Park in late September of this year, the sun will set and rise in great spots for me to get some pretty amazing sunrise and sunset shots along the Hooker Valley Track. Although the trail is a bit easier, I am not sure I will be doing any hiking in the dark to get shots of the sunrise or sunset, but I should be able to take advantage of the dawn and dusk hours to get some shots in great light with colorful skies. Remember, if you would like to get some sunrise or sunset shots along the Hooker Valley Track, make sure you plan ahead to hike safe and bring a sturdy tripod with you.

Don’t Forget to Subscribe to My Adventures!

Let Me Help You Save On Your Next Adventure!





awesome man! thanks for all the information! Great photos as well!
Thanks for the kind words Erik! 😀