LAST UPDATED 1/24/24 – Guide for Hiking the Isthmus Peak (the top Roy’s Peak Alternative)
NOTE: This post contains references to products on my Amazon Store site. I may receive a commission when you purchase these products from my store, though at no additional cost to you. I hand-pick and recommend only the products that I am either familiar with or comfortable recommending.
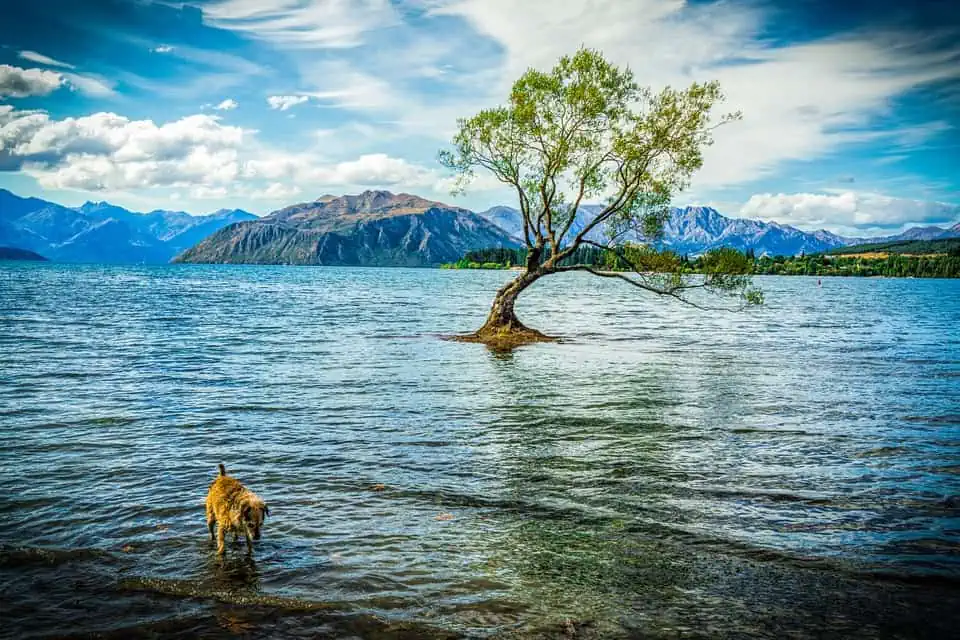
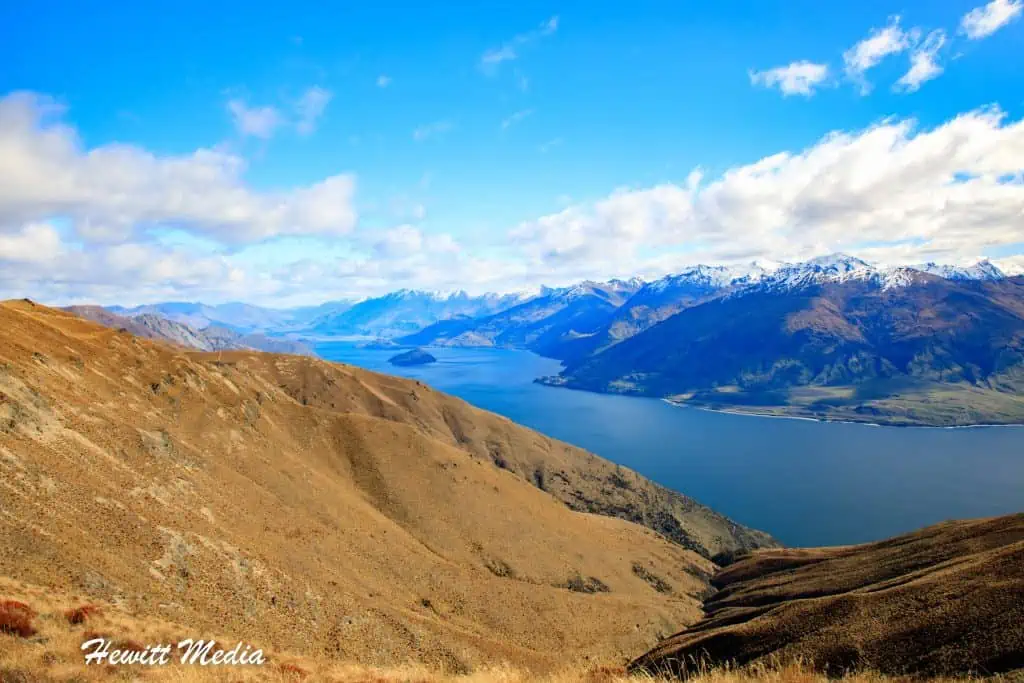
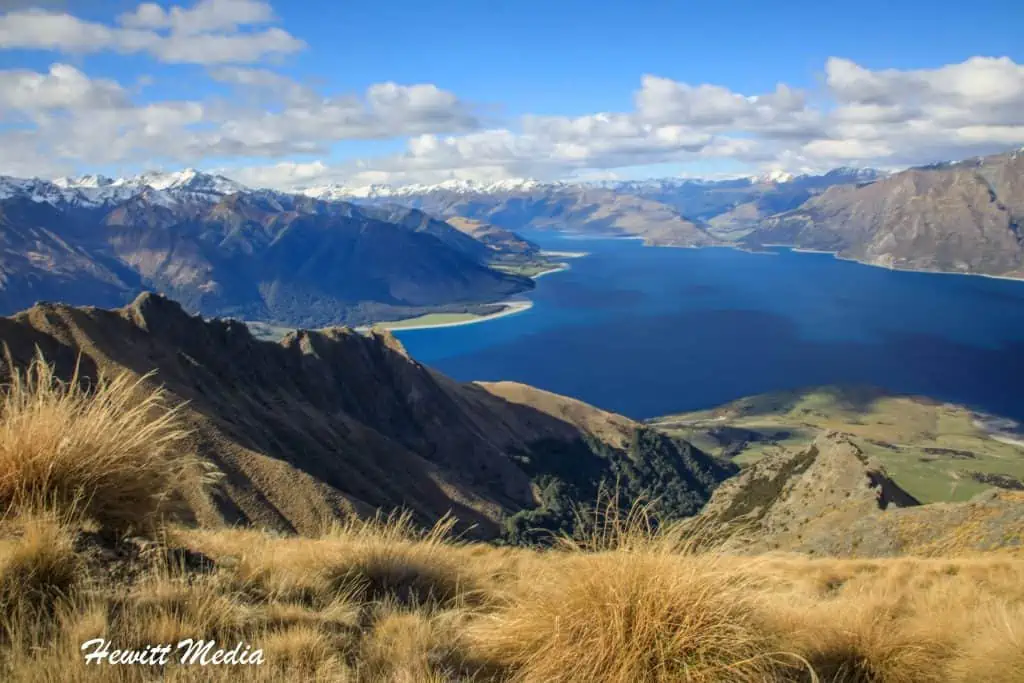
The area surrounding the city of Wanaka on New Zealand’s South Island is known for its incredible hiking tracks. After all, with two of the South Island’s prettiest lakes and the stunning Mount Aspiring National Park right at the doorstep, the landscapes in the area are beyond fantastic. When it comes to these incredible hiking tracks, the infamous Roy’s Peak Track gets most of the attention. Much of the attention it gets is deserved as the payoffs are amazing in terms of the views you get from that track.

However, many people who visit the Wanaka area don’t realize that there is an equally incredible Roy’s Peak alternative located on the north side of Wanaka. While it doesn’t get nearly the amount of publicity that the Roy’s Peak Track gets, the Isthmus Track delivers equally exceptional views and typically has far smaller crowds to contend with than Roy’s Peak.
In this guide, I am going to give you all of the information that you need to be able to successfully plan your hike of the Isthmus Peak Track. Among other things, I am going to tell you how to get there, let you know when the best time of year to plan your hike, help you decide what to bring with you on your hike, and tell you what you can expect on your hike of the Isthmus Peak Track.
Isthmus Peak Hiking Guide Navigation Menu

How to Get to the Isthmus Peak Track

The Isthmus Peak Track is located just outside the city of Wanaka, near what is called “the Neck” between lakes Wanaka and Hawea. From Wanaka, it is roughly a 32.9km (or 27-minute) drive to the Isthmus Peak Track parking area. You will need to take State Highway 84 East out of Wanaka until you get to State Highway 6. As you can see, it is a relatively close Roy’s Peak alternative.
You will turn left onto State Highway 6 and continue for roughly 29km until you see the Isthmus Peak Track Parking on the right-hand side of the road. To assist you in locating the Isthmus Peak Parking area, I have included a map for you to review below.

About the Isthmus Peak Track

Not only is the Isthmus Peak Track similar to the famous Roy’s Peak Track in the beauty of the landscape and views you can see from the trail, but it is similar in other ways. This includes distance, elevation gain, and difficulty level. Both trails are out-and-back, and although the Roy’s Peak Track has slightly more elevation gain, the Isthmus Peak Track is slightly longer.
Neither track requires technical hiking or rock scrambling, but they are both rated as difficult hikes because of their elevation gain and the distance of the hikes. I have included an overview of the Isthmus Peak Track for you to review below. As you can see, it is a more than worthy Roy’s Peak alternative if you aren’t able to hike Roy’s Peak during your visit.
| Distance: | 9.9 miles (15.9km) |
| Elevation Gain: | 3,717 feet (1,133m) |
| Route Type: | Out-and-Back |
| Estimated Time: | 4-6 hours |
| Level of Difficulty | Difficult |
When looking at the map for the Isthmus Peak Track, I like to break the hike up into five different sections. These sections are all labeled on the map you see below. Each section presents a different type of terrain or hiking that you will have to navigate as you work your way to the Isthmus Summit. If you are interested in learning more about each of these sections of the trail, I have included additional details on each section for you to review below.

The Beginning of the Track

The beginning of the Isthmus Peak Track is characterized by some steep ascents as the trail quickly climbs up from the roadside. This section involves some of the most technical of the hiking that you will need to do on the trail. No ropes or climbing equipment is needed, but you do need to be very careful with your footsteps as you navigate this part of this trail. Having proper hiking boots is very important for this part of the trail.
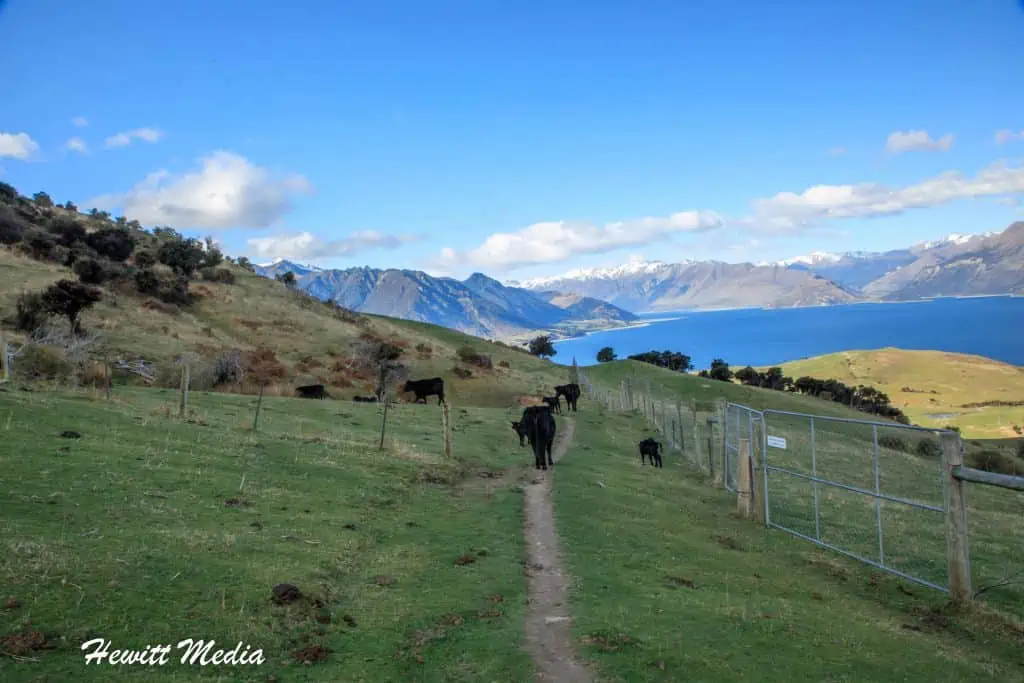
The Cow Pastures

After making an initial, sharp ascent into the mountainside from the road, the path turns and heads laterally to the south for over a mile. As you move south you will head through several cow pastures that are fenced off. Enjoy this part of the hike as this is undoubtedly the easiest stretch of the hike. There aren’t any steep ascents or descents during this stretch, but you do need to navigate the cow droppings along the trail.
Important Note: This part of the trail crosses private property. Please be respectful of the landowner’s property and livestock. Stick to the trail and make sure you leave no trace of your presence on the land.
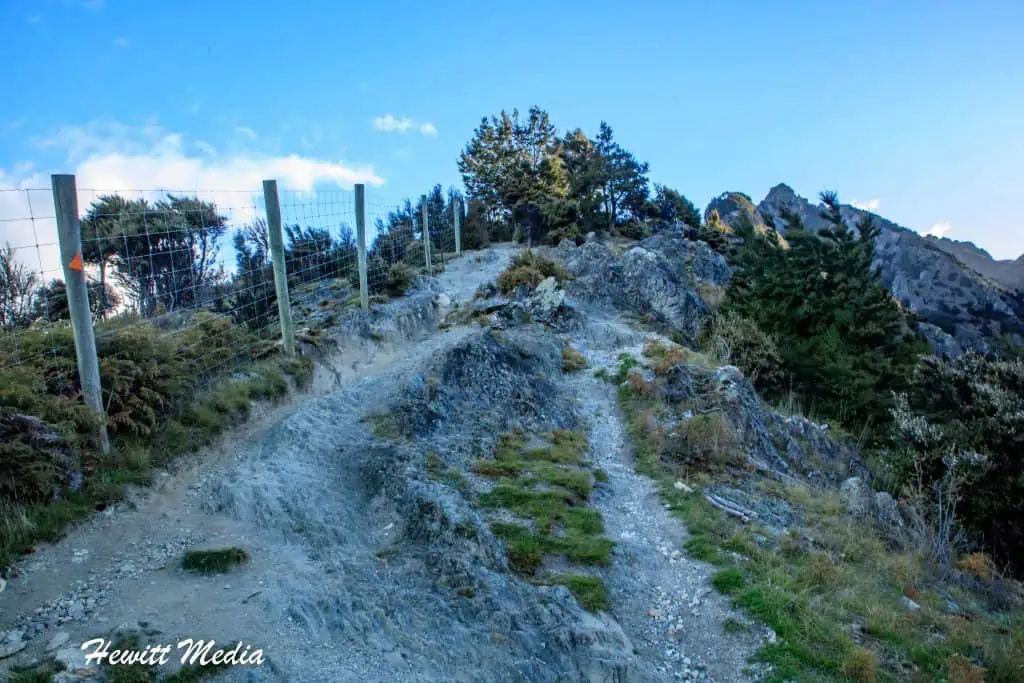
The Switchbacks

After traveling south through the cow pastures, you will come to a series of steep switchbacks. As you can see in the image above, these switchbacks are at a very steep incline, which makes this section of the track undoubtedly the most difficult section of the track. As you start to climb the seemingly never-ending procession of switch-backs and start to doubt whether you can complete the trail, just keep in mind that this is the most difficult section of the trail and things get considerably easier down the trail.
The False Summits

After you get past the massive switchbacks you might think you are on the home stretch, but the Isthmus Trail’s meanest tricks are still ahead of you. Yes, the trail does get much easier after you get past the switchbacks, but you will encounter three false summits that might erode your hiking confidence if you aren’t prepared for them.
As you start the climb of the switch-backs it appears to most hikers as if just beyond the top of the ridge is the Isthmus Peak. This isn’t the case. This is just the first of the false summits. After you get past the switch-backs you have to follow the ridgeline for a few miles before you reach the summit.
During this section of the trail, you will encounter a few more spots that look like you are approaching the summit, only to find the trail goes on. Do not be disheartened and keep in mind that you only have a few more miles of hiking before you reach the summit.
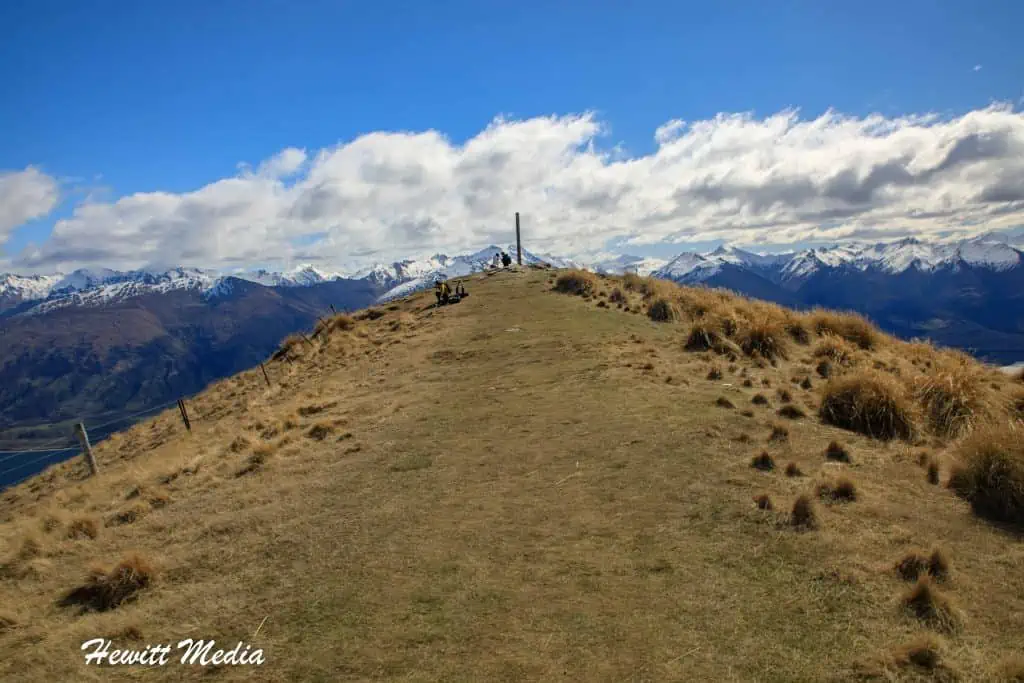
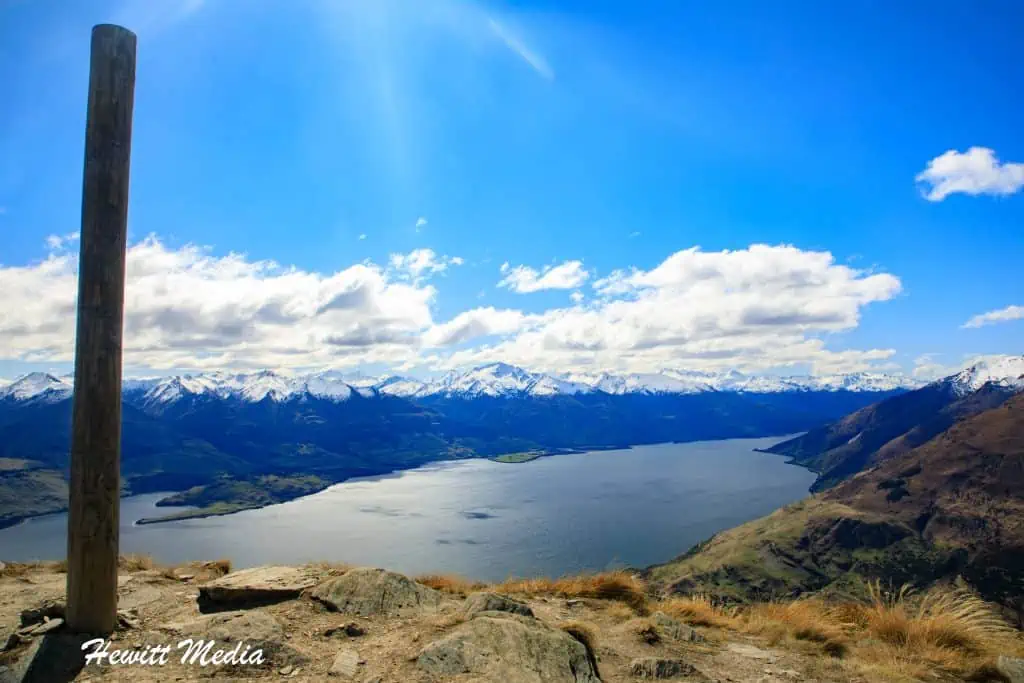
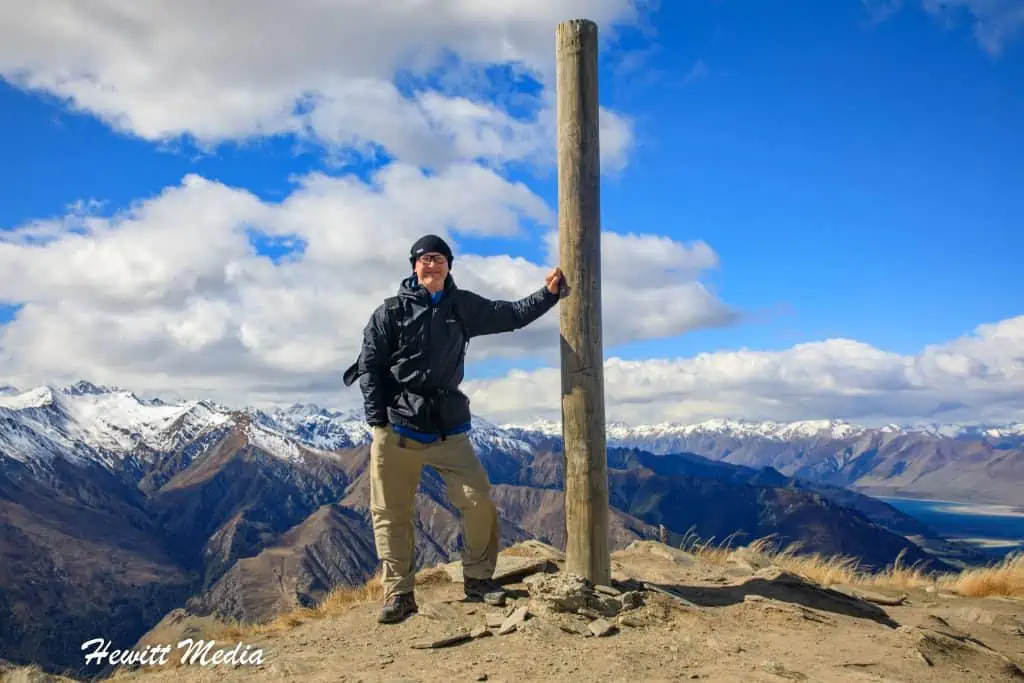
The Summit Push

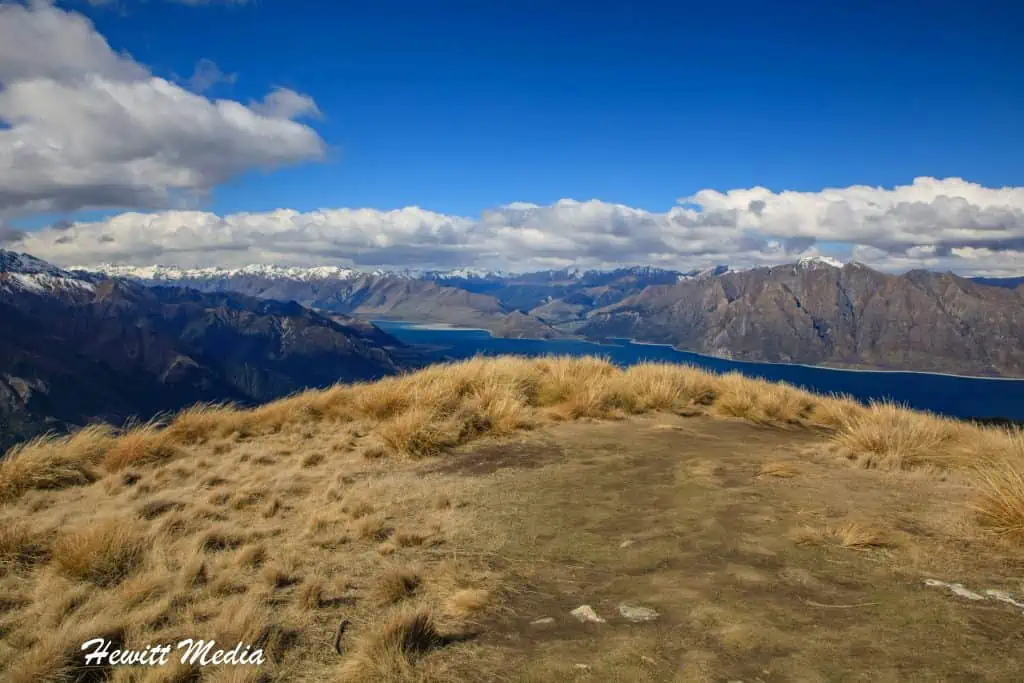
As you start to traverse the long ridgeline, at a certain point you will see the true summit. It is marked by a large wooden pole that is sticking out of the ground, as you can see above. This final push to the summit is the easiest part of the hike as you are so full of adrenaline because you are almost to the top and so filled with awe at the beauty around you.
After making it to the summit, please keep in mind that you will need at least a few hours to get back down to the parking area safely. You do not want to be stuck on this track after dark unprepared. For that reason, you must depart the summit with plenty of time to get back down.
Best Time to Hike the Isthmus Peak Track

If you are planning a trip to Wanaka to hike the Isthmus Peak Track, you are going to want to understand the typical weather conditions throughout the year, as well as the annual track closures before you start planning your trip. Just like Roy’s Peak, this popular Roy’s Peak alternative requires preparation before you show up to hike it.
If you don’t plan appropriately, you might show up in Wanaka to find that the weather is too bad to make the hike or the trail is closed altogether. To assist you in planning the best time of year for you to visit, I have included information on the average temperatures and precipitation levels throughout the year, as well as the annual track closures below for you to review.
Average Temperature (°F)
Unless you come prepared to hike in freezing cold temperatures, understanding what the average temperatures are like in the Wanaka area throughout the year will be important when planning your trip. To assist you in your planning, I have included some data below on what the average high and low temperatures are for each month of the year.
Average Precipitation (Inches)
Hiking in rain, sleet, or even snow can be a miserable experience. This is especially true if you are unprepared for these elements. To assist you in being prepared for your trip, I have included some data below on what the average precipitation level is in the Wanaka area for each month throughout the year.
Isthmus Peak Track Annual Closures
Closed from November 20 – December 20 for Fawning Season
The Isthmus Peak Track is closed annually from November 20 until December 20th for the fawning season. If you are planning a trip to the Wanaka area to hike the Isthmus Peak Track, you will want to make sure you plan your trip outside of this period. If you are going to be in the Wanaka area during this time of year and would like an alternative to the Isthmus Peak Track, I would suggest hiking the Roy’s Peak Track.
What to Wear to Hike the Isthmus Peak Track

Many of the hikes on New Zealand’s South Island are no joke. They often involve remote locations, steep terrain, and rapidly changing weather. This is especially true of the hikes in the Wanaka area like the Roy’s Peak Track and the Roy’s Peak alternatives.
The Isthmus Peak Track is a difficult enough hike when you are completely prepared. Being unprepared when you do this hike can make the hike even more difficult, if not dangerous. To make sure that you are prepared for this hike, I have included some general packing tips as well as a packing list for you to review below.
General Guidelines

When packing for any hike, it is important to know what you might expect when you head up the trail. This is where we typically need to lean on other people’s experiences the most. As you start to pack for your hike of the Isthmus Peak Track, please use the general packing principles I have listed below to help guide you in what to bring and not bring with you on your hike.
Prepare for the Elements
Much of the Isthmus Peak Track is at a higher altitude, so the weather in these areas can be unpredictable and change quickly. When you hike the Isthmus Peak Track you need to be prepared for bad weather, even if the forecast doesn’t call for it. The last thing you want is to be stuck hours into the trail without the proper clothing when bad weather moves in.
Pack Layers to Wear
A great way to make sure that you are prepared for the conditions no matter what the weather brings is to bring multiple layers of clothing with you on your hike. Your base layer should be moisture-wicking, you should have a waterproof outer layer, and then you should have a middle layer that will keep you warm if temperatures fall. You can always add or remove layers as the weather conditions change.
The Lighter the Better
It will be important for you to choose your gear wisely when you pack. Not only should your gear be comfortable, fit for hiking, and adequate for the changing temperatures, but it should also be lightweight. You will be doing a lot of walking on this hike as it is roughly ten miles out and back. You aren’t going to want to carry a ton of weight on your back as you walk up the steep switchbacks on this trail.

Don’t Forget Safety

It is very easy to get excited about your hike and forget to keep your mind on safety. This is when accidents tend to occur. This hike takes you into some fairly remote areas, so emergency evacuation in the event of an injury isn’t something that can typically be done quickly. For this reason, you must be always mindful of your safety and the safety of others while on the trail. I have included some safety tips below that will help you ensure your safety while hiking the Isthmus Peak Track.
- Be Mindful of Adverse Weather – The weather in New Zealand can be unpredictable, so you should never set out on a hike without being prepared for inclement weather.
- Be Avalanche Aware – The area that you are hiking through can produce avalanches that cross the hiking trail. Before heading out on your hike, view avalanche information and the terrain rating for this track to ensure that the track is safe.
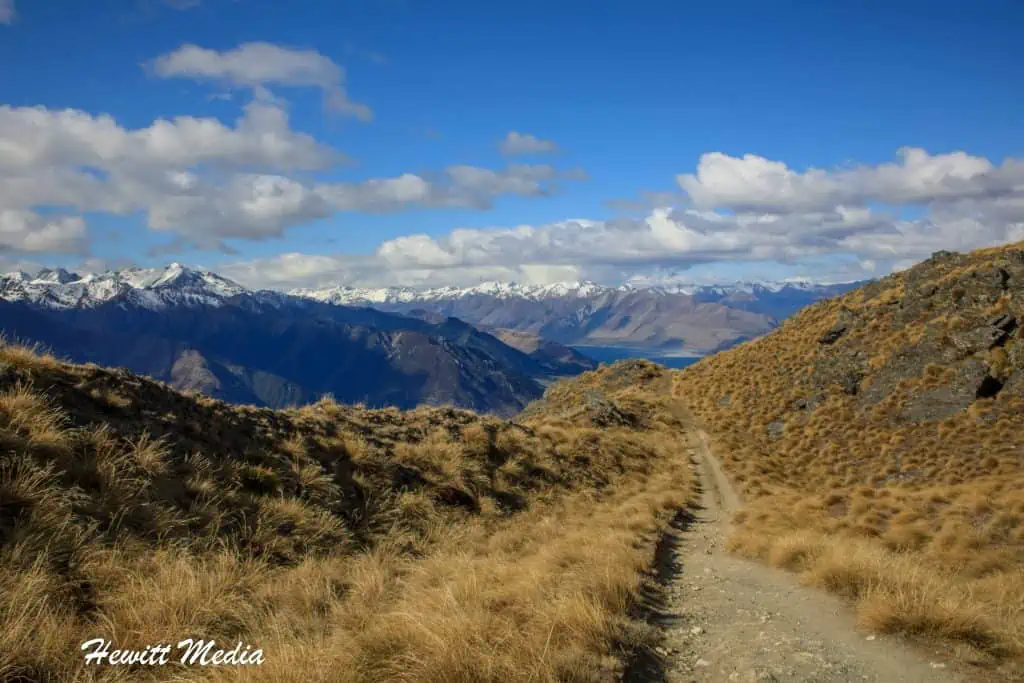
- Stick to the Trails – Some of the areas you will be hiking through are on private property and are used for hunting. For your safety, stick to the trail at all times and be mindful of posted signs and warnings along the trail (see the image above).
- Keep Track of the Time – This is a difficult trail that can take over six hours to complete. You should never attempt to start this hike if you know that you won’t have enough daylight to complete the hike. Always be mindful of the time and how much of the hike you have left. Be sure to always give yourself enough time to get back to your car during daylight.
The Essential Gear for Hiking the Isthmus Peak Track
NOTE: This Isthmus Peak Track (a Roy’s Peak alternative) post contains references to products on my Amazon Store site. I may receive a commission when you purchase these products from my store, though at no additional cost to you. I hand-pick and recommend only the products that I am either familiar with or comfortable recommending.
Bringing the right gear with you on this hike can mean the difference between being comfortable and being miserable. If you would like some tips on what I recommend that you pack for hiking the Isthmus Peak Track, I have included a gear list and an equipment checklist for you to review below.
Isthmus Peak Track Packing Checklist
There is a lot to think about when packing for a trip, so I don’t expect you to remember to come back to this article to review my packing list when packing your bags. To make things easier for you, I have included an easy-to-print packing checklist below for you to print off now and review later.
Hiking Boots
 |
While the Isthmus Peak Track isn’t an overly technical hiking trail, there are sections of the trail where you will need to be careful with your footing to prevent slipping or getting injured. For this reason, it is very important that you have proper hiking shoes or boots with you when you hike this trail. I would recommend waterproof hiking boots with a protected toe to protect your feet from the elements and the trail. |
| View My Recommendations on Amazon | |
Choosing the Right Hiking Boots
Choosing the right hiking boots is important because you are going to be spending a lot of time walking, and much of that will be on rock steps and uneven trails. When looking for a good set of hiking boots for this trip, please keep the following characteristics in mind:
- The boots should be lightweight. The last thing you will want to have is heavy boots when you are doing as much walking as you will be. It is said that each pound of weight on your feet equates to roughly five pounds on your back, so your boot weight really matters. Look for boots that weigh between 2.2lbs (1kg) to 3.3lbs (1.5kg). Anything more than that is too heavy.
- Look for boots that have a rubber sole with deep lugs. This will give you the best traction and ensure that you don’t slip on uneven rocks.
- Look for a mid-to-high height boot to give you good ankle support. You are going to be walking on some uneven surfaces and you don’t want to twist an ankle while on the trail. For added support, look for boots that have speed hooks or D Strings.
- Make sure the boots you purchase are waterproof. You will want to protect your feet from the elements should the weather turn bad. Walking in wet boots can be miserable.
Hiking Socks
 |
When you are on a long hike in an alpine region like you will be on the Isthmus Peak Track, the last thing you want to have is cold feet. If your feet get wet from rain or sweat, chanced are that they will start to get cold. I would recommend that you wear a pair of socks that are designed for hiking. These socks are typically made of wool or synthetic fibers that protect your feet from getting cold when they get wet. If you are interested, I have included a link to some socks that I recommend below. |
| View My Recommendations on Amazon | |
Hiking Pants
 |
Just like with your socks, you want to also make sure that the pants you wear on this hike are moisture-wicking. Under no circumstances should you wear denim jeans on the hike. Wearing pants like denim jeans that do not wick away moisture can be a recipe for disaster. If these pants get wet, you will become cold and miserable. Instead, look for a pair of pants that are moisture-wicking. If you know that you are going to be hiking in the rain, I would go a step further and wear a pair of hard-shell waterproof pants. If you would like to review some of the recommendations I have for pants to wear, I have included a link below. |
| View My Recommendations on Amazon | |
Breathable T-Shirt
 |
In case the weather is warm when you hike, you will want to make sure that you have a T-shirt for your bottom layer. The T-Shirt should be moisture-wicking in case you need to wear additional layers on top of it and you sweat. If the T-shirt isn’t moisture-wicking it will make you cold when it gets wet. If you would like to shop for some moisture-wicking T-shirts, I have included a link to some recommendations I have below. |
| View My Recommendations on Amazon | |
Base Layer (Medium to Heavy)
 |
Because you are going to be hiking in an alpine area, you will want to make sure you have a base layer that can protect you from cold temperatures should the temperature drop. I would recommend a medium to a heavy weighted base layer that is moisture-wicking. If you would like some suggestions of base layers that I recommend, I have included a link to some of my recommendations below. |
| View My Recommendations on Amazon | |
Fleece or Nano Puff Jacket
 |
Should the temperature start to drop while you are on the Isthmus Peak Track, you are going to want to have a jacket to keep you warm. This is especially true as you start to reach a higher altitude. The temperature might be quite warm as you start the hike, but once you reach the high ridge on the trail the temperature could be considerably colder than down below. For this reason, I recommend carrying a fleece, or even better a light down jacket, in your bag in case you get cold. If you would like some recommendations, I have included a link to some of the jackets I recommend below. |
| View My Recommendations on Amazon | |
Rain Jacket (Hard Shell)
 |
In the event that it starts to rain during your hike, you are going to want to have a hard-shell waterproof jacket to stop you from getting wet. This is one of the most important pieces of equipment you will carry in your bag because getting wet at high altitude can be a recipe for disaster. When looking for a jacket to bring, I would recommend a rain jacket with a hood to keep your head dry as well. If you would like some recommendations on a hard-shell rain jacket, I have included a link to some of my recommendations below. |
| View My Recommendations on Amazon | |
Hat and Gloves (1 Hat and 1 Pair of Gloves)
 |
Even though it may be too warm to wear a winter hat and gloves at the beginning of the hike, these are things that you will likely be glad you have in your bag when you get to the high ridge on this hike. The temperature can be much colder at high altitude and the winds are typically much stronger. If you would like to see some of the hats and gloves that I recommend, I have included a link to my recommendations below. |
| View My Recommendations on Amazon | |
Hiking Backpack
 |
Chances are that you are going to be bringing a number of pieces of clothing and gear with you on your hike that you won’t be wearing at the start of the hike. You are going to need some way to comfortably carry this gear. I would recommend a small, light-weight hiking backpack. You aren’t going to be carrying a ton of gear, so a light bag that is under 25L is probably adequate. If you would like to see some of the bags that I recommend, I have included a link to my recommendations below. |
| View My Recommendations on Amazon | |
Water Bottle or Water Bladder
 |
The Isthmus Peak Track is a long hike. It will take you somewhere between four and six hours to complete, depending on your fitness level and hiking experience. For hikes as long as this one, it is important for you to stay hydrated. If you don’t stay hydrated you can cramp up or get dizzy and make the hike unsafe. I would recommend carrying a water bottle or water bladder with you on the hike. If you would like some of my recommendations, I have included a link to some great water bottles and water bladders for you to review below. |
| View My Recommendations on Amazon | |
50%-100% Deet Insect Repellent
 |
If you are doing this hike during the early spring, late autumn, or winter seasons, you probably won’t need to worry about bringing insect repellent. However, if you are going to be doing this hike during the summer months, having some insect repellent with you is a great idea. The bugs won’t be as bad as you climb in elevation, but at the beginning of the hike, you will be glad to have it. For some recommendations on insect repellent to bring with you as you travel, please refer to the recommendations I’ve included at the link below. |
| View My Recommendations on Amazon | |
Sun Screen
 |
Sunscreen is another item that you probably don’t need to worry about if you are going to be doing this hike during the early spring, late autumn, or winter seasons. However, if you are doing this hike during the summer months, having some sun protection is a good health precaution. Granted, a majority of your body is probably going to be covered by clothing for much of the hike (especially at higher altitudes), but you will want to protect your face from getting sunburned. For some recommendations on sunscreen to bring with you as you travel, please refer to the recommendations I’ve included at the link below. |
| View My Recommendations on Amazon | |
Sunglasses
 |
Even if you are going to be doing this hike during the dead of winter, having a good pair of sunglasses will help you a great deal on this hike. In fact, during the winter months when snow will likely be on the ground, having a pair of glasses to protect your eyes from snow glare is recommended. During the months where snow isn’t a factor, having a good pair of sunglasses to shield your eyes when hiking into the sun will make the hike more comfortable. If you would like to see some of the sunglasses that I recommend, I have included a link to my recommendations below. |
| View My Recommendations on Amazon | |
Camera Gear
 |
The views that you will see on the Isthmus Peak Track are too beautiful to properly put into words. If you don’t bring a way to record the beauty you see on this hike, you will regret it for as long as you live. I know that sounds dramatic, but it’s true. You will definitely want to have some way to take some pictures of the absolutely stunning beauty that you will see on this hike.
I would recommend bringing a lightweight camera or your camera phone with you for this hike. DSLRs take great photos, but they can be very heavy to carry and this hike is long and challenging. That is why I think lighter is better here. If you have the money to invest in one, a mirrorless camera would probably be ideal for a hike like this. They take DSLR caliber photos but are much smaller and lighter. If you would like to see some of the cameras and camera gear that I recommend, I have included a link to my recommendations below. |
| View My Recommendations on Amazon | |
Hiking Gaiters (Optional)
 |
Having gaiters with you when you hike the Isthmus Peak Track isn’t essential, which is why I have them marked as optional on my list. However, if you have them, they can be a real asset on this hike. This is especially true if you are hiking in inclement weather such as rain or snow. If you are interested in bringing some gaiters with you on your hike and would like some recommendations, I have included a link below with some of my recommendations for you to review. |
| View My Recommendations on Amazon | |
Headlamp or Flashlight (Optional)
 |
If you are going to complete your hike of the Isthmus Peak Track during the daylight, then you don’t need to worry about having a headlamp or a flashlight with you. However, if you are planning on getting a very early start on the trail so that you can reach the summit in time to snap some amazing sunrise photographs, you will need to bring a source of light with you.
Important Note: If you do plan on hiking this track in low light conditions, I would suggest that you be very careful and also bring reflective clothing items with you, take it slow, and make sure you put safety first. Hiking in the dark on alpine trails can be perilous, so make sure you know what you are getting into before setting out in the dark. |
| View My Recommendations on Amazon | |
In addition to the items listed above, the following list includes some additional items that you might want to consider bringing with you on the Isthmus Peak Track hike.
- Travel Medical Kit
- Blister Pads or Mole Skin
- Tylenol or Ibuprofen
Other Hikes in the Wanaka Area

For those of you who are going to be in the Wanaka area for an extended period and are looking for some additional hikes to do while in the area, I have included a list of some additional hikes that I highly recommend below. In addition to the infamous Roy’s Peak, I have included several other popular Roy’s Peak alternatives.
- Roy’s Peak Track (top-rated track in the Wanaka area).
- Brewster Hut (can be done as a day hike but is even better as an overnight). It is another popular Roy’s Peak alternative.
- Diamond Lake\Rocky Mountain Track (a much shorter and easier Roy’s Peak alternative with great views).
- Rob Roy Glacier Track (very difficult Roy’s Peak alternative that involves many water crossings).
- Liverpool Hut (a long Roy’s Peak alternative that for most people requires an overnight, but it isn’t an overly difficult hike).
Photographing the Wanaka Area
If you are going to be in the Wanaka area and would like to know where you can find the most scenic locations to take photographs, you might want to review my Wanaka Area Photography Planning Guide, which I have linked below. In addition to outlining how to best photograph the Isthmus Peak Track, I also touch on how to photograph some of the other Roy’s Peak alternatives and other beautiful spots in the Wanaka area.
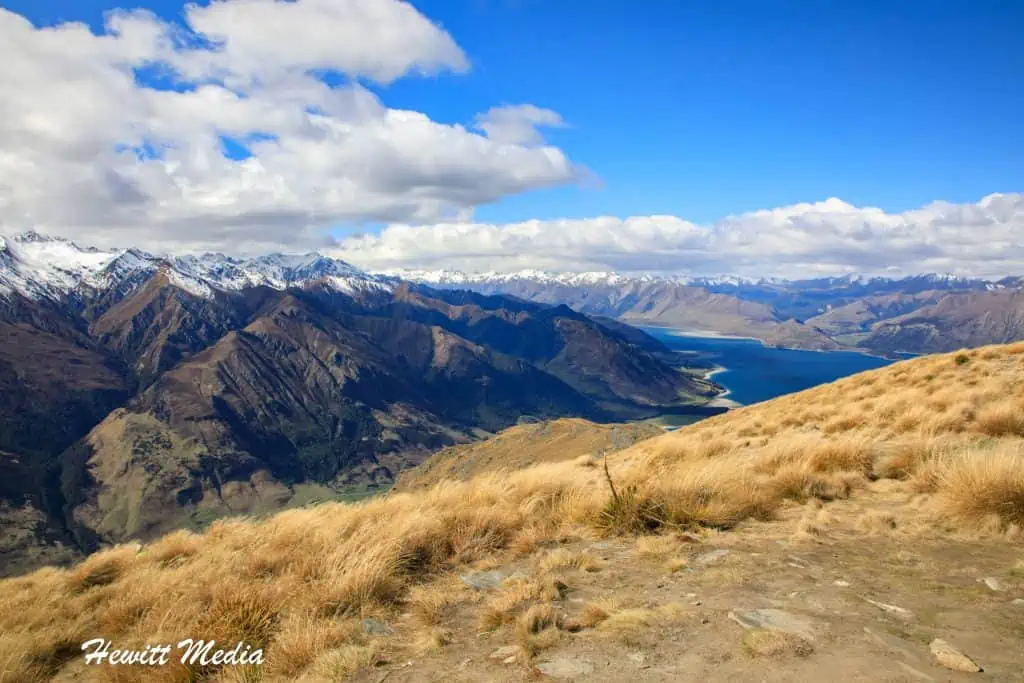
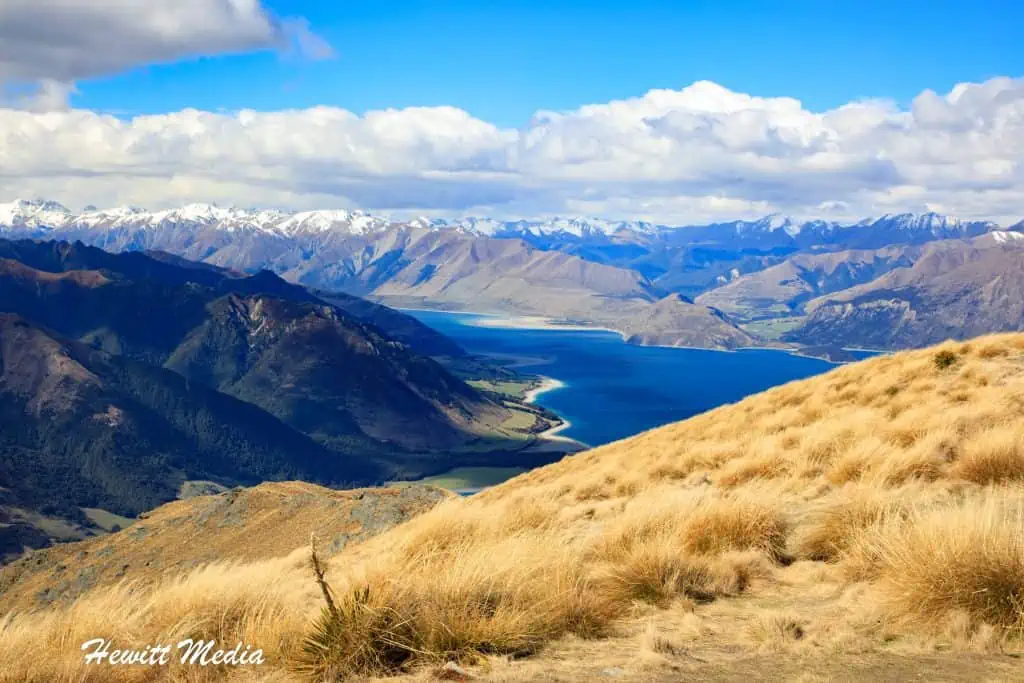
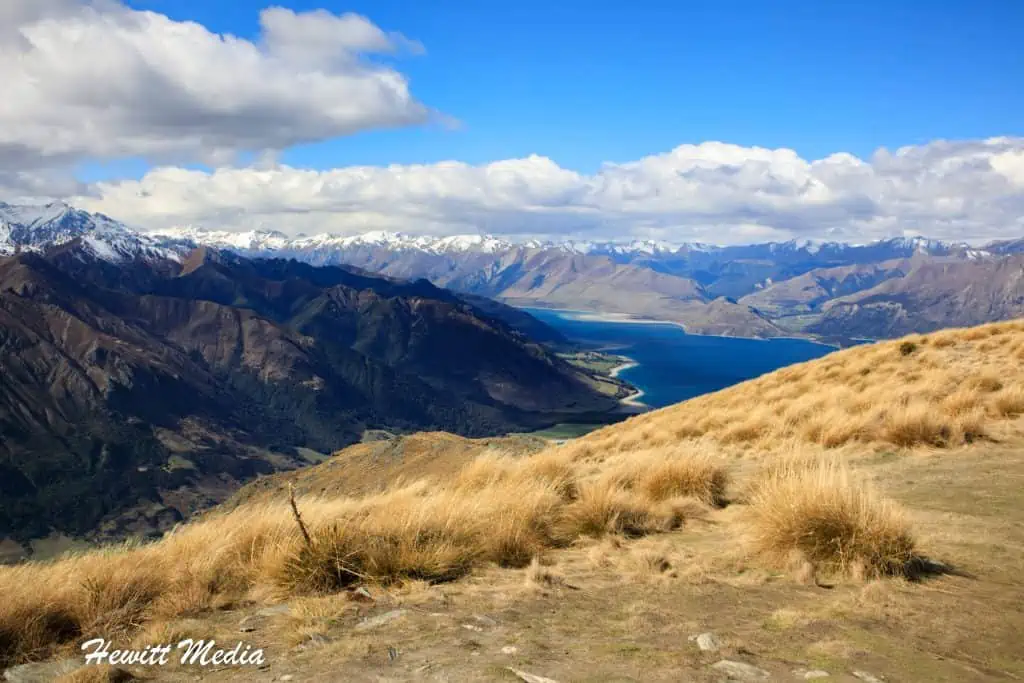
Isthmus Peak Track Photo Gallery
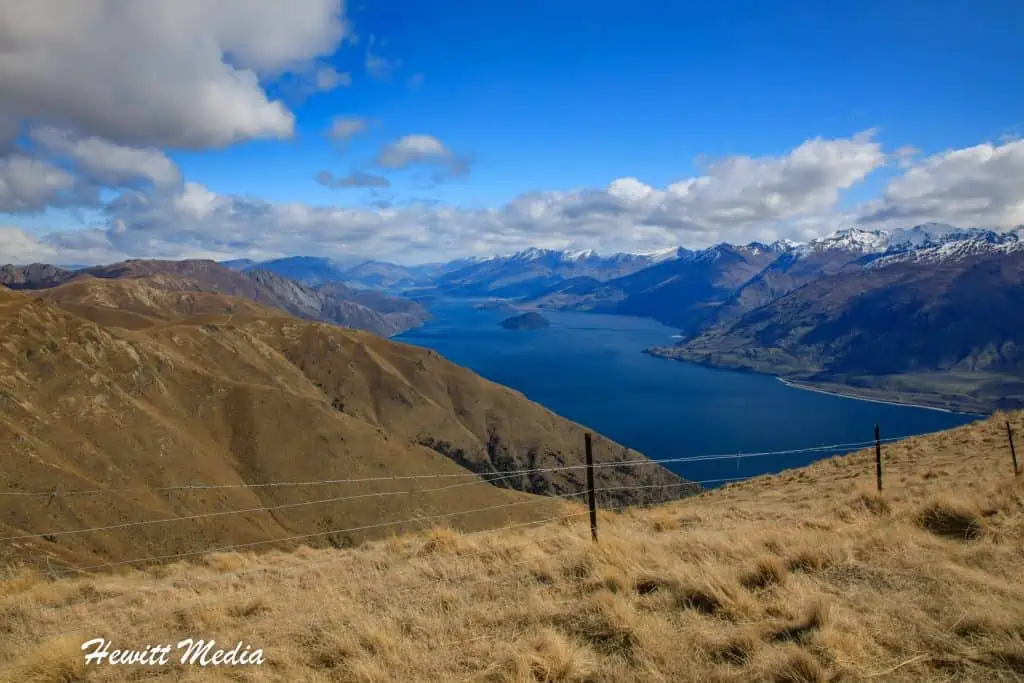
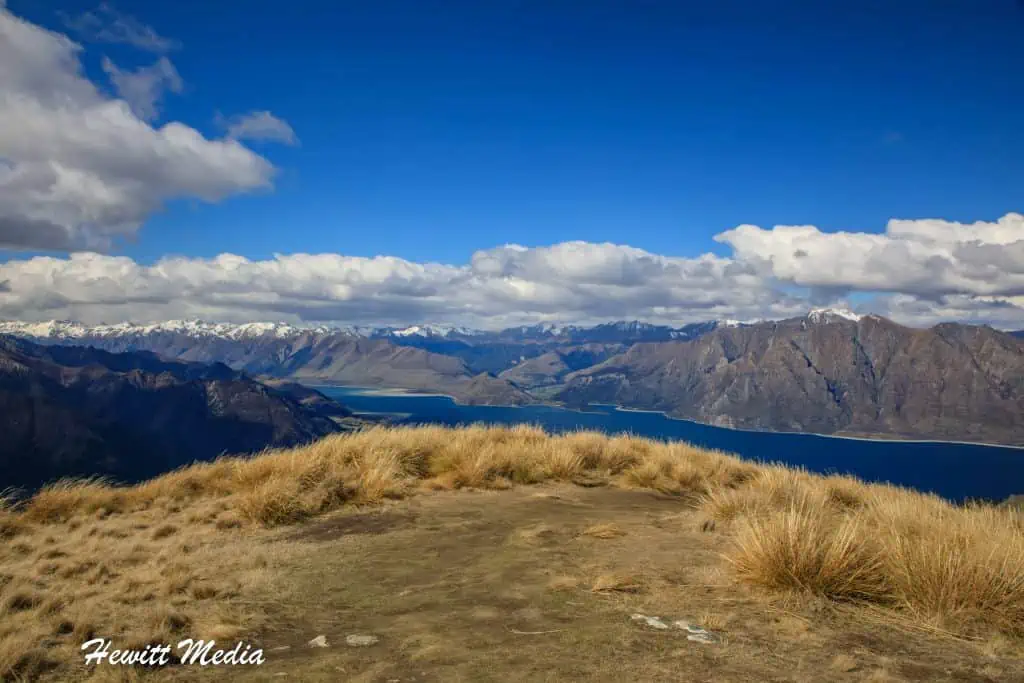
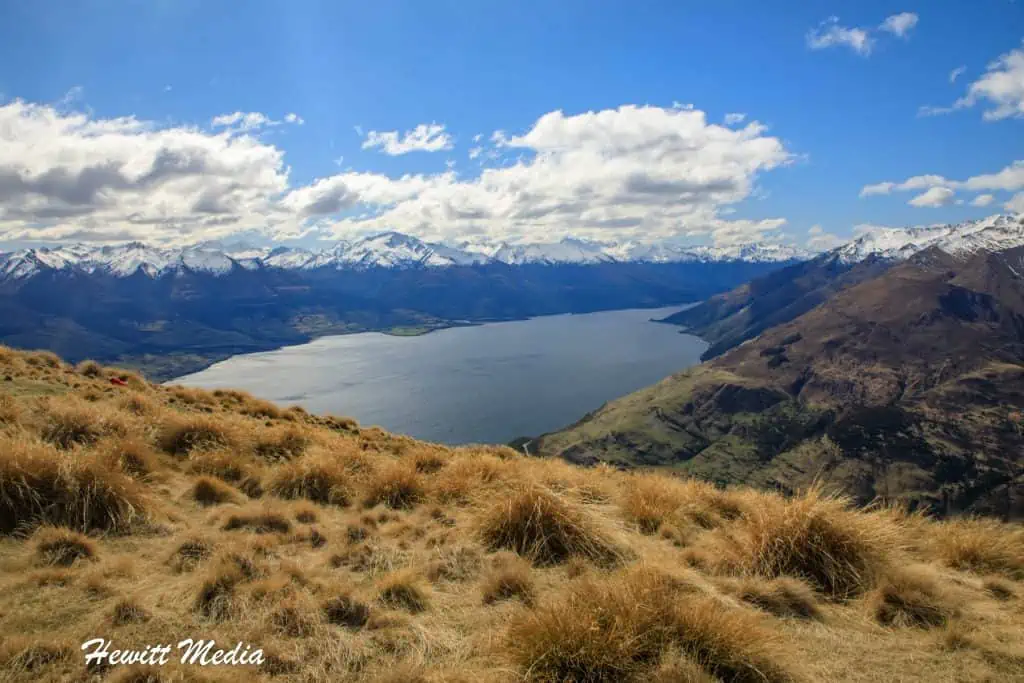
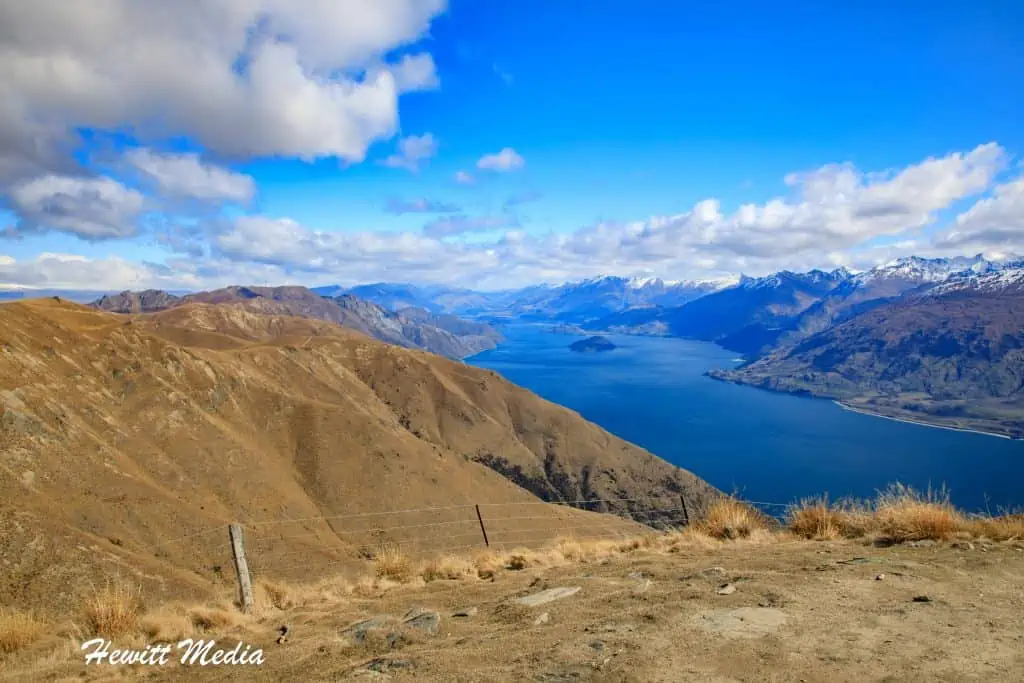
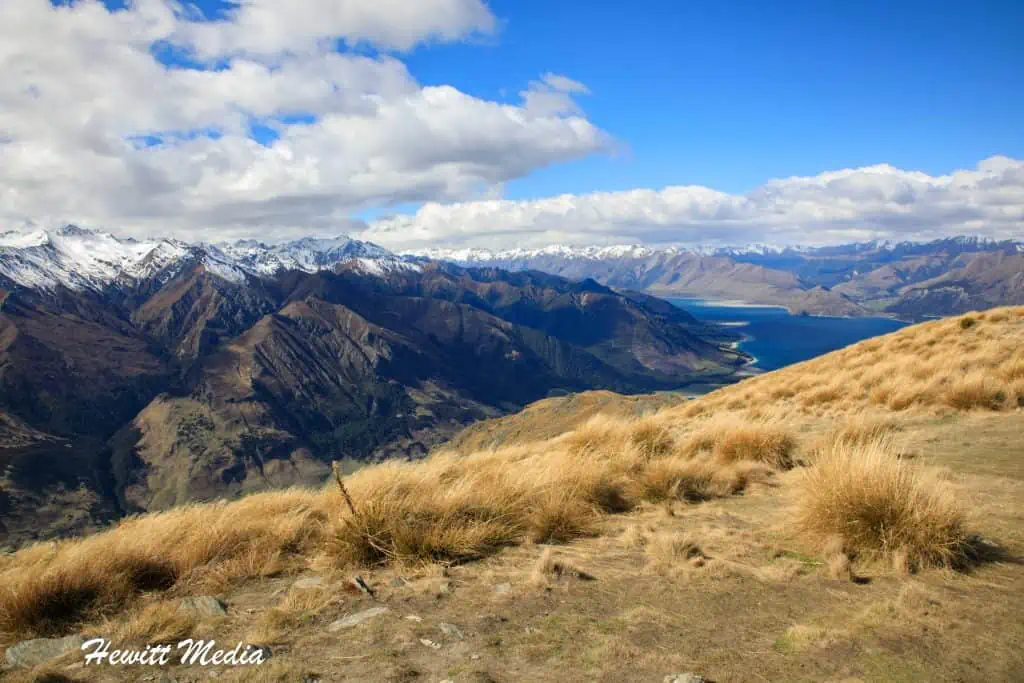
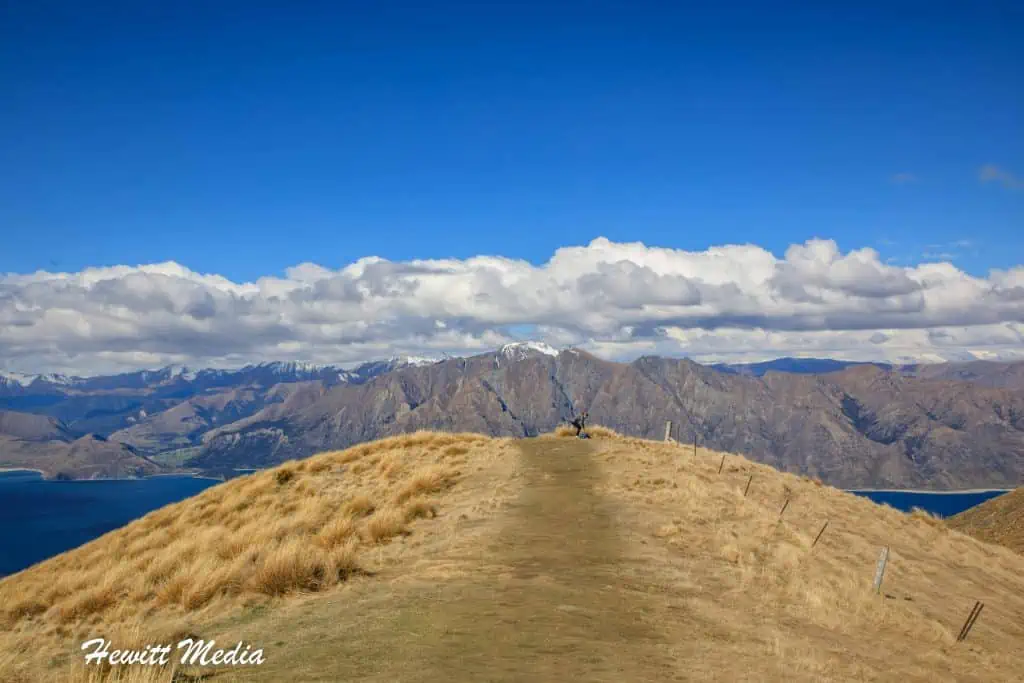
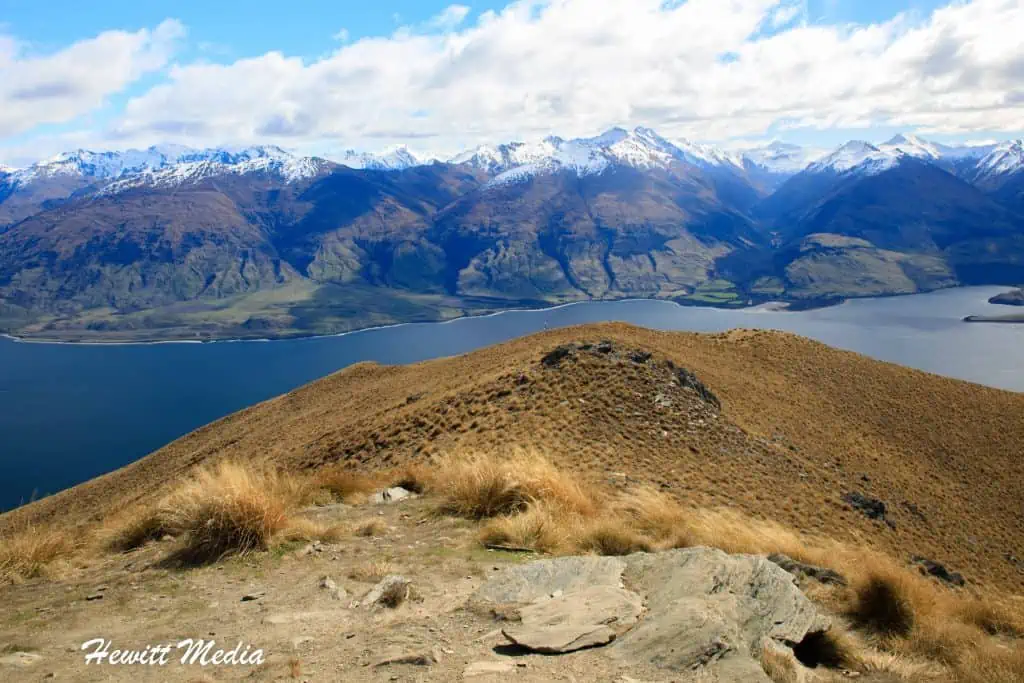
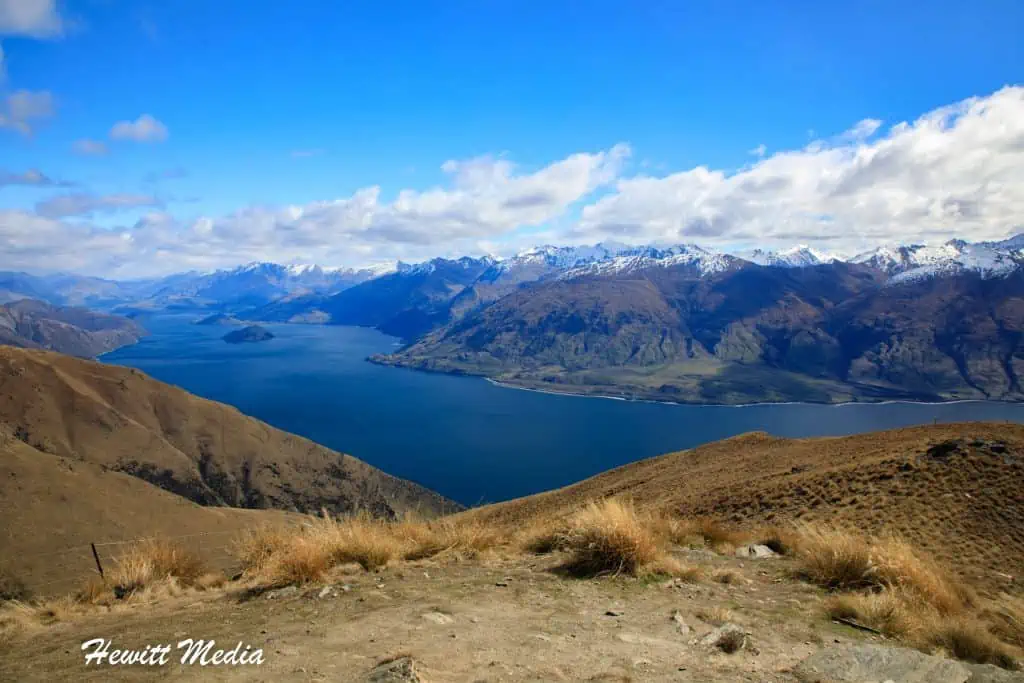
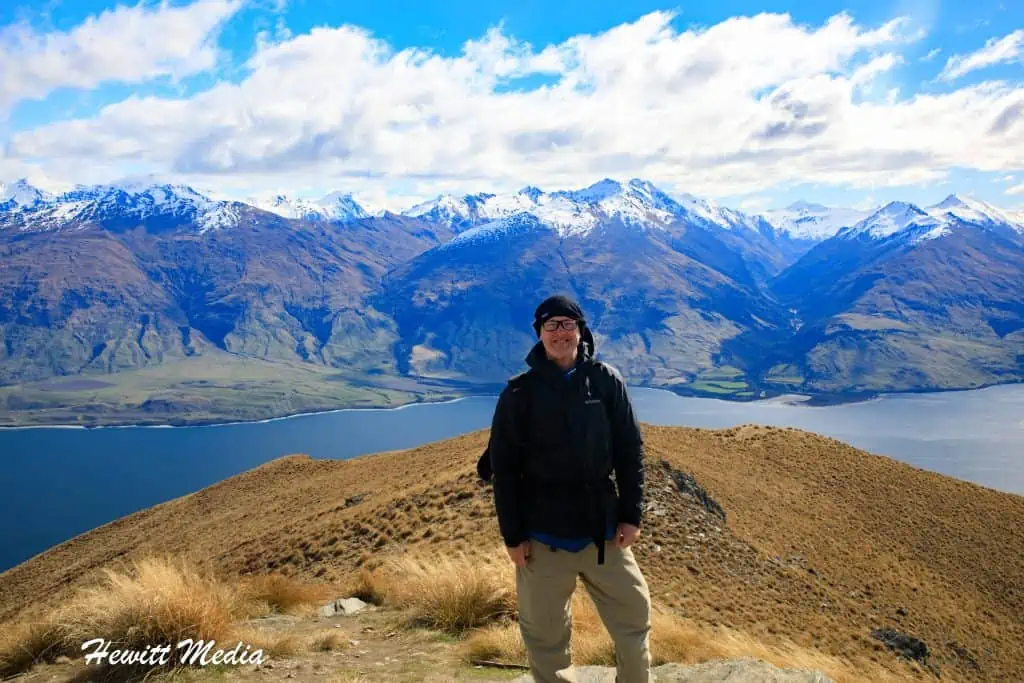
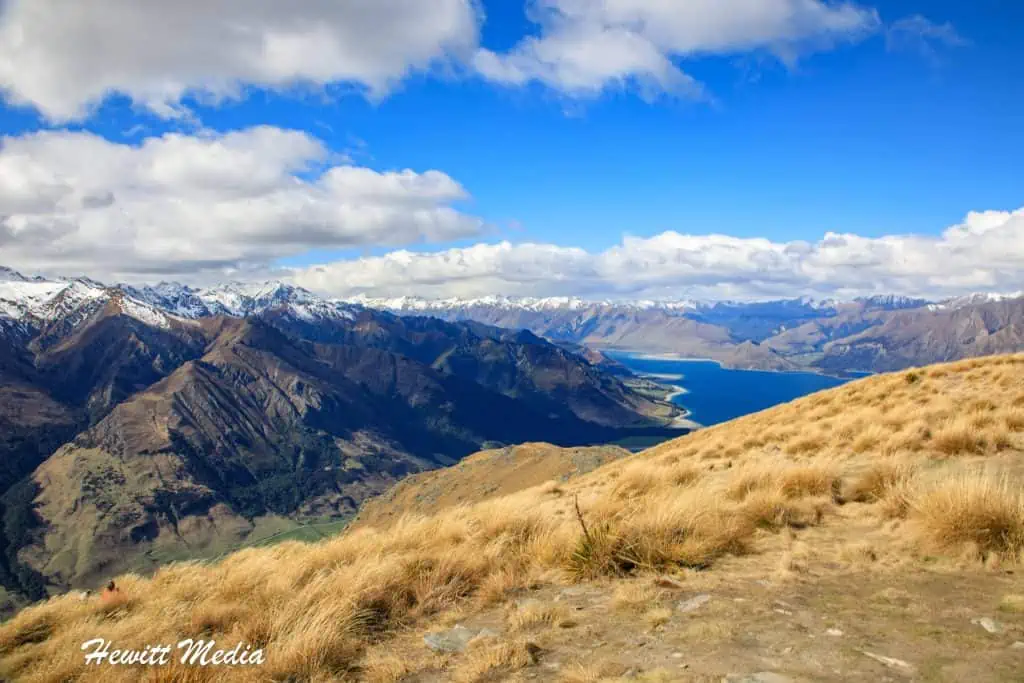
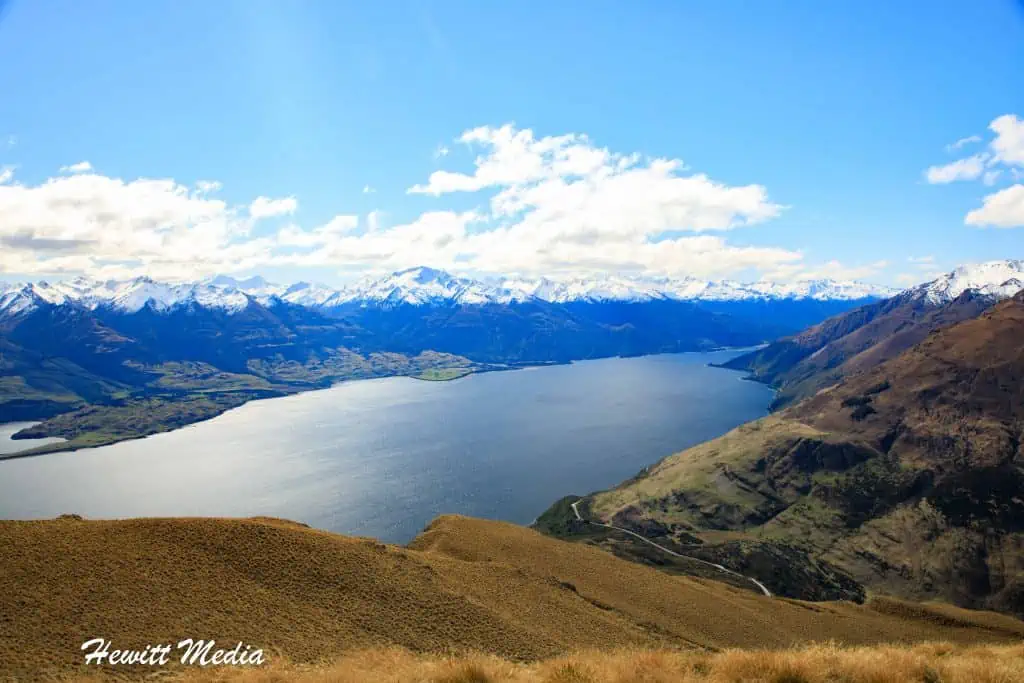
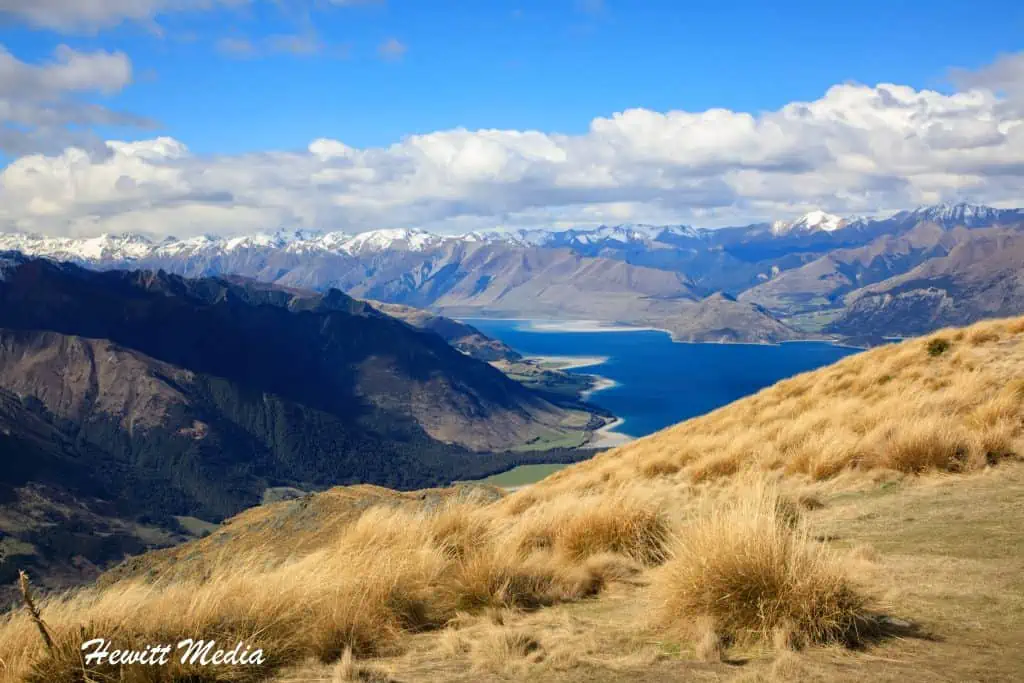
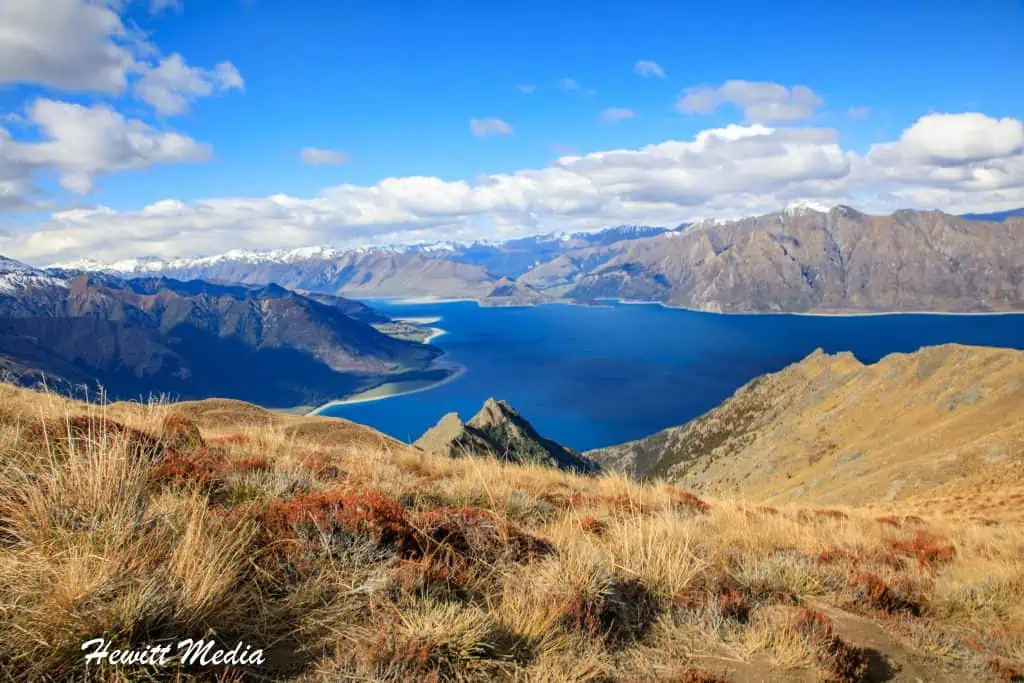
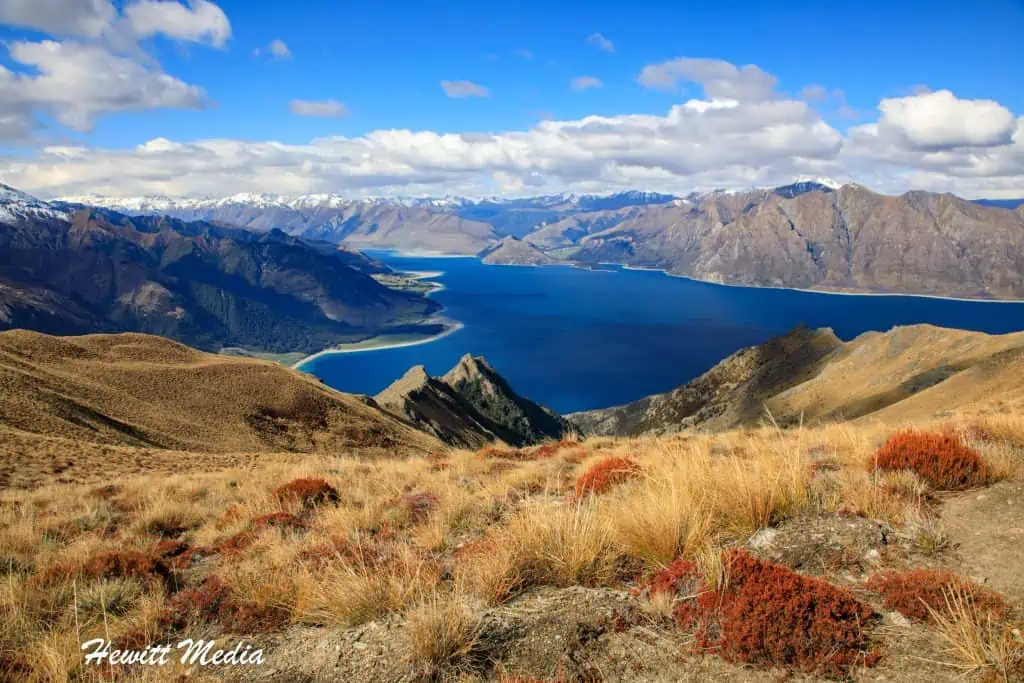
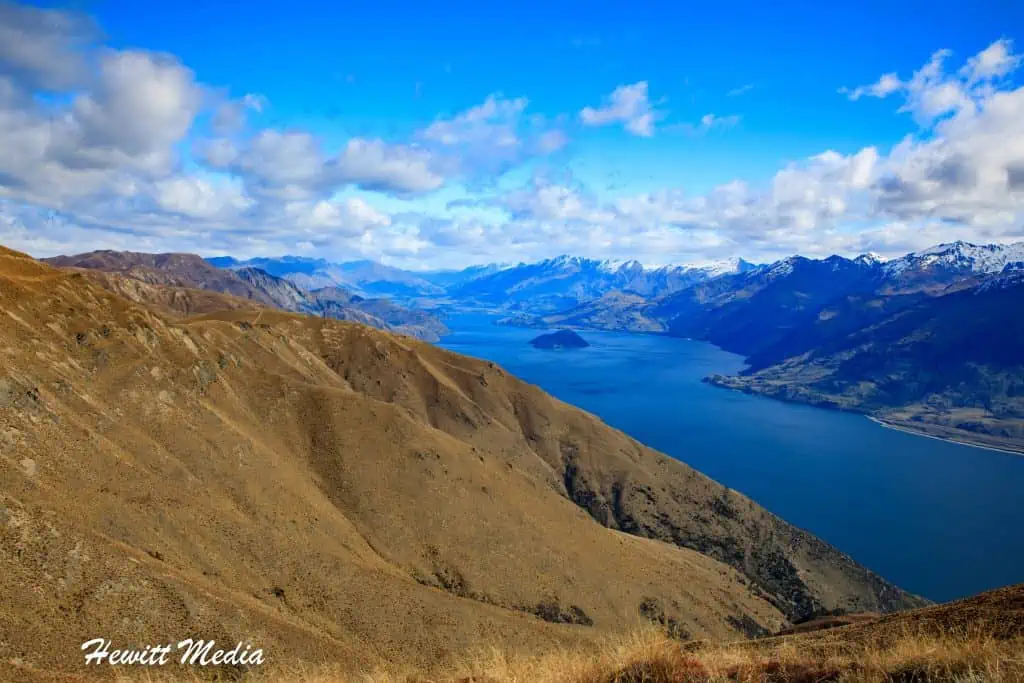
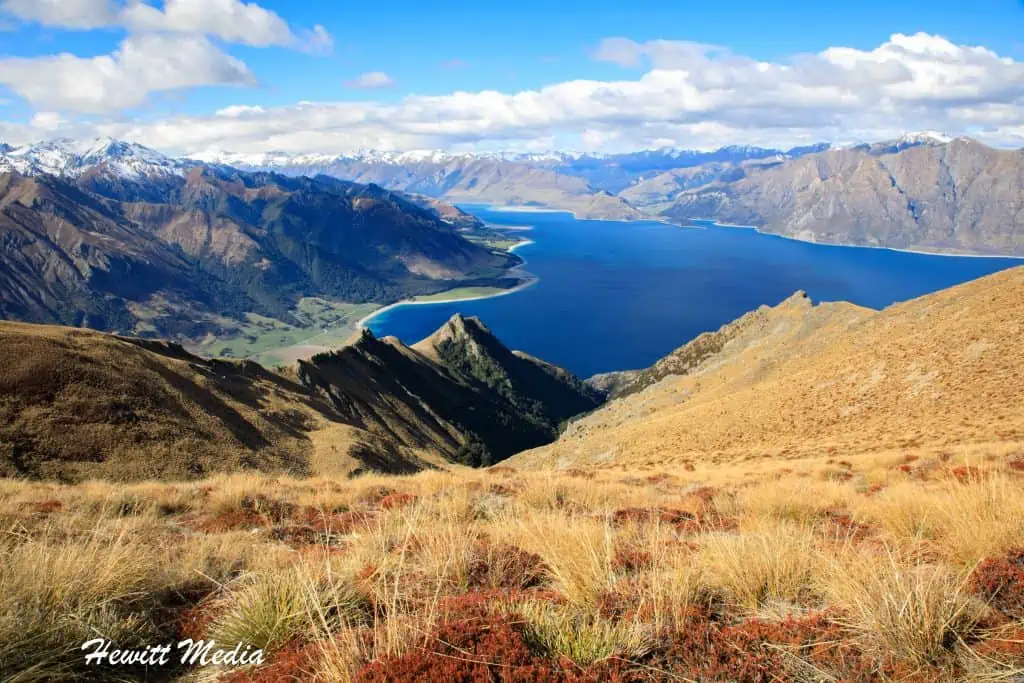
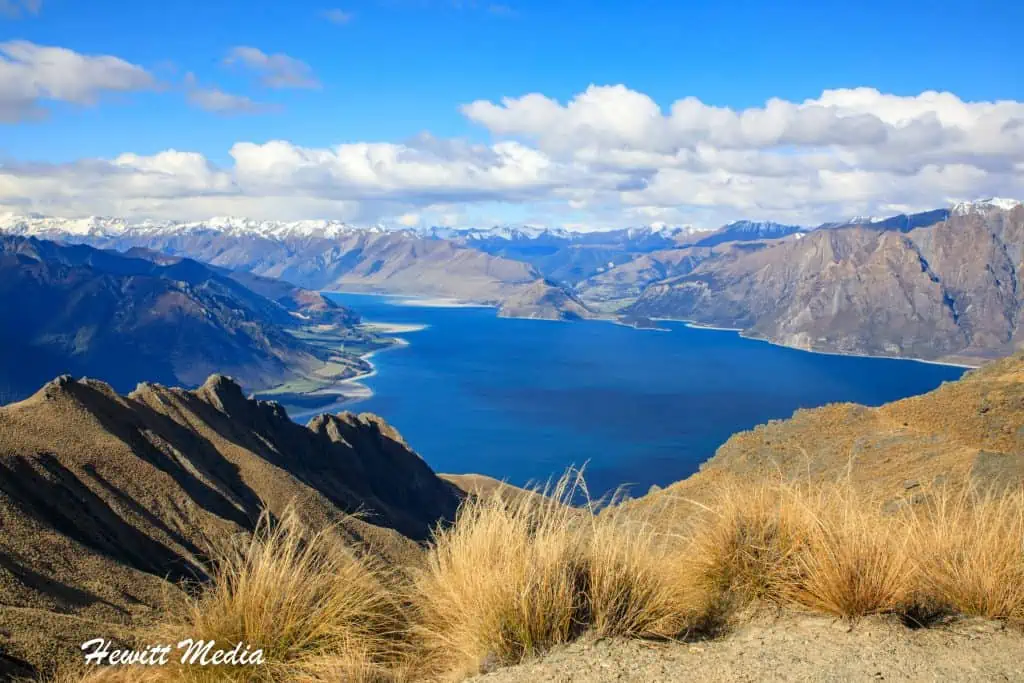
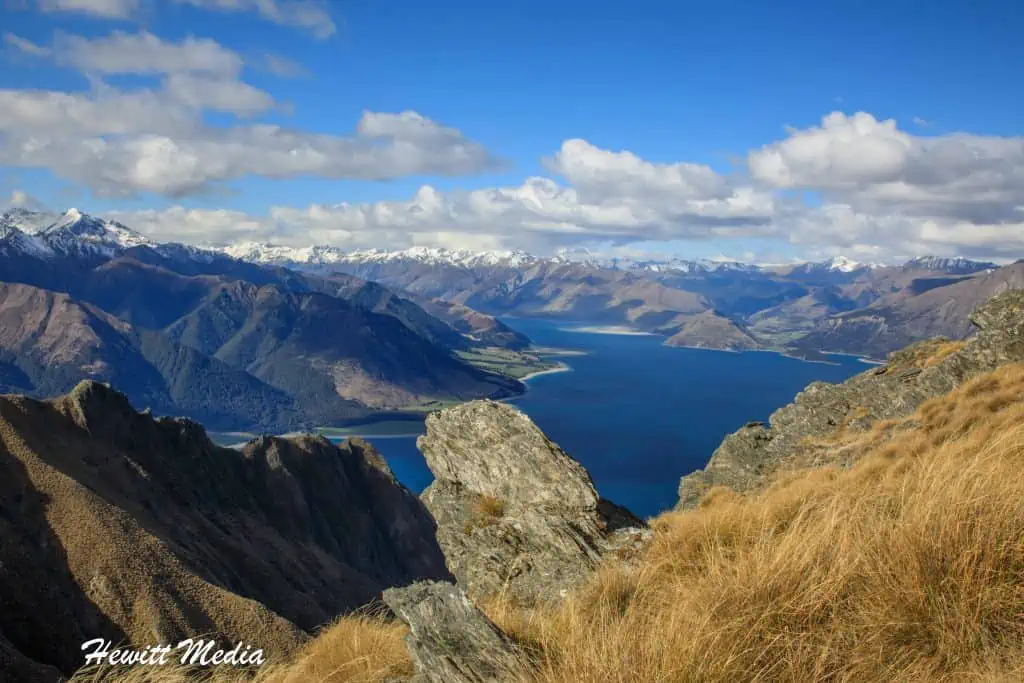
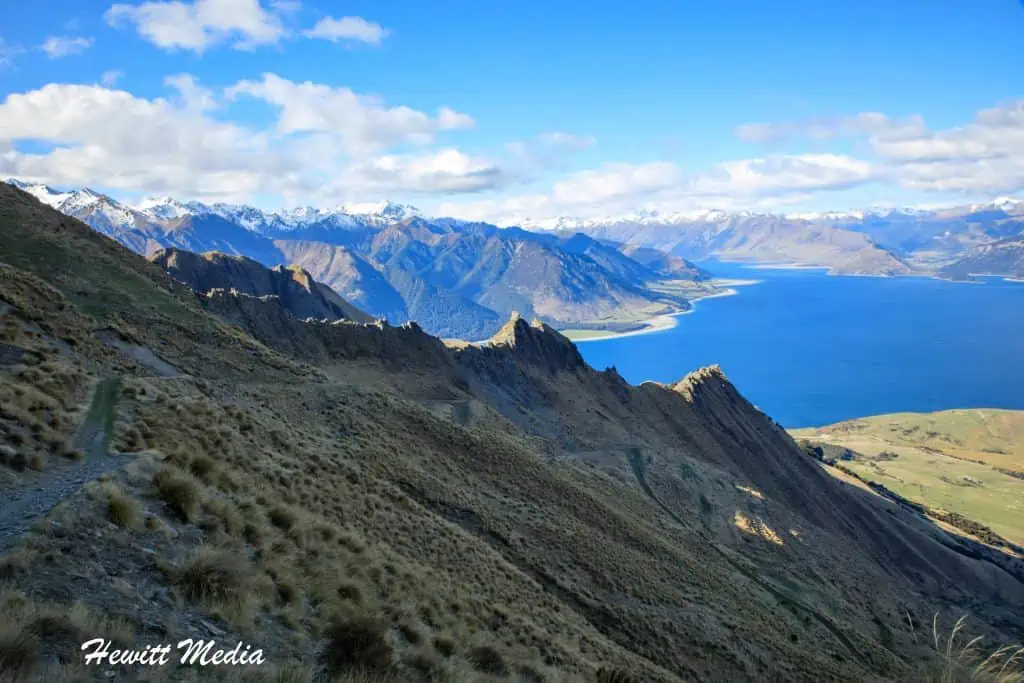
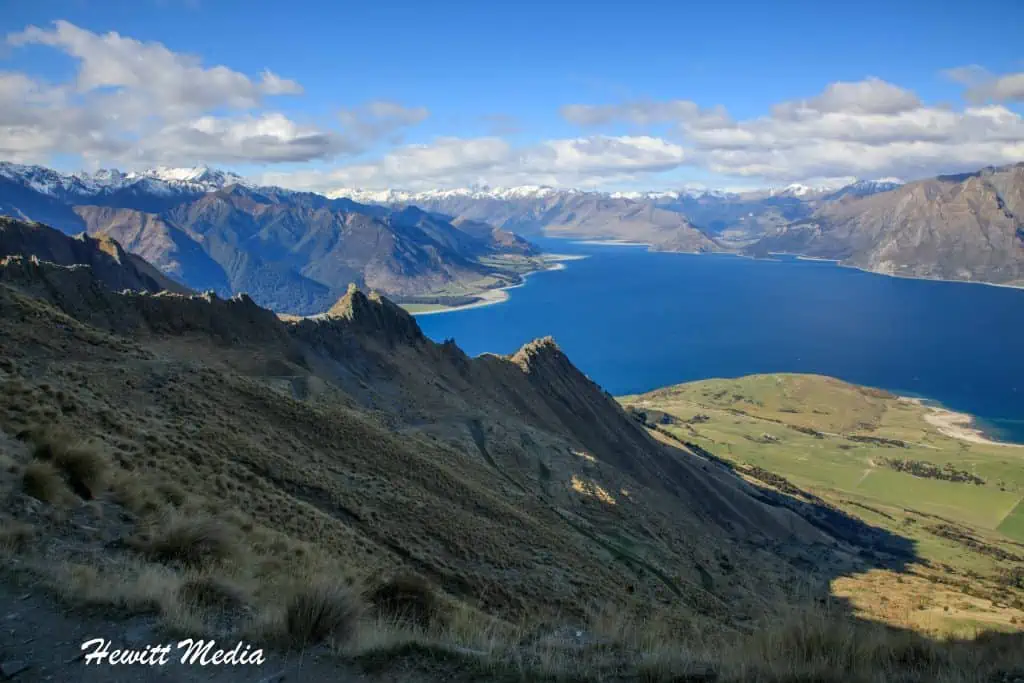
The views you will see from the Isthmus Peak Track will absolutely blow your mind they are so beautiful. They really do make all of the sweat and effort to get to the top well worth it. Below is a gallery of just some of the amazing pictures that I was able to take when I hiked the Isthmus Peak Track. In my opinion, it isn’t as much a Roy’s Peak alternative as it is equal to that famous hiking trail.
If you would like to see more of my travel photography, I would also encourage you to give me a follow on Instagram. Putting this blog together to pass on my free guides, itineraries, and travel photography tips is a lot of work and your support in the form of a follow-on Instagram would be so very much appreciated!

Don’t Forget to Subscribe to My Adventures!

Let Me Help You Save On Your Next Adventure!


Hi Josh, the way you had described the directions and about the things of that place would be a great help to those who are travelling to the New Zealand. What do you think is the best month to visit in there again? Thanks for sharing it.
Thank you Brodie!! If you are looking to do some skiing, the winter months of June thru August are the best months. If you are looking to do some hiking, I would target the summer months of December thru February. You can try and save some money by going during the shoulder months, but be aware of closure for lambing season that I outlined in guide. Good luck and have fun! 👍😀
Great guide. Planning on going in March — do you have a sense of the temperature difference at the top vs bottom of the hike?
Excellent!! You will love it! I would say there is a good 20-25 degree Fahrenheit difference between the trailhead and summit. It is very exposed at the top, so it was quite windy. When we started our hike at around noon it was roughly 50 degrees and it was definitely below freezing when we reached the summit 2.5-3 hrs later. We brought an extra layer that we put on about 3/4 into the hike and then took off during descent. Hope this helps. Have fun and safe travels!! 😀👍