LAST UPDATED: 6/13/25 – Tips for Photographing National Parks
In this segment of our Art of Travel Photography series, I am going to talk to you about some tips for photographing national parks. There is a good reason why photographers flock to national parks to take pictures. National Parks hold some of the most beautiful landscapes in the world, and everyone wants to capture that beauty on film (or digital media).
I have spent over a decade photographing inside national parks. From the deserts in Arizona, to the mountains of Banff in Canada, to the plains of the Serengeti National Park in Tanzania, I have taken pictures in all kinds of landscapes and conditions.

In this article, I am going to give you some tips and tricks that I have picked up over the years that will help you make sure your next photography trip to a national park is a success.
Some of these tips for photographing national parks I have learned from my own experience; some I have picked up from others along the way. I have found all of these tips to be incredibly useful in photographing national parks. I hope some of these tips will be helpful to you as well.
Know the Park Rules

One of the most important tips for photographing national parks that I can give you isn’t completely related to photography. Sure, each national park system has its own rules governing what type of photography equipment you can and cannot bring into a park without a permit, but some of the most important rules you need to be aware of are there to ensure your safety.
The last thing you want is to get seriously hurt or killed when attempting to take a photograph. So, before you start venturing off into the park to take some stellar shots, make sure you read the park’s safety advice and consult with a park ranger if you have any questions.
This could be something as straightforward as bringing enough water with you on a hike, making sure you are safe among the park’s wildlife, or ensuring that you know how to properly navigate some of the park’s more dangerous features.
Regarding a park’s photography-related rules, here are some general guidelines you should follow:
- Stick to areas where the general public is allowed.
- Avoid using models or props in your photos.
- Don’t do anything that would require the park to monitor your or the park’s safety.
Make Sure You Have Necessary Permits

To see some of the park’s most beautiful places, you will often need to venture into the backcountry. To venture into the backcountry at some parks, you will need to have the proper permit.
If you plan on visiting a park to photograph and will require a backcountry permit, you are going to want to make sure that you obtain that permit as far in advance as possible. At some parks, these permits need to be booked well in advance because of demand.
Some of these permits are especially difficult to obtain. The park service isn’t limiting the permits to make your life difficult; they do it to protect the parks.
No one wants to see some of the most beautiful parkland get overrun. If you are looking to do some photography in a park with a hard-to-get wilderness permit, below are some resources with some great tips for making sure you get the permit you need.
- REI – 5 Tips for Securing Popular Back-Country Permits
- The Big Outside – 10 Tips for Getting a Hard-to-Get National Park Back-Country Permit
Respect the Park’s Wildlife

Everyone would love to get that fantastic wildlife shot that you can show your friends and family or share on Instagram. I have gotten some pretty amazing opportunities to photograph some pretty spectacular wildlife in my lifetime, and it is always an amazing experience. However, we have to remember that we are visiting the wildlife in their home, not the other way around.
National parks are created to protect the beautiful landscapes and critical habitats so that the landscapes and the animals that call them home will be here for future generations. So, as travel photographers, it is critically important for us to be good ambassadors for the park system and do our part to make sure we don’t interfere with the wildlife.
Here are some tips I can give to assist you in making sure you get the shots you need without jeopardizing the safety of either yourself or the animals you are photographing:
- Give animals at least 100 yards of room. Never approach an animal any closer than this. They need their space, just like we need ours.
- Always do what the park rangers tell you. If you are not supposed to leave your car or roll down your window, then do what they say. Your safety may depend on that.
- Bring long lenses with you. I always try and have at least one long prime lens or zoom lens with me when I visit a national park. They allow you to get the close-ups without having to actually get close up.
- Take advantage of guided photo tours. Your guides will be able to get you into position to safely take shots.
Don’t Overpack on Gear

We all want to be prepared when we travel to our favorite national park to get some great photographs. The natural instinct is to bring as much gear as you can because you never know which lens or filter you are going to need. However, one of the important tips for photographing national parks that I can give you is to resist the urge to overpack.
Every piece of equipment you bring is another piece of equipment you need to lug around with you. The last thing you want is to be hampered because you are carrying too much weight.
Now, I am not saying you shouldn’t bring the gear you need. If you know you are going to need three different lenses to get the shots you want, then by all means, bring those lenses. In addition, if you know you are going to be camping in one spot to get the shots you are looking for, then having more gear probably won’t be an issue for you.
However, if you are looking to explore a park to get some shots, you might be better served by carrying just one body and a few go-to lenses with you. Keep in mind, you are also going to need to carry an adequate supply of water and any other supplies you might need.
Here is a list of essential gear that I would recommend you have in your bag. Unless you have a specific need for anything else, I would think twice about bringing it if you are going to do a lot of hiking.
The Essential Camera Gear
- Camera Body
- Wide Angle Prime or Zoom Lens for landscapes
- Telephoto Lens for wildlife
- Polarizing Filter for Telephoto Lens
- Polarizing or Graduated Neutral Density Filter for Wide Angle Lens
- Extra Batteries
- GPS Unit (if not built into your DSLR)
- Tripod
| READ MORE: |
 |
| Essential Gear for Travel Photographers |
This is more than enough gear to get the shots that you need. The telephoto lens will give you some flexibility in range for wildlife shooting, and the wide-angle lens will allow you to get those fantastic landscape shots. The optimal focal length of your wide-angle lens and focal range of your telephoto lens will depend on whether or are shooting with a camera that has a full frame or crop sensor.
The Difference Between Full-Frame and Crop-Sensor Cameras
The biggest difference between a full-frame and a crop sensor is the field of view of the cameras. For instance, a Canon 7D Mark II camera has a crop sensor that uses a 1.6x multiplier, whereas a Canon 5D Mark IV camera has a full-frame sensor that has no multiplier. This means that (at the same focal length) the field of view of the 7D Mark II camera is going to be 1.6 times closer than the field of view of the 5D Mark IV.

There are pros and cons to having both a crop sensor and a full-frame camera. Crop sensors have the advantage of having more reach than a full-frame camera does. By “reach,” I mean that you are going to be able to zoom in on far-away objects far easier than you can with a full-frame camera.
For instance, if you need to zoom in to 200mm to see an object with a 7D Mark II, you would need to zoom in to 320mm (200 x 1.6) with the 5D Mark IV to get the same shot. This extra reach can be especially useful when doing a lot of long-range wildlife photography.
On the other hand, the full-frame cameras generally create a much better image in low light. The full frame cameras expose much more light to the camera’s sensor, so images taken in low light usually require a lower ISO (light sensitivity adjustment) when taken with a full frame camera. Full frames also allow you to get more of a landscape into an image from close range because the sensor isn’t cropping the image. This can be especially useful when doing a lot of landscape photography.
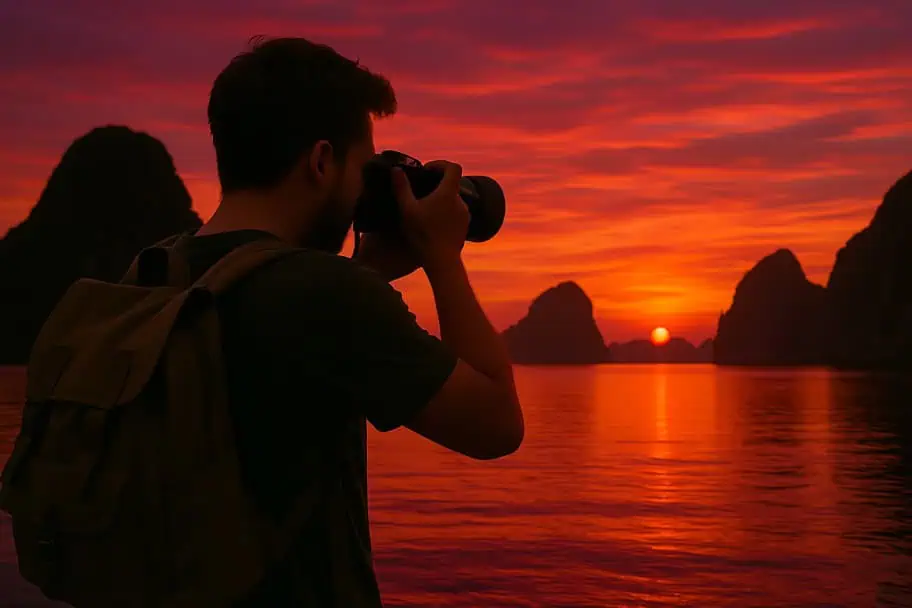
Get Up Early

This may be one of the most important tips for photographing national parks that I share with you. One thing you are always going to want to do when you travel to photograph a national park is get up early. And when I mean early, I mean long before the sun rises.
In fact, you want to be at the locations you want to photograph before the sun even starts to peak over the horizon. This will also allow you to get some great sunrise shots to enhance your pictures if there is going to be a great sunrise that morning.
| READ MORE: |
 |
| Predicting Amazing Sunrises and Sunsets |
Not only will this allow you to take your shots during the golden hour of sunrise, when the light you will have will be at its best, but you will also beat the crowds and be able to get in a prime position to get your shots. Some of the most popular spots to photograph in national parks, such as Canyonland’s Mesa Arch, attract some pretty big crowds daily. To photograph these spots, you need to stake a claim on the prime real estate early in the morning.
Be Prepared to Hike

To get to some of the most beautiful spots in the national parks to photograph them, sometimes you are going to need to do quite a bit of hiking. For this reason, make sure you dress appropriately when you visit. You should make sure that you have adequate hiking boots and wear the proper clothing. We would strongly recommend that you dress in layers. Dressing in layers will allow you to quickly adjust your dress depending on the conditions.

You are also going to want to make sure that you bring enough water and food if you will be staying out for a while. If you are planning to camp in the backcountry, you are going to want to make sure that you have a tent and the proper camping gear. The last thing you want is to spend a lot of time and resources getting to a park and then realize that you are completely unprepared to get the shots you had hoped for.
Get Off the Beaten Path

While we are on the topic of hiking to get great shots, in many cases, those hikes are going to take you off the beaten path. While you will see some fantastic views from alongside the park roadways and at pull-outs, many of the million-dollar views you will find in the national parks require you to hike into the back country. Don’t be afraid to explore the less-traveled areas. You will be pleasantly rewarded for your efforts.
In fact, some national parks are comprised almost exclusively of backcountry. For instance, you can see very little of Guadalupe Mountains National Park without getting out and exploring the back country. Similarly, parks like Canyonlands National Park reserve their most fantastic views for those who are willing to explore off the beaten path. That doesn’t mean you need to go on a week-long or even an overnight hiking expedition. It just means that you need to plan some longer hikes to get to these treasured areas.
Bring a Polarizing or Neutral Density Filter

When you are shooting the epic landscapes that you will find in the national parks, having a polarizing filter or graduated neutral density filter will be critically important. A polarizing filter will help bring out deep colors in the sky and minimize the loss of detail that reflecting light from the sun can create.
A graduated neutral density filter will help you control the sky from becoming too light and blown out when shooting in sunlight without making the foreground of your image too dark. It does this by varying the density of the filter and allowing you to darken half the image without darkening the other half.
I always have a polarizing filter on my lenses when I am shooting in the daylight and only take them off when I am shooting around sunrise and sunset. I would recommend bringing a polarizing filter for each of your lenses when you visit a national park to shoot.
In the coming weeks, I will be talking about another option available to you in post-production called exposure blending. It’s a way to take multiple pictures of the same thing, using different exposures for each shot, then blending those images so that you can bring out the detail in your foreground without having to lighten your sky. There are some significant advantages to using this technique that I am excited to teach you about.
Be Creative in Your Framing and Composition

One of the most important pieces of advice that I can give to you is to be creative in your compositions. Find unique and creative ways to frame your shots, use things in the foreground of your image to make your shot stand out, and change your perspective to make your shots unique.
In the shot above, I could have just taken a picture of Bryce Canyon. After all, the canyon itself is incredibly beautiful. However, by using the tree in the foreground, I have added depth to my image and made the picture more visually appealing.
| READ MORE: |
 |
| 10 Easy Vacation Photos Tips |
When composing your pictures, make sure you take advantage of the Rule of Thirds. Not just from a horizontal perspective, but also vertically. Put interesting subjects in the right or left thirds of your images, or top or bottom thirds, for that matter, to make your images stand out. It will make a world of difference in how your pictures turn out.
Don’t Be Shy About Taking a Photo Tour

The last tip I have for you might be the best piece of advice I can give you. Don’t be shy about taking a guided photography tour when at a national park. I think it is human nature to want to do stuff on our own and to have that freedom and flexibility. However, there is tremendous value in having someone along who knows the area and knows how and where to get the best shots.
A great example is my recent trip to Antelope Canyon. I was able to get some truly fantastic shots of the canyon (pictured above) largely because I was with a guide who knew where and how to take the best shots. I never would have thought to throw up sand to make the light beams entering the canyon visible in my shots. It was a fantastic touch that really took my shots to the next level.
Don’t Forget to Subscribe to My Adventures!

Let Me Help You Save On Your Next Adventure!
‘Start Exploring Today’ Merchandise Available Now!
 |
 |
 |
 |
 |
 |
 |


All great tips Josh! Thanks again for a very informative post. 🙂
Thanks LuAnn!
Nice Photography.
Thank you so much!
This Article is Really Fantastic And Thanks For Sharing The Valuable Post.
Instant Clipping Path Services | Get Clipping Path Services In 30 Minutes.