LAST UPDATED: 3/23/26 – Photography Tips for Safaris in Africa
This photography tips for safaris in Africa post contains references to products on our Amazon Store site. We may receive compensation when you purchase these products, but we handpick and recommend only those we are familiar with and enjoy.
Being on safari in Africa is an exciting and exhilarating experience. It is something that you want to remember and bring back to show your family and friends. The photos we take on safari are the best way to remember and share this amazing experience. For this reason, you want to be able to take great safari pictures that you can. Pictures that will really represent the experience well and WOW those that you show them to.
Like most photography, half the battle is putting yourself in the right position. Since you are reading this, I assume that you have already made plans to go on safari in Africa. So, you have done the really important work. By reading this article, you will be armed with the photography tips for safaris that you need. All that is left is to go on your trip and make memories to last a lifetime!

Gear and Photography Tips for Safaris
For your convenience, I have separated my top photography tips for safaris into two sections. In the first section, I talk about the essential photography gear for safaris. The necessary gear will help make sure that you are prepared to take the best pictures possible.
In the second section, I discuss the photography tips for safaris that can really help you enhance your pictures. These tips can really bring your pictures to the next level and make sure they impress your family and friends. Follow these photography tips for safaris, and you have a great chance of coming home with some fantastic photos.
Safari Photography Guide Navigation Menu

Have the Right Gear with You

Having the right gear with you when you are on safari is important. Not just because the right gear can help you take some great pictures. Without the right gear, you might not be able to take pictures at all. Before you depart for your trip, I would make sure you have the following gear in your camera bag.
Bring Plenty of Memory Cards

Believe me, you are going to want to take A LOT of pictures when on safari. Being on safari in Africa is a wildlife photographer’s dream come true. You will be overwhelmed with the sheer abundance of amazing wildlife, all in their natural habitat. There is just something magical about that.
The last thing you are going to want is to run out of memory cards halfway through your safari experience. For this reason, I suggest you bring more memory cards than you think you will need. A general rule of thumb is to guesstimate how many photos you think you will take, and then double it. I want to make sure I have enough memory cards to take at least that many pictures.
You need to make sure you have fast memory cards with you. You are going to want to take bursts of photos to capture animals in movement. I will talk about some of the photography tips for safaris to capture movement later. For now, it is important to make sure you have the necessary cards to follow those tips.
Look for cards with a write speed of at least 90 MB\sec. Anything over that speed, and your camera should be able to write pictures to memory as fast as you will be taking them.
Memory Cards Recommendations
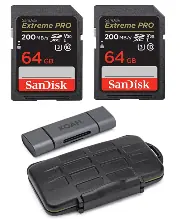 |
|
| View Recommendations on Amazon.com | |
Bring Plenty of Batteries

You also want to make sure you have an adequate amount of camera batteries when you are on safari. Like with memory cards, if you run out of batteries, you will miss a lot of great photo opportunities.
Don’t assume that you will be able to charge your batteries every night. In much of Africa, you never know when you will be out of power. The power grids in much of Africa are unreliable, and power outages are not an uncommon occurrence. This is especially true in many of the remote regions where you will be on safari.
I like to bring a battery for each day that I know I will be on safari. Before I leave, I make sure all of these batteries are fully charged. When I do find power, I like to charge the batteries that I have used.
I do this even if I am not sure I will need them. There is no such thing as having too many charged backup batteries. Especially when great safari photos are at stake.
A Good Zoom Lens is a Must

A great zoom lens is an absolute must when on safari. Many times, you won’t be able to get very close to the animals you see. Being able to zoom in to get the great shots you want will be essential.
Prime lenses (lenses that are of a fixed focal length) take great shots. However, I would sacrifice them in favor of a good quality adjustable focal length zoom lens. This is especially true if you have limited space in your camera bag. The flexibility that zoom lenses offer will be invaluable while on safari.
I would recommend bringing a lens with at least a 200mm maximum focal length. For Canon users, the Canon EF 70-200mm f/2.8L IS III USM is a great lens to have in your bag.
It doesn’t have quite the maximum focal length as the Canon EF 100-400mm f/4.5-5.6L IS II USM lens does, but it is much faster and better in low light.
If you are looking for a good lens that isn’t as costly, the Canon EF 70-300mm f/4-5.6 IS II USM Lens is a good, low-cost zoom lens that I would recommend. All three of these lenses are great options to have on safari.
Camera Lens Recommendations
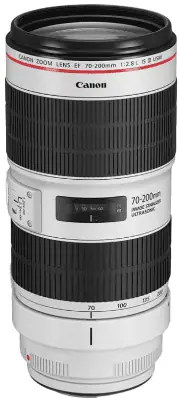 |
Canon EF 70-200mm | 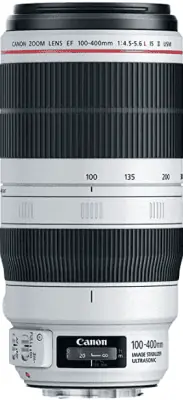 |
Canon EF 100-400mm |  |
Canon EF 70-300mm |
| f/2.8L IS III USM | f/4.5-5.6L IS II USM | f/4-5.6 IS II USM | |||
| View on Amazon.com | View on Amazon.com | View on Amazon.com |
Bring a Photo Journal or Use GPS

A good photo journal is a great tool to have when you are taking pictures on safari. You are going to want to document where you were and what you were seeing.
This way, you can go back and reference your journal when you are going through your pictures at home. Even better would be to have your photos tagged with GPS coordinates when you take them. If your camera has built-in GPS functionality, I recommend that you enable this functionality before heading off on safari.
If your camera does not have built-in GPS functionality, most camera manufacturers make attachable GPS units. Before I upgraded cameras, I used Canon’s GP-E2 attachable GPS receiver for years and loved it.
Camera GPS Recommendations
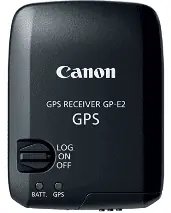 |
|
| View Recommendations on Amazon.com | |
Bring a Camera Bean Bag

Another really useful piece of gear to have in your bag is a camera bean bag. Because of the limited amount of space in most safari vehicles, using a tripod is almost impossible. There just isn’t enough space in the vehicles or enough room to maneuver to set one up.
A camera bean bag is a great tool that you can use to steady your camera. This will help you get great shots and help protect your camera. I used one on safari in Tanzania, South Africa, Botswana, and Zimbabwe, and I absolutely loved it. You can fill them up with a variety of different materials when you get to your destination. This makes transporting the empty bag a breeze.
View Camera Bean Bag Recommendations on Amazon.com
Have a Backup Strategy

An important photography task that is often overlooked by travel photographers is regularly backing up photos. It is easy to forget when you are having so much fun on a trip of a lifetime.
However, not having a backup plan can be disastrous if neglected. I once lost a week’s worth of photos because of a memory card failure on a trip. Those are precious photographs I will never get back. I was absolutely heartbroken.
Many top-end DSLRs allow you to save pictures to multiple memory cards simultaneously. This will cover you if you have a memory card failure. Just make sure you double-check to ensure that this functionality is turned on. If your camera doesn’t have this functionality, there are other options. Simply rotate memory cards in your camera periodically or invest in a backup device.
If you have the money to invest, there are some great memory card readers available. These devices allow you to back up your pictures while on your trip. You simply take the memory card out of your camera, back up the memory card, and then put the card back into your camera.
View Memory Card Backup Device Recommendations on Amazon.com
What Do I Bring in My Bag?

If you are interested, here is the gear that I would have in my camera bag when going on safari. I typically bring a backup camera just in case something were to happen to my primary camera.
You travel all that way to go on safari, and I want to make sure I can take pictures. I also like to carry a battery grip. Not only do they allow me to use two batteries at once, but they also give me better access to the shutter button on portrait shots.
My Safari Camera Gear List
- Primary Camera – Canon 5D Mark IV
- Backup Camera – Canon 7D Mark II
- Memory Cards (twice as much storage as you think you will need – 95MB/sec or faster)
- Batteries (I recommend one per day you will be on safari)
- Battery Grip
- Zoom Lens – Canon EF 100-400mm f/4.5-5.6L IS II USM Lens
- Wide Angle Lens (for landscapes) – Canon EF 24-105mm f/4L IS USM
- Surge Protector
- Camera Bean Bag
- Camera Rain Sleeve
- Photo Journal
- Filters – Polarizing and UV Filters for both lenses
- Lens Hoods – For both lenses
Photography Tips for Safaris

Now that we’ve discussed gear, let’s talk about some of the photography tips for safaris that can be helpful. I have found that the following techniques and tips have allowed me to capture the best safari images. By following these tips, you should be able to capture some truly remarkable shots.
Use Shutter Priority with a Fast Shutter Speed

This is a critically important photography tip for safaris. Unless you are just shooting a landscape, make sure your camera is set to Shutter Priority Mode. If your camera doesn’t have a shutter priority mode, make sure it is set to the Action Shot setting. This will allow you to freeze the motion of the animals you are shooting. If you don’t adjust this setting, you will end up with blurry images.

Using a Fast Shutter Speed is Critical
When you use Shutter Priority mode, you can specify which shutter speed you want to use. Then, your camera decides which aperture to use to get the best exposure.
If you are unfamiliar with the concepts of shutter speed and aperture, I explain these concepts in depth in my low-light photography article.
| READ MORE: |
 |
| Tips for Taking Pictures in Low Light |
Essentially, by adjusting how fast your camera takes the picture (the shutter speed), you can freeze the motion of the animals. Depending on the animal and what they are doing, you will need to adjust the shutter speed accordingly.
For instance, to photograph a buffalo grazing, you can safely use a shutter speed of between 1/50 and 1/320. You shouldn’t see any motion blur shooting at this speed unless it is really dark out.
On the other hand, to shoot a cheetah running, you’d need a much faster speed. You would need a shutter speed in the range of 1/1000 to 1/1250 to prevent motion blur.

Use the Rule of Thirds

A great general photography tip for safaris is to always try to use the Rule of Thirds. This principle guides how you compose your photographs. Instead of always putting the animals in the middle of the frame, try to frame them off-center. You can compose your shots with the animals in either the left or right (or top or bottom) thirds of the frame.
By following this rule, you will compose shots that are much more interesting to the eye. In my example below, I have taken two shots of the same elephant that we encountered in Lake Manyara National Park.
In the shot on the left, I have centered the elephant in the middle of the frame. While in the shot on the right, I followed the Rule of Thirds and positioned the elephant in the right third of my shot. Judge for yourself as to which of the two photographs is more visually appealing.

Focus on the Eyes

If you are going to remember just one of these photography tips for safaris, my hope is that you remember this one. The cardinal rule for wildlife photography is to always focus on the eyes of the animals you are shooting. Instead of just firing pictures when you see an animal, wait for the animal to look your way, and then make sure you set your focus on their eyes.

By focusing on the animal’s eyes, you are giving the viewer of your pictures the perception that the animals are looking through the photograph and at them. This creates much more captivating pictures than pictures where the animals are looking away. This is especially important when you are taking a close-up shot of an animal, as we did here with this shot of a lioness in the Serengeti National Park in Tanzania.
Don’t Miss the Golden and Blue Hours

One of the best ways to enhance your photographs is to take them during the Golden and Blue Hours. I am not trying to discourage you from taking pictures during other times of the day. However, the light during these periods is soft, and the pictures you take will really grab your viewer’s attention.
In case you aren’t familiar with them, the Golden Hours and Blue Hours refer to the hours around sunrise and sunset. The Golden Hours are the hours right after sunrise and right before sunset.
The Blue Hours refer to the hour before sunrise and the hour right after sunset. During these times, the sun’s light is soft instead of being too harsh. This is exactly the kind of light you should be looking for.

When you are on safari, let your guide know you are interested in getting sunrise and sunset shots before you depart. This way, your guide will always have that in the back of their mind.
Hopefully, they will be able to adjust your safari schedule to compensate for some good photo opportunities during these magical times of the day.
Don’t Forget the People

The final photography tip for safaris that I have for you is an easy tip to forget when you are surrounded by such amazing wildlife as you can be when you are on safari in Africa. Don’t forget to include the people you are with in your shots. Too often, we get so fixated on taking great pictures of the animals that we forget to include our loved ones in the shots.
Now, I am not suggesting people actually get out of the vehicle and interact with the animals to create a photo opportunity. On the contrary, you should NEVER do that. What I am suggesting is that you find ways to incorporate the people you are with into your photos.
In the shot above, I captured a picture of my father watching the rhinos in Kruger National Park. This picture is going to be extra special because I included him in the shot. Make sure you take the time to find creative ways to fit your loved ones into your wildlife shots.
Don’t Forget to Subscribe to My Adventures!

Let Me Help You Save On Your Next Adventure!
‘Start Exploring Today’ Merchandise Available Now!
 |
 |
 |
 |
 |
 |
 |


This is so cool!!!!
Thank you so much for the kind words Jessica! 😀
This is an excellent and easy to understand list.
You mention filters in your gear bag ( Filters – Polarizing and UV Filters for both lenses ). I’m familiar with the CPL filters.
Is a UV filter the same as ND? When would you use them?
I have the Canon Canon EF 100-400mm. Is there much need for a shorter tele (55-250) lens?
Thanks so much for the comment Frank! Great questions. If your camera has a crop sensor, then a reach of 250mm would probably suffice. However, I would recommend 300mm. If your camera is a full frame, you don’t have the advantage of 1.4-1.6x magnification, so a lens that has up to 400mm is really necessary. Much of the time, you can’t control how close you can get to the animals.
The ND filter is used to reduce the light. During day safaris, the African sun can be intense and your pictures risk looking washed out in the harsh light. An ND filter will reduce highlights and make your pictures look much less washed out. Just make sure to only use it on day safaris.