LAST UPDATED: 4/21/26 – 14er Hiking Gear List Guide
This 14er Hiking Gear List contains references to products on my Amazon Store site. I may receive a commission when you purchase these products from my store, though at no additional cost to you. I hand-pick and recommend only the products that I am either familiar with or comfortable recommending.
Few hikes rival the thrill of summiting one of America’s tallest peaks. In mountaineering circles, any mountain over 14,000 feet (4,267 meters) is called a “fourteener.” For many climbers, reaching these summits is irresistible—a test of endurance rewarded by unforgettable views. But fourteeners demand respect.
Each year, unprepared hikers face serious risks on these challenging trails. To help you safely conquer one of the nation’s 96 fourteeners, I’ve created a comprehensive gear list to ensure you’re ready for the climb.
An All-You-Need 14er Hiking Gear List
In this 14er Hiking Gear List, I am going to give you some general principles that you can use to guide your gear planning. I outline how heavy your backpack should weigh and how much water you should plan to bring with you. I also provide you with my recommendations on what hiking clothing and gear to bring with you.
Not only do I cover the general hiking gear that I recommend, but I also cover the climbing and safety gear that I think is important as well. Armed with this information, you will be able to successfully plan your big adventure to conquer one of America’s many fourteeners. More importantly, you will be prepared to do it safely.
Before I get into my 14er hiking gear list, there are several general gear guidelines that I think are important to review. If you do not understand and follow these guidelines, the gear that you pack will have far less significance because you will likely struggle on the trail to the top of the mountain. You should always have these guidelines in the back of your mind as you start to prepare and pack for your hike.
Bring Layers of Clothing
Layering is crucial on a fourteener. You’ll gain significant elevation, and temperatures can swing sharply between the trailhead and the summit. A moisture‑wicking base layer plus a few insulating layers you can add or remove keeps you from overheating early or getting dangerously cold higher up. Smart layering keeps you comfortable and safe throughout the climb.
Make Sure Your Pack is Light
If there’s one key takeaway from my 14er hiking gear list, it’s this: watch your pack weight. Bring what you need, but keep your load light enough for the long, demanding climb. As you shop for gear, pay close attention to weight. A good rule of thumb for 14ers is to keep your backpack at no more than 10% of your body weight—so if you weigh 200 pounds, your pack shouldn’t exceed 20 pounds.
Carry Enough Food and Water
Many new hikers underestimate how much water they need. Some gear is a luxury or a convenience, but water is a necessity—and running out on a 14er can be dangerous. Plan on 1 liter of water for every two hours of hiking per person.
For a two‑person group hiking for ten hours, that means ten liters total. Since 1 liter weighs about 2.21 pounds, factor that weight into your pack. You might manage with slightly less if you hydrate well beforehand, but staying close to this guideline is the safest approach.
Don’t Neglect Safety
The final guideline to consider as you finish your 14er hiking gear list is to always include safety gear. Even on a Class 1 route, fourteeners are tough, remote, and unforgiving. If something goes wrong, you need to be prepared.
Every year, hikers are injured or lost in the backcountry, and many outcomes would be different with proper emergency gear. Items like an emergency bivy, waterproof matches, and a GPS alert device can save your life. For specific recommendations, see the 14er Safety Gear section in my 14er hiking gear list below.
Essential 14er Hiking Gear
When most hikers prepare for their first 14ers, they focus heavily on conditioning. While being in good shape is important, having the right gear is just as critical. Every year I see hikers on backcountry trails who are completely unprepared—wearing flip‑flops on steep climbs, carrying no cold‑weather layers at elevation, and lacking basic navigation or safety gear. Before you read my 14er hiking gear list, here are a few general rules I follow when packing for a 14er.
General Rules to Follow When Preparing Your Gear
Food and Water – Plan both carefully. Bring enough water for the entire hike and carry some food to refuel so you don’t risk dehydration or exhaustion.
Footwear – Wear proper hiking shoes or boots. Fourteener trails are too steep and rugged for flip‑flops or casual sneakers.
Clothing – Dress for elevation. Use proper footwear, layer your clothing for changing temperatures, and carry rain protection.
Hiking Gear – Bring gear that keeps you safe on tough terrain. Hiking poles help with balance, microspikes or crampons help on icy slopes, and a headlamp is essential if you’ll be hiking in the dark.
Climbing Gear – For Class 3 or 4 routes, pack rope, a harness, and a helmet for exposed sections or areas with rockfall.
Safety Gear – Carry essentials like waterproof matches, an emergency blanket, a life bivy, and a GPS device so you can contact help if something goes wrong.
Clothing for Hiking a 14er
One of the first things to consider when building your 14er hiking gear list is the clothing you’ll wear. As noted in the guidelines above, layering is essential because temperatures and weather can change quickly as you gain elevation. Avoid dressing too heavy or too light—both can create problems on the trail. For specific clothing recommendations, see the section included in my 14er hiking gear list below.
Hiking Socks
Good hiking socks are an absolutely critical piece of hiking equipment. Not only can wearing the wrong socks leave you uncomfortable, but wearing the wrong socks can be dangerous if your feet get wet when it is cold. If possible, I would strongly avoid wearing cotton socks when you hike in the backcountry. Cotton does a poor job of insulating when wet, so your feet are sure to get cold if your boots\shoes get wet on the trail. I love to wear light weight wool socks when I hike, even during the summer months. For some recommendations on good hiking socks to purchase for your next hiking adventure, please see the link in my 14er Hiking Gear List below.
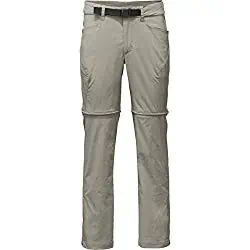
You will be doing a lot of hiking when you climb a 14er, so you will want to have a pair of pants or shorts that are comfortable. I would strongly recommend that you NOT wear jeans while you go hiking in the backcountry, as jeans can be quite uncomfortable to walk in when they are wet. In addition, they do a very poor job of keeping your warm when they get wet as well. I always bring a pair of convertible pants with me when I climb a 14er because they give me the flexibility of wearing either pants or shorts depending on the weather.
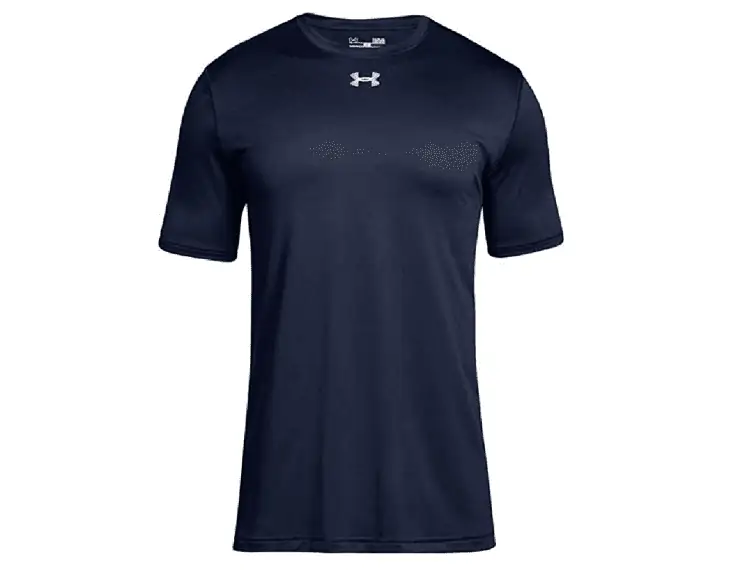
When hiking in the backcountry, you will want to make sure that you bring layers of clothing with you. This is important because you really don’t know what kind of weather to expect and you need to be flexible with your clothing. The last thing you want is to be ill prepared. I recommend wearing a breathable T-Shirt as your bottom layer because they wick moisture away from your body when you sweat. This will ensure that you don’t get cold after hiking all day and then stopping.
Having a warm, yet light, jacket to wear when hiking in the backcountry is important because you never know when temperatures are going to turn cooler. This is especially true early in the morning or when you wind down your hike in the evening. In addition to being warm, you will also want to make sure that the jacket you bring is light. The last thing you will want to do when hiking long distances with a heavy pack on your back is to have to carry a heavy jacket around with you.
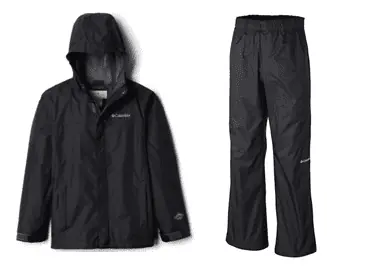
Hiking when you are wet can be an absolutely miserable experience. If you have the room in your backpack, it is always a good idea to have rain jacket with you when you climb a 14er. The water resistant shell can also be used as a wind breaker and as a top layer when trying to make a winter ascent. If you are looking for some good recommendations for gear to purchase, I have included a link to my recommendations below.
If you are planning on climbing a 14er early or late in the hiking season, then you will definitely want to have a warm base layer with you. Good base layers will wick the moisture from your sweat away from your body, keeping you warm even when your clothes are wet. When I do difficult back-country hikes like climbing a 14er, I take a light weight base layer with me, even during the summer. For some good base layer recommendations, check out the link in my 14er Hiking Gear List below.
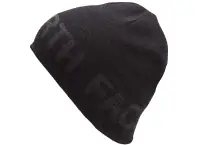
Just like it is important to protect your head when it is hot, it is also important to keep it protected when hiking in very cold temperatures. If you plan on climbing a 14er during the winter, early spring, or late autumn, then it is a smart idea to carry a winter hat with you. You may not wear it during your whole hike, but you will be glad you have it at higher elevations. For winter expeditions, you will also want to have a good pair of winter gloves and even a face covering with you. If you are looking for a good winter hat and gloves to purchase, I have included a link below with some great recommendations.
When you are on a hike as challenging as climbing a 14er, an injury that leaves you unable to walk can be a major inconvenience or even dangerous. You will want to make sure that you have the proper footwear with you before setting off on any hike, let alone up one of North America’s tallest mountains. When looking for the right hiking shoes or boots, please keep the following factors in mind:
Factors to Consider When Choosing Footwear
Lightweight Boots – Choose boots between 2.2 lbs (1 kg) and 3.3 lbs (1.5 kg). Heavier boots add unnecessary strain on long hikes.
Good Traction – Pick boots with rubber soles and deep lugs to maintain grip on uneven, rocky terrain.
Ankle Support – Use mid‑ or high‑cut boots to protect your ankles on rough trails. Features like speed hooks or D‑strings add stability.
Proper Fit With Hiking Socks – Try boots on while wearing your hiking socks so they fit correctly during real use.
Toe Room Check – Make sure your toes don’t touch the front when you step down. This prevents pain on descents and scrambles.
Waterproofing – Ensure your boots are waterproof. Wet feet lead to blisters, discomfort, and potential injuries, especially in rain or wet terrain.
Hiking Boots
Making sure you always have the proper footing is paramount to hiking safely, which is why you should always wear proper hiking shoes or boots when you are in the backcountry. This is especially true when you are hiking trails with high elevation gains and uneven terrain. If you are planning to climb a 14er and would like to ensure that you have the proper footwear to bring with you, I have included a number of my recommendations for hiking boots below.
No matter which fourteener you climb, you should expect a demanding hike. Even the easiest routes require proper gear, and some trails hold snow well into summer, creating slick, steep sections. To stay safe, carry microspikes for traction and use hiking poles. On tougher routes, you may also need crampons, alpine snowshoes, or even an ice axe.
Depending on the mountain and trail difficulty, you may also need climbing gear on your 14er hiking gear list. A climbing helmet is useful on almost any route because it protects you from falls and rockfall, even on Class 1 or 2 trails. Gear like a harness and rope is usually only necessary on Class 3 or 4 routes, but some peaks absolutely require it.
For example, I would never consider the Northeast Ridge of Capitol Peak without a rope and harness. For more details on what climbing gear to bring and when, see the recommendations in my 14er hiking gear list below.
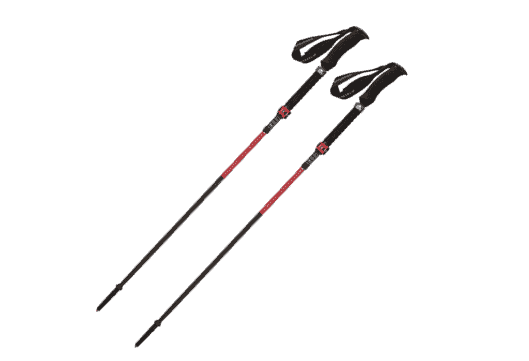
Hiking Poles (Recommended)
For hikers who know that they will be encountering some uneven terrain during their hike, including a set of hiking poles on your trip may be a smart decision. A good set of hiking poles can really help you maintain your balance as you are moving over uneven or steep ground. Like the rest of your gear, you will want to keep the weight of the poles in mind. For some of my top recommendations on hiking poles, please refer to the link I provided below.
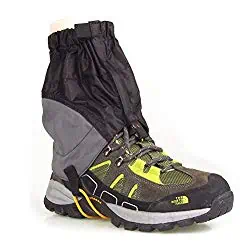
If you plan on hiking in a sandy, muddy, or snowy environment, then bringing a pair of lightweight gaiters with you may be a good idea. They will keep sand and water out of your hiking shoes or boots, which will make your hike much more comfortable. I like to bring a set of gaiters with me whenever I do long hikes because I never know what to expect on the trail. For some good hiking gaiter recommendations, check out the link I provided below for my recommendations.
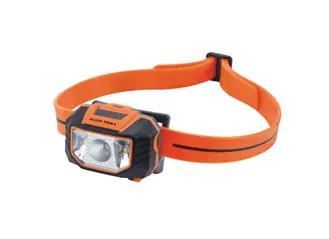
Depending on the 14ers that you plan to climb, you may be in for a very long day of hiking. This means that you may be on the trail very early in the morning or in the evening, when the light is bad. It is always a good idea to have a portable and dependable light source with you. That is why I always carry a head lamp with backup batteries in my bag. If you don’t have a head lamp, a small, light weight flashlight will do the trick as well.
Having a good hiking backpack with you when you climb a 14er can be the difference between a fun and successful hike and a hike that is absolutely miserable. You are going to need your hands for using hiking poles and making at least three points of contact with the ground during the difficult parts of your hike, so you don’t want to have to carry your gear with you in your hands when you hike a 14er. You are also not going to want to have a ton of weight on your back when you tackle a challenging hike like climbing a 14er, so you want to make sure that your bag and your gear is relatively lightweight. If you are looking for some recommendations on great lightweight hiking backpacks, I have linked to some of my recommendations for you to review below.
In addition to having a good pair of hiking shoes or boots on your 14er Hiking Gear List, you will also want to have something with you that will allow you to get some extra traction should the trail turn icy. On most trails, a good pair of micro spikes is sufficient to give you the extra traction that you need. Even if you don’t expect to encounter icy conditions on the trail, I would strongly recommend having a pair of these spikes in your bag just in case. If you are planning to climb a more difficult mountain that routinely has deep snow pack on steep slopes, then you will want to consider bringing a pair of crampons instead. However, these aren’t needed for most of the easier Class 1 mountains where a good pair of micro spikes will suffice. For tips on which micro spikes to invest in, please see the link I provided below to review my recommendations.
One of the most critical of the supplies that you will bring with you when you climb a 14er is your supply of water. Let’s face it, even the easiest of the 14ers in the United States still involves a lot of elevation gain and a good amount of miles that need to be trekked. If you would like to make it to the top and back down safely, then you are going to want to be sure that you have enough water for your hike. I would strongly recommend packing a water bladder with you so that you can ensure that you have enough water. I have tried quite a few different water bladders over the years and I have linked to some great recommendations for you to review below if you are interested.
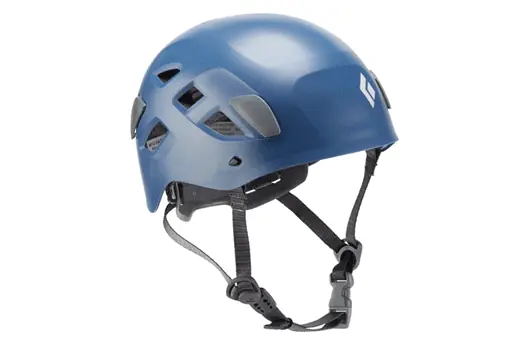
Climbing Helmet (Recommended if Rockfall is Likely)
On most Class 1 rated trails for America’s 14ers, you won’t need to worry about things like rockfall because the trails are very well defined and the amount of rock scrambling you will need to do to summit these mountains is minimal. However, when you start getting into the more difficult Class 2 trails, and definitely the Class 3 and Class 4 trails, it is a very different story. The dangers of rock fall and falls from exposed parts of the trail become a real danger when you attempt to climb some of the more difficult 14ers. For that reason, I would strongly recommend you bring a climbing helmet with you if you think these dangers will be an issue. This is yet another reason why I would recommend researching the mountains you plan to climb before finalizing your packing list. For some suggestions on good climbing helmets to invest in, please see the link I provided below.
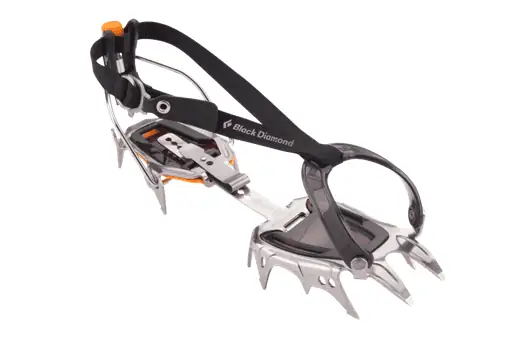
Crampons (Recommended if Snow Pack is Expected on Trail)
If you are planning on climbing a more difficult Class 3 or Class 4 mountain, or if you expect to encounter heavy snowpack on steep slopes on the trail, then you are going to want to have more than just micro spikes on your 14er Hiking Gear List. In these situations, I would strongly recommend having a good pair of crampons with you. Crampons will give you much more traction than micro spikes will and will keep you safe on steep, slippery slopes. However, before you go out an purchase a pair, you need to understand how to choose the proper crampons for your needs. With some crampons that use step-in bindings, you need to have certain mountaineering boots in order to wear them. While with others that use strap bindings are much more versitle in which types of footwear they work with. If you are interested in seeing which crampons I recommend, please see the link I provided below.
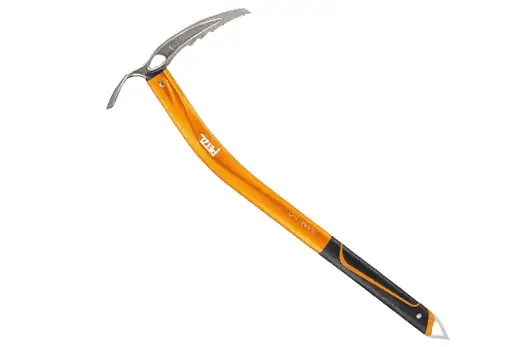
Ice Axe (Recommended if Snow Pack is Expected on Trail)
Another piece of equipment that you may or may not need to add to your 14er Hiking Gear List is an ice axe. While this piece of equipment isn’t a necessary tool for the Class 1 routes and many of the Class 2 routes, it is a very important piece of equipment for the tougher trails that may involve hiking over heavy snow pack on steep ascents and descents. Not only is an ice axe a critical piece of equipment for doing a self-arrest on a steep fall, but it can also be used to prevent a fall when hiking on steep, slick slopes. It isn’t enough to just have one with you, you are also going to need to learn how to use an ice axe. If you would like some recommendations on good ice axes to use for alpine ascents, I have linked to my recommendations for you to review below.
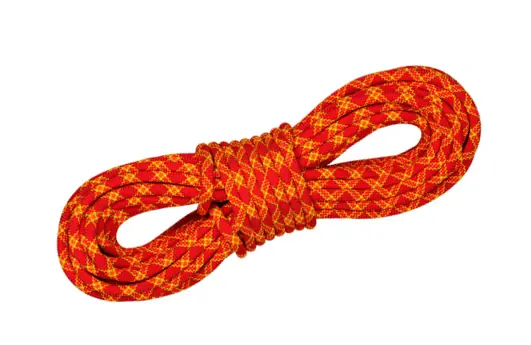
Climbing Rope (Recommended for Some Class 3/4 Trails)
If you are planning on climbing a Class 1, Class 2, or an easy Class 3 14er, then you probably won’t need to worry about packing climbing rope for your hike. While these climbs are definitely not easy, they aren’t typically technical enough to warrant needing a rope and harness. However, if you are planning on tackling a difficult Class 3 or a Class 4 mountain, then climbing rope becomes much more necessary. I would definitely recommend doing your research on the mountain you plan on climbing before you finalize your packing list and include climbing gear such as rope if it is necessary. For some good recommendations on climing rope to invest in, please see the link below.
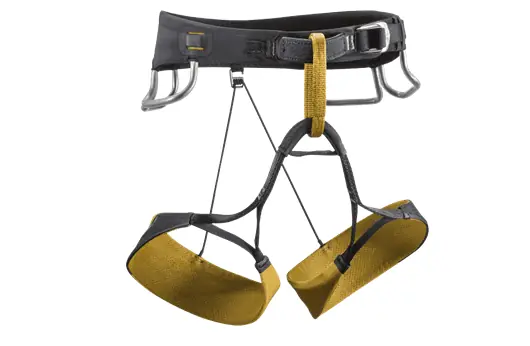
Climbing Harness (Recommended for Some Class 3/4 Trails)
Just like with climbing rope, a climbing harness is typically only necessary if you plan on hiking some of the more exposed routes on the diffiult Class 3 or Class 4 mountain trails. A good climbing harness is an invaluable piece of safety equipment not only for climbing mountains, but for canyoneering as well. Again, I would strongly recommend doing your research on the 14er you plan to climb before finalizing your packing list and I would definitely recommend packing a good climbing harness if there are very exposed sections of the trail. For some good recommendations on a climing harness to invest in, please see the link below.
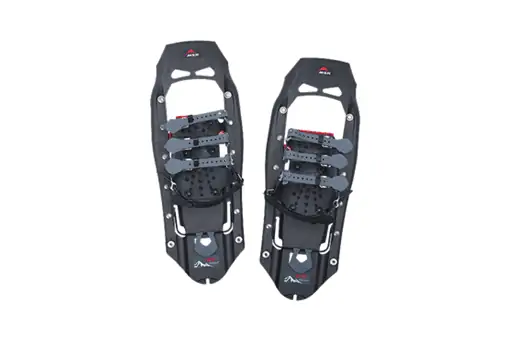
Alpine Snow Shoes (Recommended for Trails with Steep Snowpack)
The last piece of gear that I would consider adding to your 14er Hiking Gear List if you are expecting to encounter a deep snowpack on the trail is a good pair of light alpine snowshoes. They need to be light because you don’t want to add a lot of extra weight to your back on these steep, difficult hikes, but they can save you a considerable amount of energy traversing deep snow. Depending on how much snowpack you expect to encounter, the extra weight may be worth it. You will also want to make sure you have a pair of snowshoes that are designed for alpine use as the have extra crampons, sidebars, and other features designed to help you on steep, snowy ascents and descents. I would strongly suggest researching which snowshoes are right for you before purchasing as there are many different options available. Personally, I love the snowshoes that MSR builds as I think they are great quality and reasonably priced. For more recommendations on snowshoes and snowshoe gear, please see the link I provided below.
Because 14er trails are so difficult, I generally don’t recommend carrying full camping gear on the ascent. However, camping near the base can make sense if you want an early start. In those cases, adding a tent, sleeping bag, and sleeping mat to your 14er hiking gear list can be helpful. You can set up camp, leave your gear at the base, and summit with a lighter pack.
Many fourteeners have campgrounds near the trailheads for this reason. For example, hikers on the Longs Peak Keyhole Route in Rocky Mountain National Park often camp to get an early start and avoid afternoon storms. For camping gear suggestions, see the recommendations in my 14er hiking gear list below. If you’re climbing a fourteener as part of a longer backpacking trip, my Complete Backpackers Packing Guide may also be useful.
If you are planning on spending a night or more in the backcountry while climbing a 14er, then you will want to bring a tent with you. However, you won’t want to bring just any tent. There are specific tents that are designed for use while backpacking. Unlike most tents you use while camping, these backpacking tents are much lighter weight as to minimize your load while carrying your gear. If you are in the market for a backpacking tent to use on your next adventure, I have included a link with some of my suggested tents for you to review below. I have also included some information in my backpackers packing guide below on how to choose the right backpacking tent for you.
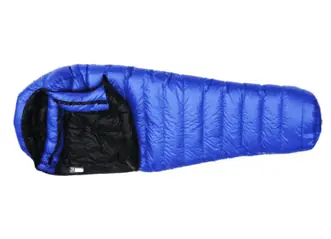
In addition to your tent, the sleeping bag that you choose for your adventure on a 14er will go a long way to determining how comfortable you are. There is no such thing as a temperature controlled environment in the backcountry, so your sleeping bag is the most effective tool that you have to keep you warm on cold nights. If you choose the wrong sleeping bag to bring with you, a cold night can be unbearably uncomfortable or even dangerous. If you would like to view some of my recommended backpacking sleeping bags, please refer to the link below.
In addition to a light, but warm sleeping bag, you are going to want to make sure that you have a decent sleeping pad with you. This is especially important if you are going to be camping for multiple days or hiking thru rocky ground. A good sleeping pad can make a big difference in keeping your spirits up on extended hikes. You will want to be sure the pad you pick is both comfortable and light because you will need to carry it with you when you hike. For my top recommendations on sleeping pads, please see the link below.
Just like taking care of your sleeping bag is important, so is taking care of your tent. Like anything, tents can get worn out with extended use. This is especially true if you are camping on hard, uneven surfaces. That is why I like to carry a light-weight tent footprint with me when I go backpacking. The tent footprint sits on the ground below the tent, which not only protects the tent from wear-and-tear, but it also provides a moisture shield. For my top recommendations on tent footprints, please see the link I included below.
I bet I am not the only one who wishes I could take the pillow off my bed at home, compress it, and pack it in my backpacking bag to take with me on overnight hikes. Sadly, the size and weight of standard pillows makes them an impractical addition to your backpacking gear. However, they do make some very light weight and compact backpacking pillows that are almost as comfortable. Some are blow up, while other backpacking pillows are made of compressible material. For a look at my top backpacking pillow recommendations, please see the link I included below.
When it comes time to start packing for climbing a 14er, some of the most routinely overlooked pieces of equipment are related to navigation and safety. These are pieces of equipment that you hope you won’t need, but can be absolutely lost without.
Should you get lost or injured on your climb, having these tools to help you navigate and stay safe until you can get yourself out or are found can be the difference between life and death. That’s why I strongly recommend that the safety equipment I list below be part of any 14er Hiking Gear List.
Survival Blankets
If you use my 14er Hiking Gear List wisely, then you should seldom find yourself stuck in a situation where you aren’t prepared for the trail. However, there are certain circumstances that even the most experienced backcountry backpackers can’t anticipate. That is why it is so important to always have emergency gear with you in your bag. If the weather turns for the worst and you find yourself without adequate cold weather gear, a survival blanket could literally be the difference between life or death. These compact, easy to carry Mylar foil blankets reflect up to 90% of your body heat back at you. That is often enough to stave off hypothermia and give you time to get yourself out of a bad situation.
In the unfortunate event that someone gets hurt on your hike, it is always good to be prepared. Even if there aren’t any big injuries, being able to properly treat blisters, sun burn, scratches, abrasions, and other small injuries is important. Having to hike with a bad blister or cut can be very uncomfortable, especially if they get infected. Being able to treat these small wounds can help you avoid having to hike some uncomfortable miles with nagging injuries.
Many of the summit trails for America’s 14ers have defined trails for you to follow, but many do not. The last thing you want to worry about when tackling a difficult challenge like reaching the summit of a 14er is getting lost. One of the best ways to avoid this is to carry a GPS device with you. If you don’t want to invest in a device, you can sign up for the pro version of the Alltrails App. I like the Garmin InTouch devices because they have GPS, allow me to send messages, and have an emergency SOS feature in case I get in trouble. If you would like to review these devices, please see the link I included below.
While GPS devices are great for navigation, you don’t want to be completely dependent upon them in case of an emergency. If all you have to navigate is a GPS device and its battery dies, then you are in trouble. That’s why I like to always carry a small compass in my bag as well. Should all else fail, I am able to use a compass, along with the maps that I bring with me, to navigate myself out of trouble. If you would like to review some of my recommendations for small, light weight compasses, please see the link I included in my 14er Hiking Gear List below.
If you find yourself in an emergency situation during your hike where your GPS device is out of batteries or unusable, a compass will only help you if you know where you are going. That it why it is always important to carry a topographical map with you as well. Not only will the map help you navigate, but they are also great for helping you with route finding. Without a sense of what is ahead, you might find yourself navigating yourself towards impassable canyons, steep cliffs, etc.. If you would like to purchase a topographical map for a hiking destination in the United States, I have included a link to the USGS website below.
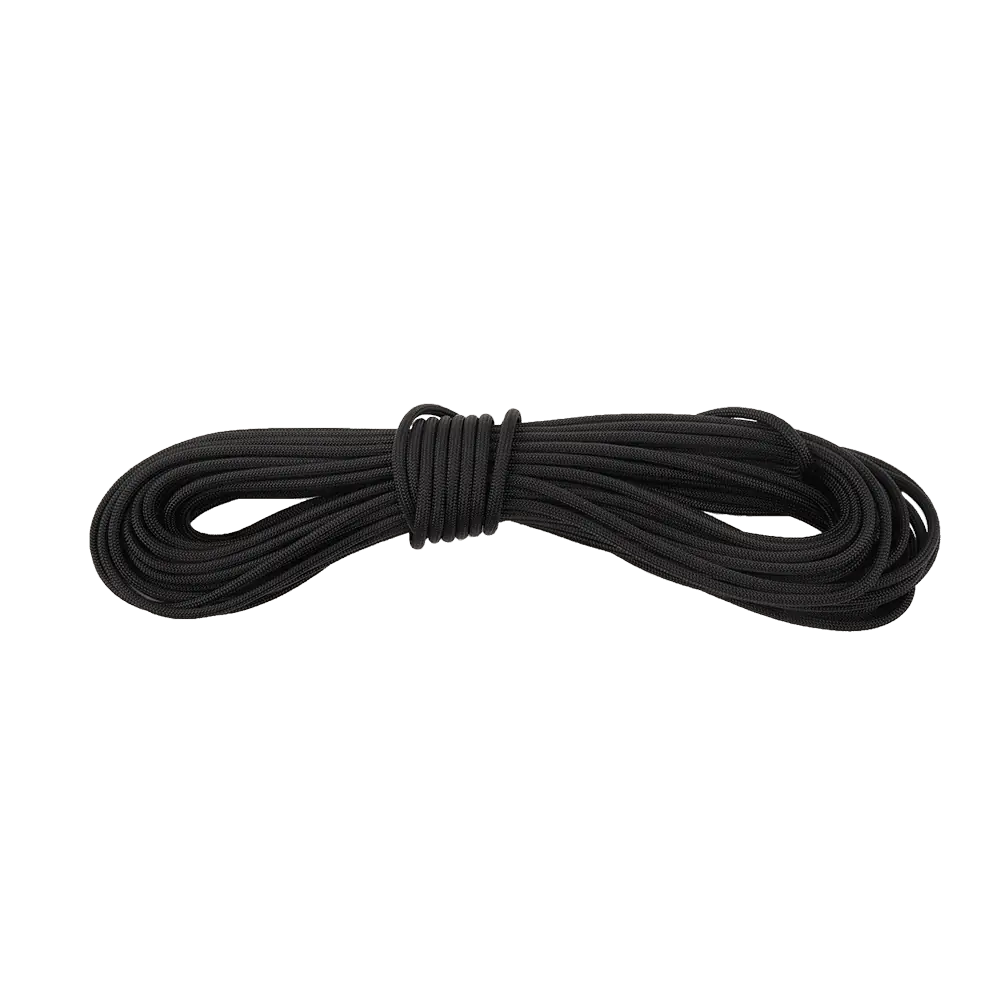
When I am on a difficult hike such as climbing a 14er, I like to bring some paracord with me in case I need it. There are a bunch of reasons why paracord could come in handy, but one of the reasons I use it the most is for a backpack drop line. If I encounter a steep climb or descent on my hike where I feel more comfortable tackling it with my backpack off, I can use the paracord to either pull my backpack up after I have finished the climb or to lower my backpack down ahead of me before I make a descent. I cannot tell you how valuable this is and how much safer I feel doing difficult hikes knowing I don’t need to wear my backpack on the technical sections.
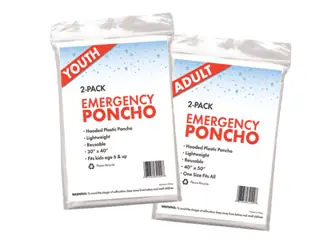
Even if you pack rain gear for your hike, having an emergency backup that you can quickly throw on if the weather turns suddenly wet while on the trail can be a huge advantage. A portable rain poncho can also be a great lightweight substitute if you are trying to cut down the weight of your gear and don’t want to pack heavier rain gear. I always keep a portable ponch in a quick access pouch on the belt of my backpack when I am hiking so that I can quickly throw it on if need be.
Chances are, there will be situations on your hike where a small knife will come in handy. In fact, a small utility knife is one of the most valuable tools that you can have with you when hiking, camping, or backpacking. Having a small, compact knife with you is always a good idea. I like to keep a Swiss Army Knife in the belt pouch of my backpack in case I need to cut rope, trim fabric, or use my knife for a myriad of other reasons while on the trail.
If you get stuck on your ascent or descent, you are definitely going to want to make sure you can keep yourself warm if you need to overnight on the mountain. For that reason, I would strongly recommend carrying a pack of waterproof matches with you when you climb a 14er. Chances are that you won’t need them, but they are certainly an item you will be happy to have with you if you do.
No one likes to think about needing one, but if you do get stranded on a mountain you will certainly be glad that you have an emergency bivy sack in your bag. Even the most skilled and prepared hikers that I know bring some sort of emergency shelter with them when they are in the backcountry or on a difficult climb. I am very serious when I say that it could mean the difference between life and death should you run into trouble and need to overnight. If you are looking for some good options for an emergency bivy sack, I have included a link to the one I regularly use and depend on for you to review below.
Avid traveler and photographer who loves to see new places, meet new people, and experience new things. There is so much this world can teach us, we just need to explore!
View all posts by Josh Hewitt
Great list and advice, Josh. I just climbed Quandary Peak (14,271) last week and there was still some snow up there that we had to traverse, though our microspikes weren’t necessary. I’m 100% with you on hiking poles. Going up, going down – it doesn’t matter. They are a lifesaver.
We've detected that you are using AdBlock Plus or some other adblocking software which is preventing the page from fully loading. We don't have any banners, Flash, animation, obnoxious sound, or popup ads. I do not implement these annoying types of ads.
Creating the travel guides, itineraries, and other premium travel content for this blog is a lot of work and it costs money to host this blog. Almost all of my revenue to run this blog comes from our online advertising.
Don't miss out on any of my premium travel guides, itineraries, and travel advice articles by subscribing to follow my adventures. All these guides will be delivered to your mailbox, hassle-free!


Great list and advice, Josh. I just climbed Quandary Peak (14,271) last week and there was still some snow up there that we had to traverse, though our microspikes weren’t necessary. I’m 100% with you on hiking poles. Going up, going down – it doesn’t matter. They are a lifesaver.
Awesome!!! That is fantastic!!!! I love that mountain! Brilliant minds think alike re: the hiking poles 😄