LAST UPDATED: 5/2/26 – Reflection Canyon Trail Guide
Southern Utah has no shortage of stunning backcountry hikes, but the trek to Reflection Canyon is my favorite—and one of the toughest. The unmarked 15‑mile round‑trip route winds through slot canyons and deep washes with almost no shade, fully earning its “Difficult” rating. The beauty of Reflection Canyon is unforgettable, but preparation is essential. I created this Reflection Canyon trail guide to help you get ready so you can complete the hike safely and confidently.

In this Reflection Canyon trail guide, you’ll find the key details you need: weather insights, the best times to attempt the hike, and several important planning maps. My Hole in the Rock Road directions map will help you reach the trailhead—an adventure of its own.
You’ll also find a Reflection Canyon trail navigation map in this Reflection Canyon trail guide, highlighting major landmarks to help you stay oriented on the unmarked route. I’ve included additional resources on gear, permits, and supplies for both day hikers and overnighters. With this information, you’ll be fully prepared to reach Reflection Canyon and return safely.
Reflection Canyon Trail Guide Navigation Menu

How to Visit Reflection Canyon

Accessing Reflection Canyon by Boat
While most of the iconic photographs that you have seen of Reflection Canyon were taken from above the canyon, the canyon is also accessible from the water by boat. The views of the canyon from the water level aren’t nearly as spectacular, but it is much easier to visit Reflection Canyon by boat than it is to hike in to see the canyon. If you aren’t sure that you are up to the task of hiking to see the canyon, I have included some tips on visiting by boat in my Reflection Canyon trail guide below.
Tips for Visiting Reflection Canyon by Boat
- You can rent a boat from either the Wahweap Marina or the Bullfrog Marina on Lake Powell. I would strongly recommend renting from the Bullfrog Marina as it is closer to Reflection Canyon and some of the other Glen Canyon National Recreation sites like Rainbow Bridge National Monument.
- Make sure you begin your trip early in the day, as it is a long boat ride to Reflection Canyon from either marina. On a straight line, it is roughly 25 miles from Bullfrog Marina and 34 miles from Wahweap Marina, but you will be following the contours of the lake, so the distance is actually much longer from each.
- Reflection Canyon is located at mile marker 57 and is marked by a sign, so it is rather easy to find if you are paying attention.
- The water level within the canyon will dictate how far you can go. There is no place to dock within the canyon, and I would strongly recommend not trying to get off the boat and climb on the rock structures.

Hiking to Reflection Canyon
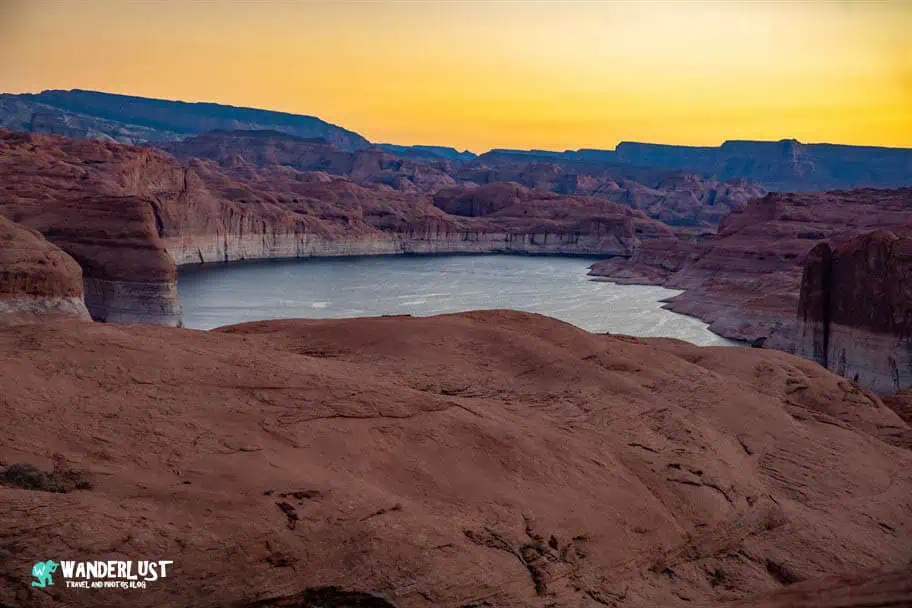
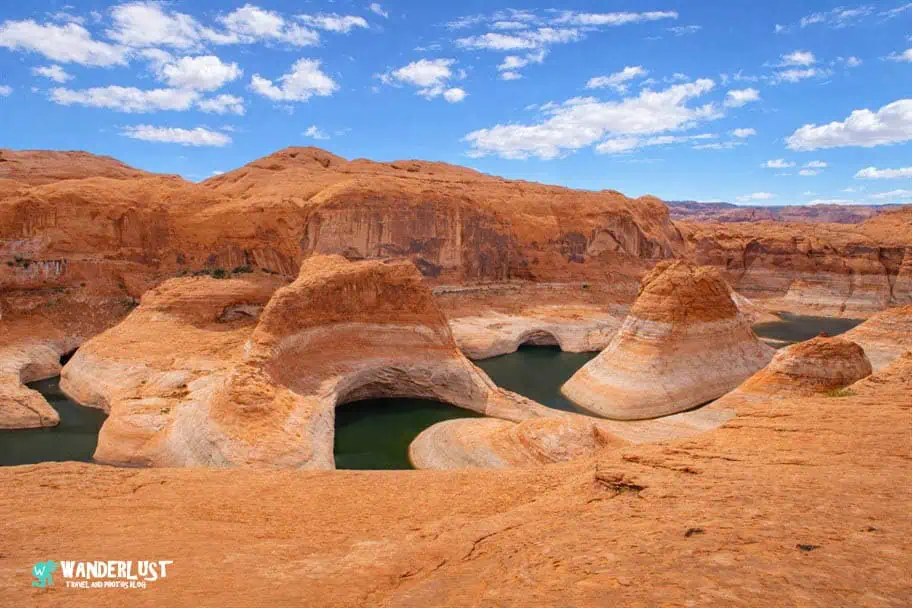
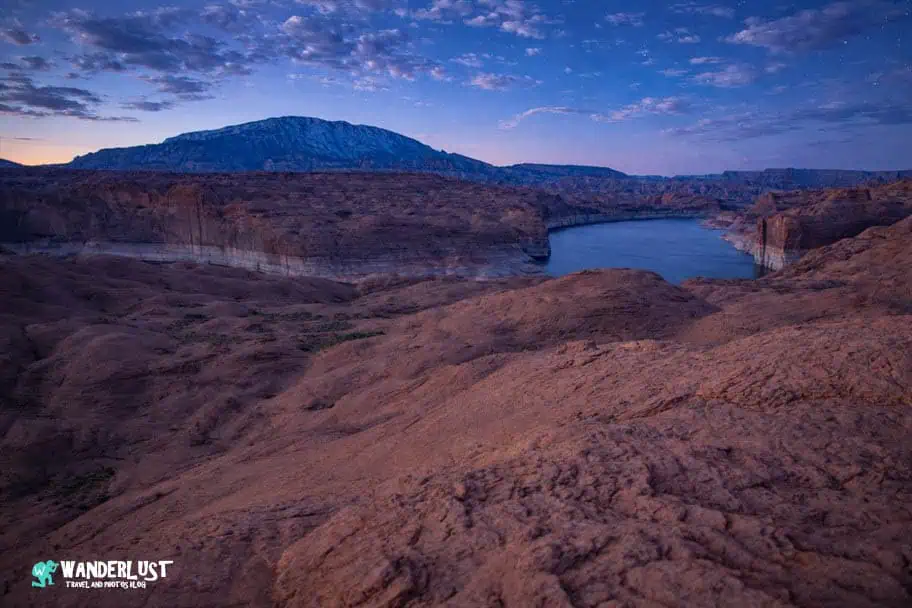
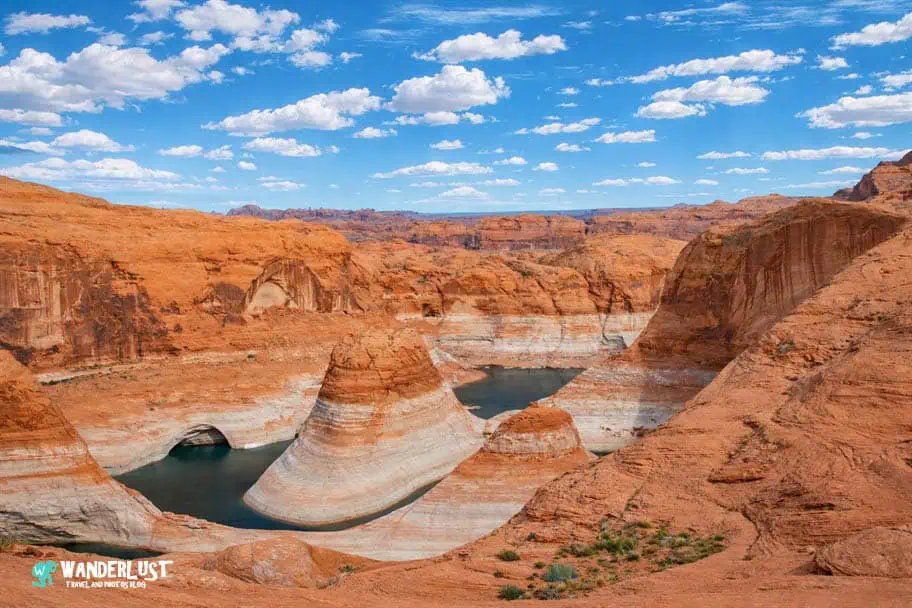
Without a doubt, the best way to view and photograph Reflection Canyon is to hike to the canyon and see it from above. While the views from the water level are beautiful, they pale in comparison to seeing the canyon from up high. While it does require a difficult and strenuous hike to get to Reflection Canyon, the views you will be rewarded with are well worth it. In this Reflection Canyon trail guide, I am going to give you all of the information you need to successfully hike to the canyon and photograph it.
When to Visit Reflection Canyon

One of the biggest reasons the hike to Reflection Canyon is so challenging—and at times dangerous—is the weather. Summer temperatures regularly soar past 100°F, and with almost no natural shade along the route, the heat becomes a serious hazard for anyone unprepared.
To stay safe, make sure you’re fully ready before attempting this hike. Use the information in my Reflection Canyon trail guide, along with the safety and packing guides I’ve linked, to ensure you have the gear, knowledge, and preparation needed for this demanding backcountry route.
Visiting Reflection Canyon in the Summer
If you plan to visit Reflection Canyon between June and August, it’s essential to carry plenty of water. There is rarely water available along the route, so you cannot rely on finding and purifying any during the hike. In the extreme heat, you’ll go through water quickly on both the approach and the return.
I recommend bringing at least 6 liters per hiker, and more if you can carry it. On my most recent trip, I packed 9 liters and used all of it. Nighttime temperatures can also stay uncomfortably hot this time of year, so you may want to consider doing the hike as a day hike if you’re able.
Visiting Reflection Canyon in the Spring or Autumn
If you’re planning to visit Reflection Canyon in early spring or late autumn—April or October—I strongly recommend treating it as an overnight trip rather than a day hike. Daylight hours are limited during these months, and completing the full hike in one day is difficult. Many hikers also underestimate the long, slow drive to the trailhead due to the rough conditions on Hole in the Rock Road.
The drive from Escalante takes more than two hours, making an early start challenging. Because of the road conditions and the rugged terrain on the trail, I don’t recommend driving or hiking in the dark. For guidance on planning an overnight at Reflection Canyon, refer to the overnight hike preparation section of this guide.
Visiting Reflection Canyon in the Winter
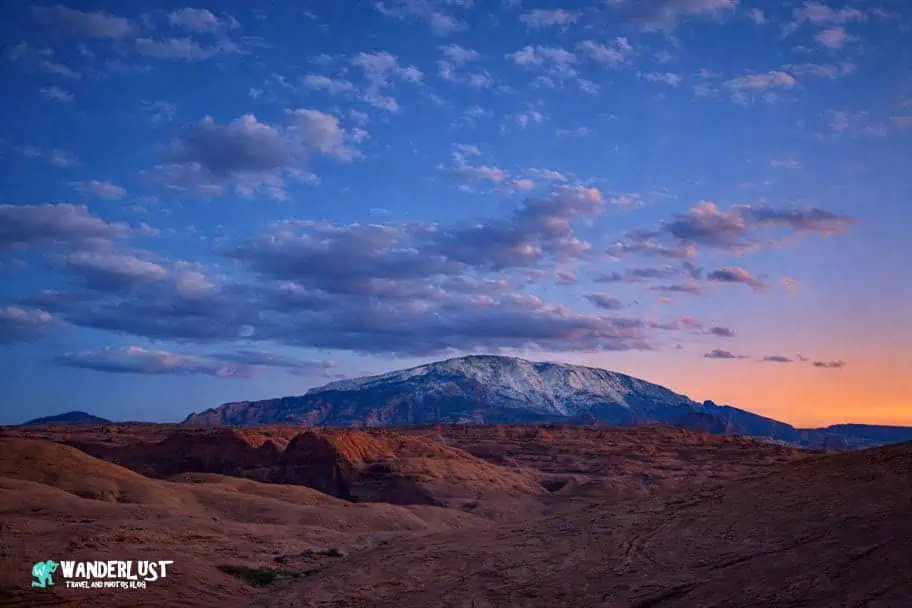
During the winter months of December through February, conditions around Reflection Canyon can be harsh. The area sits at a high enough elevation to receive snow, and strong winds are common year‑round. Much of the route also requires navigating slot canyons, deep washes, and slickrock, making winter travel both miserable and potentially dangerous.
If you want to avoid extreme heat, plan your hike for spring or autumn instead and treat it as an overnight trip. Reflection Canyon is too beautiful to rush. For a clearer picture of what to expect throughout the year, I’ve included several weather charts in my Reflection Canyon trail guide below.
Average Temperature (°F)
Average Precipitation (Inches)
Reflection Canyon Safety Advice
Backcountry hiking and backpacking are incredible ways to experience nature, but they demand serious preparation. Every year, hundreds of hikers in the United States—and many more worldwide—are injured while exploring remote areas.
While no amount of planning can eliminate all risk, many accidents happen because hikers are poorly prepared. If you’re heading to Reflection Canyon, I strongly recommend reviewing my article on the Ten Easy Backpacking Safety Steps, which is linked in my Reflection Canyon trail guide below.
| READ MORE: |
 |
| Ten Easy Backpacking Safety Steps |
Reflection Canyon Trail Stats
| Trail Stats | |
|---|---|
| Trail Type: | Out-and-Back |
| Distance: | 15.5 miles/24.9 kilometers |
| Elevation Gain: | 1,584 feet/483 meters |
| Time to Complete: | 7 to 10 hours |
| Difficulty Level: | Very Difficult |
| Trail Map |
|---|
The Reflection Canyon Trail is Difficult
As you can see by the trail stats map above, the Reflection Canyon hike is not easy, no matter what time of the year you are visiting. This out-and-back trail measures just over 15 miles round trip and features over 1,500 feet of elevation gain.
If you look at the topographical map for the Reflection Canyon Hike on the Alltrails website, you’ll notice that most of this elevation gain comes from dropping into and climbing out of many slot canyons and deep washes along the trail. In fact, one of the most exhausting aspects of this hike is the seemingly constant up-and-down required to navigate the landscape.
The Reflection Canyon Trail is Unmarked
Another aspect of this hike that makes it fairly difficult is the fact that it is an unmarked trail, so you really need to be able to navigate on your own. For the first two-thirds of the hike, you will be hiking on dirt and can oftentimes see the footprints of previous hikers.
However, when you get to the smooth rock section that covers the final third of the hike, there is absolutely no path for you to follow. If you aren’t able to navigate or don’t have the tools to help you navigate, then you could make this hike much longer than it needs to be or even get lost.
Having the Right Navigation Tools is Important
There are some very distinct landscape features that you can use to help you navigate, which I cover in my Navigating the Reflection Canyon Trail section of this Reflection Canyon trail guide, so I would definitely recommend reading that section. I have also included several trail photos that I took during my hike in the What to Expect on the Trail section of this guide.
Those resources should help you find your way to Reflection Canyon and back safely. However, if you want to be extra sure of your direction when hiking, I would strongly recommend signing up for the Pro version of the Alltrails App or investing in a Garmin InReach GPS device and setting up waypoints to assist you in your navigation.
Getting to the Reflection Canyon Trailhead

The first major challenge that you will face when attempting to hike to Reflection Canyon is getting to the trailhead. The trailhead is only accessible via the Hole in the Rock Road, which starts just outside of the town of Escalante, Utah.
The road traverses much of the interior of the Grand Staircase-Escalante National Monument and then enters the Glen Canyon National Recreation Area before terminating at the trailhead for the Hole in the Rock trail. The Hole in the Rock Road is not paved, and sections of the road are very rough, especially after it rains.
The Road Requires a 4×4 Vehicle With High Clearance
If you are planning to hike to Reflection Canyon, I would strongly recommend that you bring a 4×4 vehicle with high clearance. The high clearance is important as you will risk bottoming out your vehicle on sections of the road. You can manage to drive much of the road without a 4×4 vehicle when the road is dry, but once the road enters the Glen Canyon National Recreation Area, it is pretty much undrivable without a 4×4 vehicle.
Keep in mind, even with a 4×4 vehicle, the Hole in the Rock Road is so rough in sections that it may be impassable in wet conditions. Keep this in mind before you head out for your hike. If there are heavy rains while you are down the road, you may be stuck in the backcountry until the road dries out.
Leave Early and Obey the Speed Limit
The trailhead for the Reflection Canyon hike is located roughly 50 miles down the Hole in the Rock Road. To get to it from Escalante, you will take highway UT-12 East out of Escalante and then turn right on the Hole in the Rock Road. Be prepared for the drive to take you roughly 2.5 hours from Escalante to the trailhead. As I mentioned above, the road is very rough in places.
I would strongly recommend not exceeding the speed limit while driving on Hole in the Rock Road, as you will jeopardize damaging your vehicle or getting stuck in the backcountry. On the bright side, the difficulty in reaching the trailhead has the benefit of keeping Reflection Canyon less crowded, as only motivated hikers are willing to venture this far down an unimproved road.
Hole in the Rock Road Trailhead Map
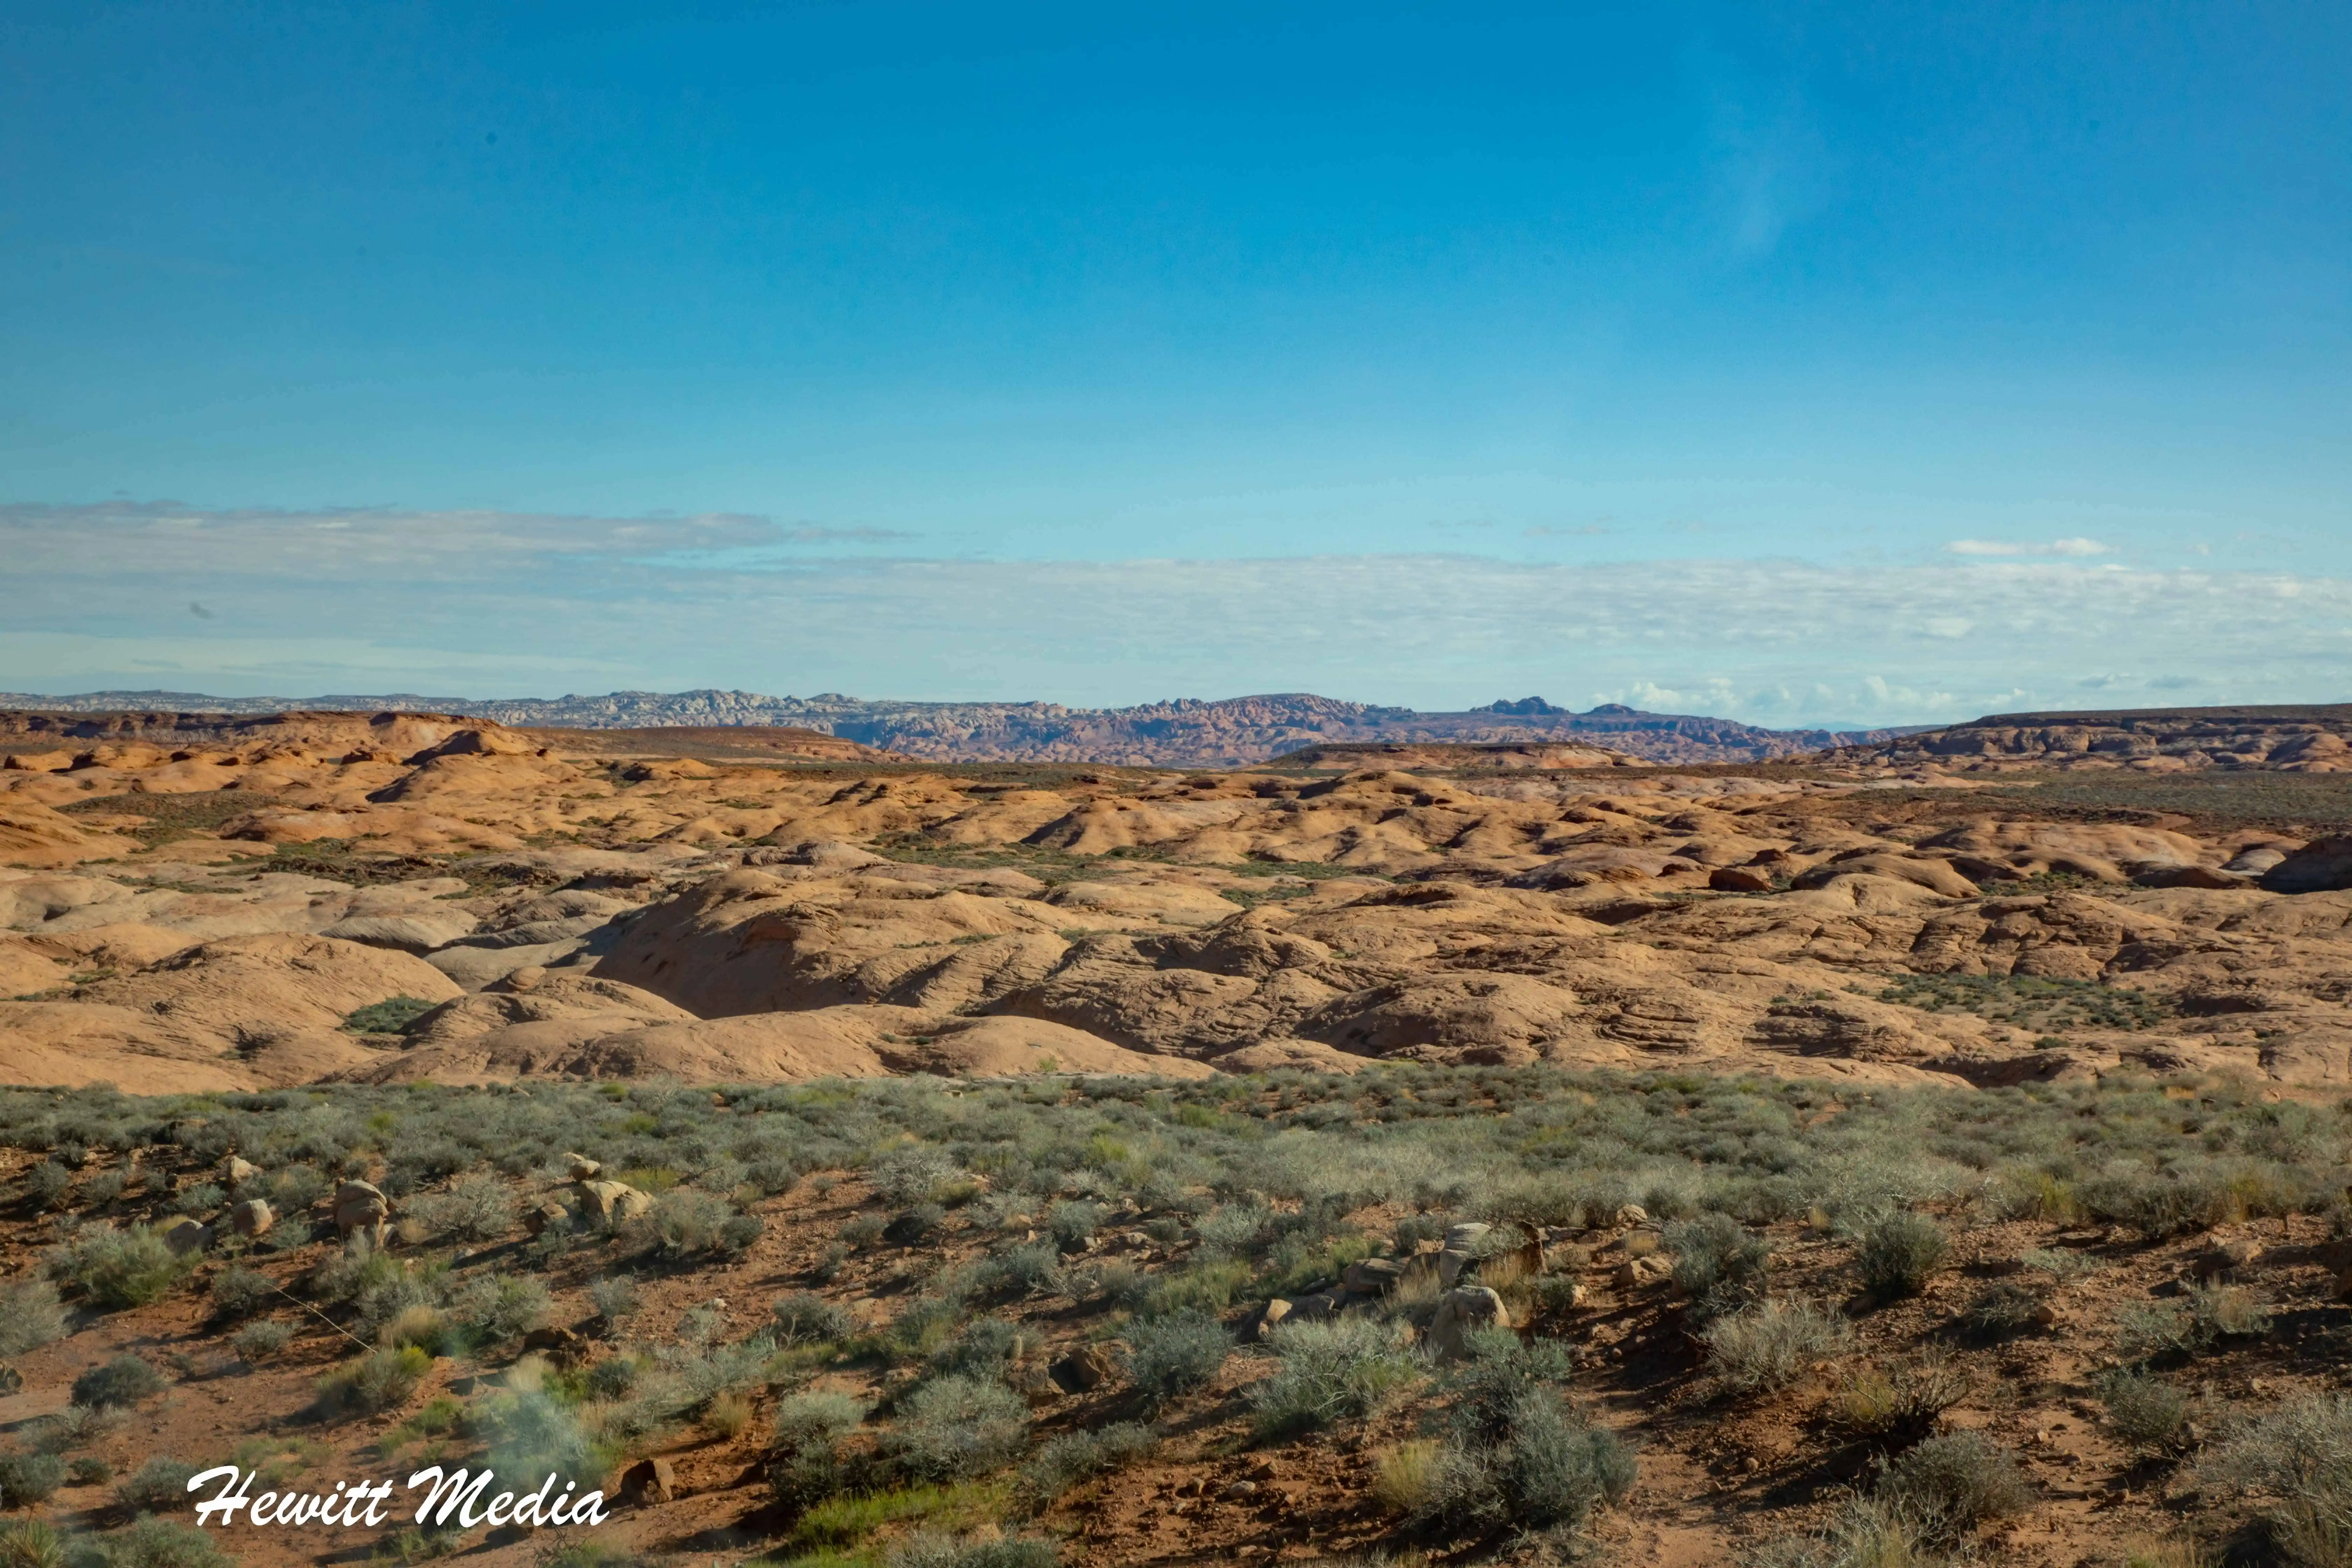
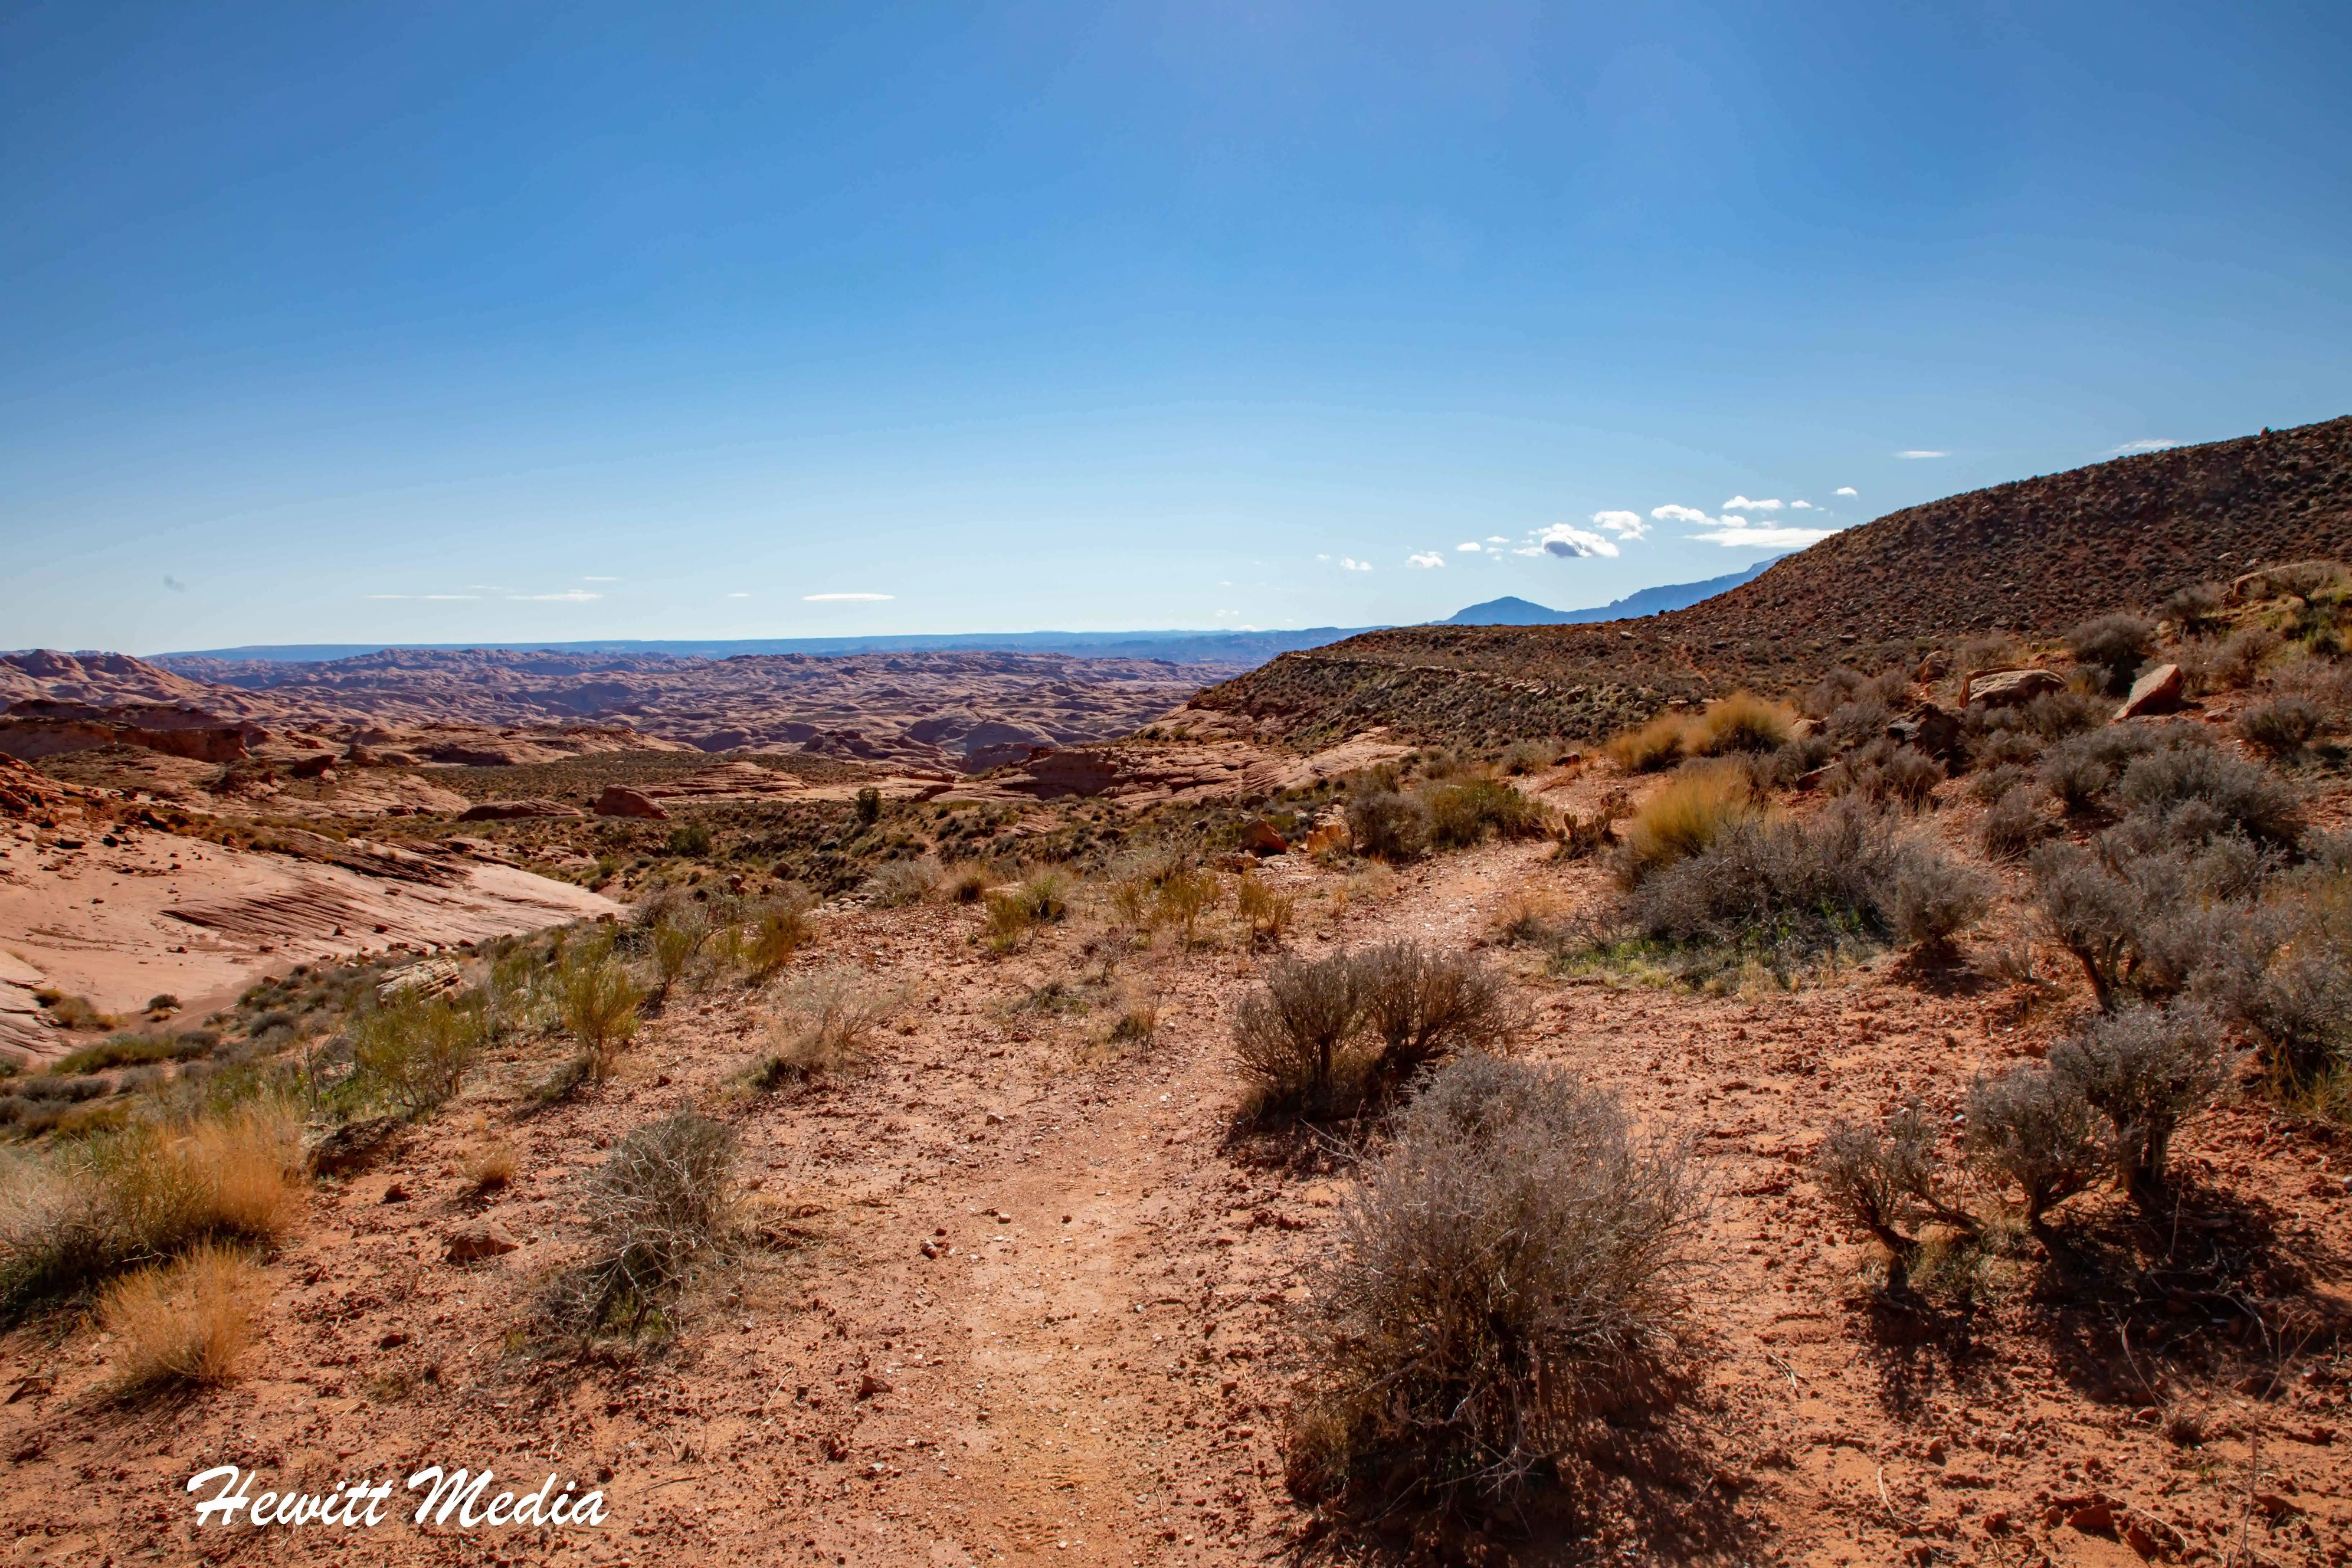
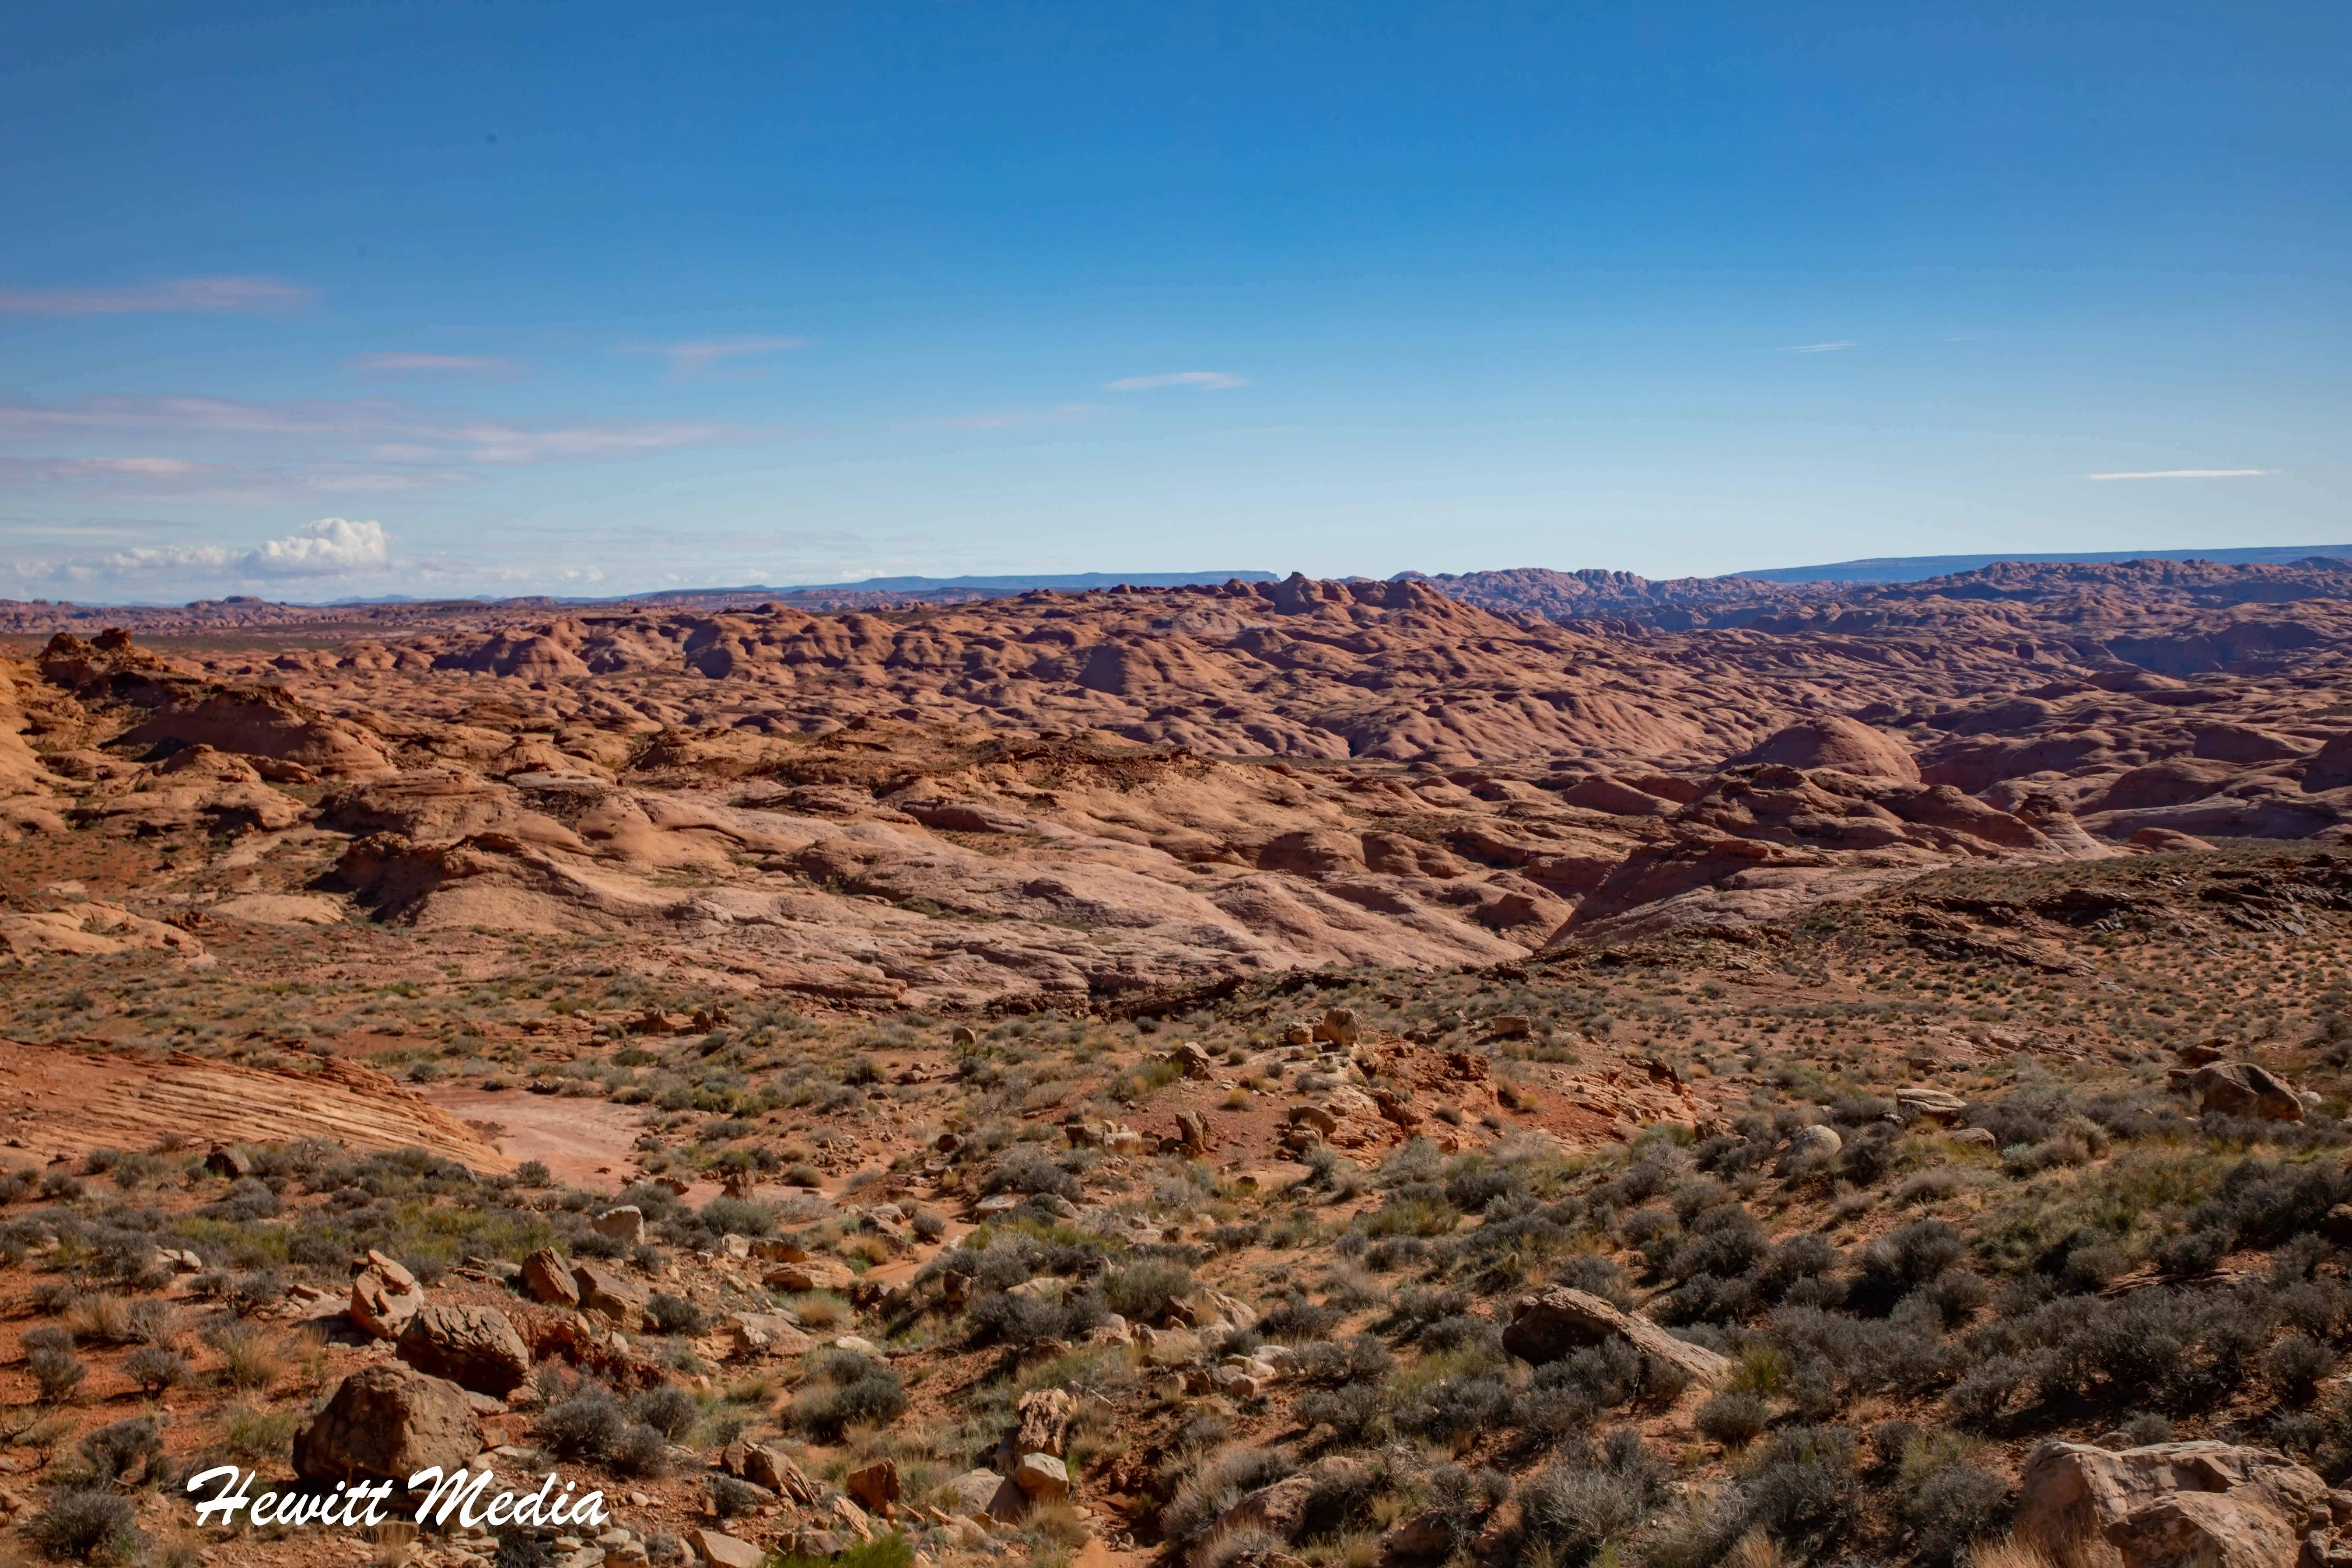
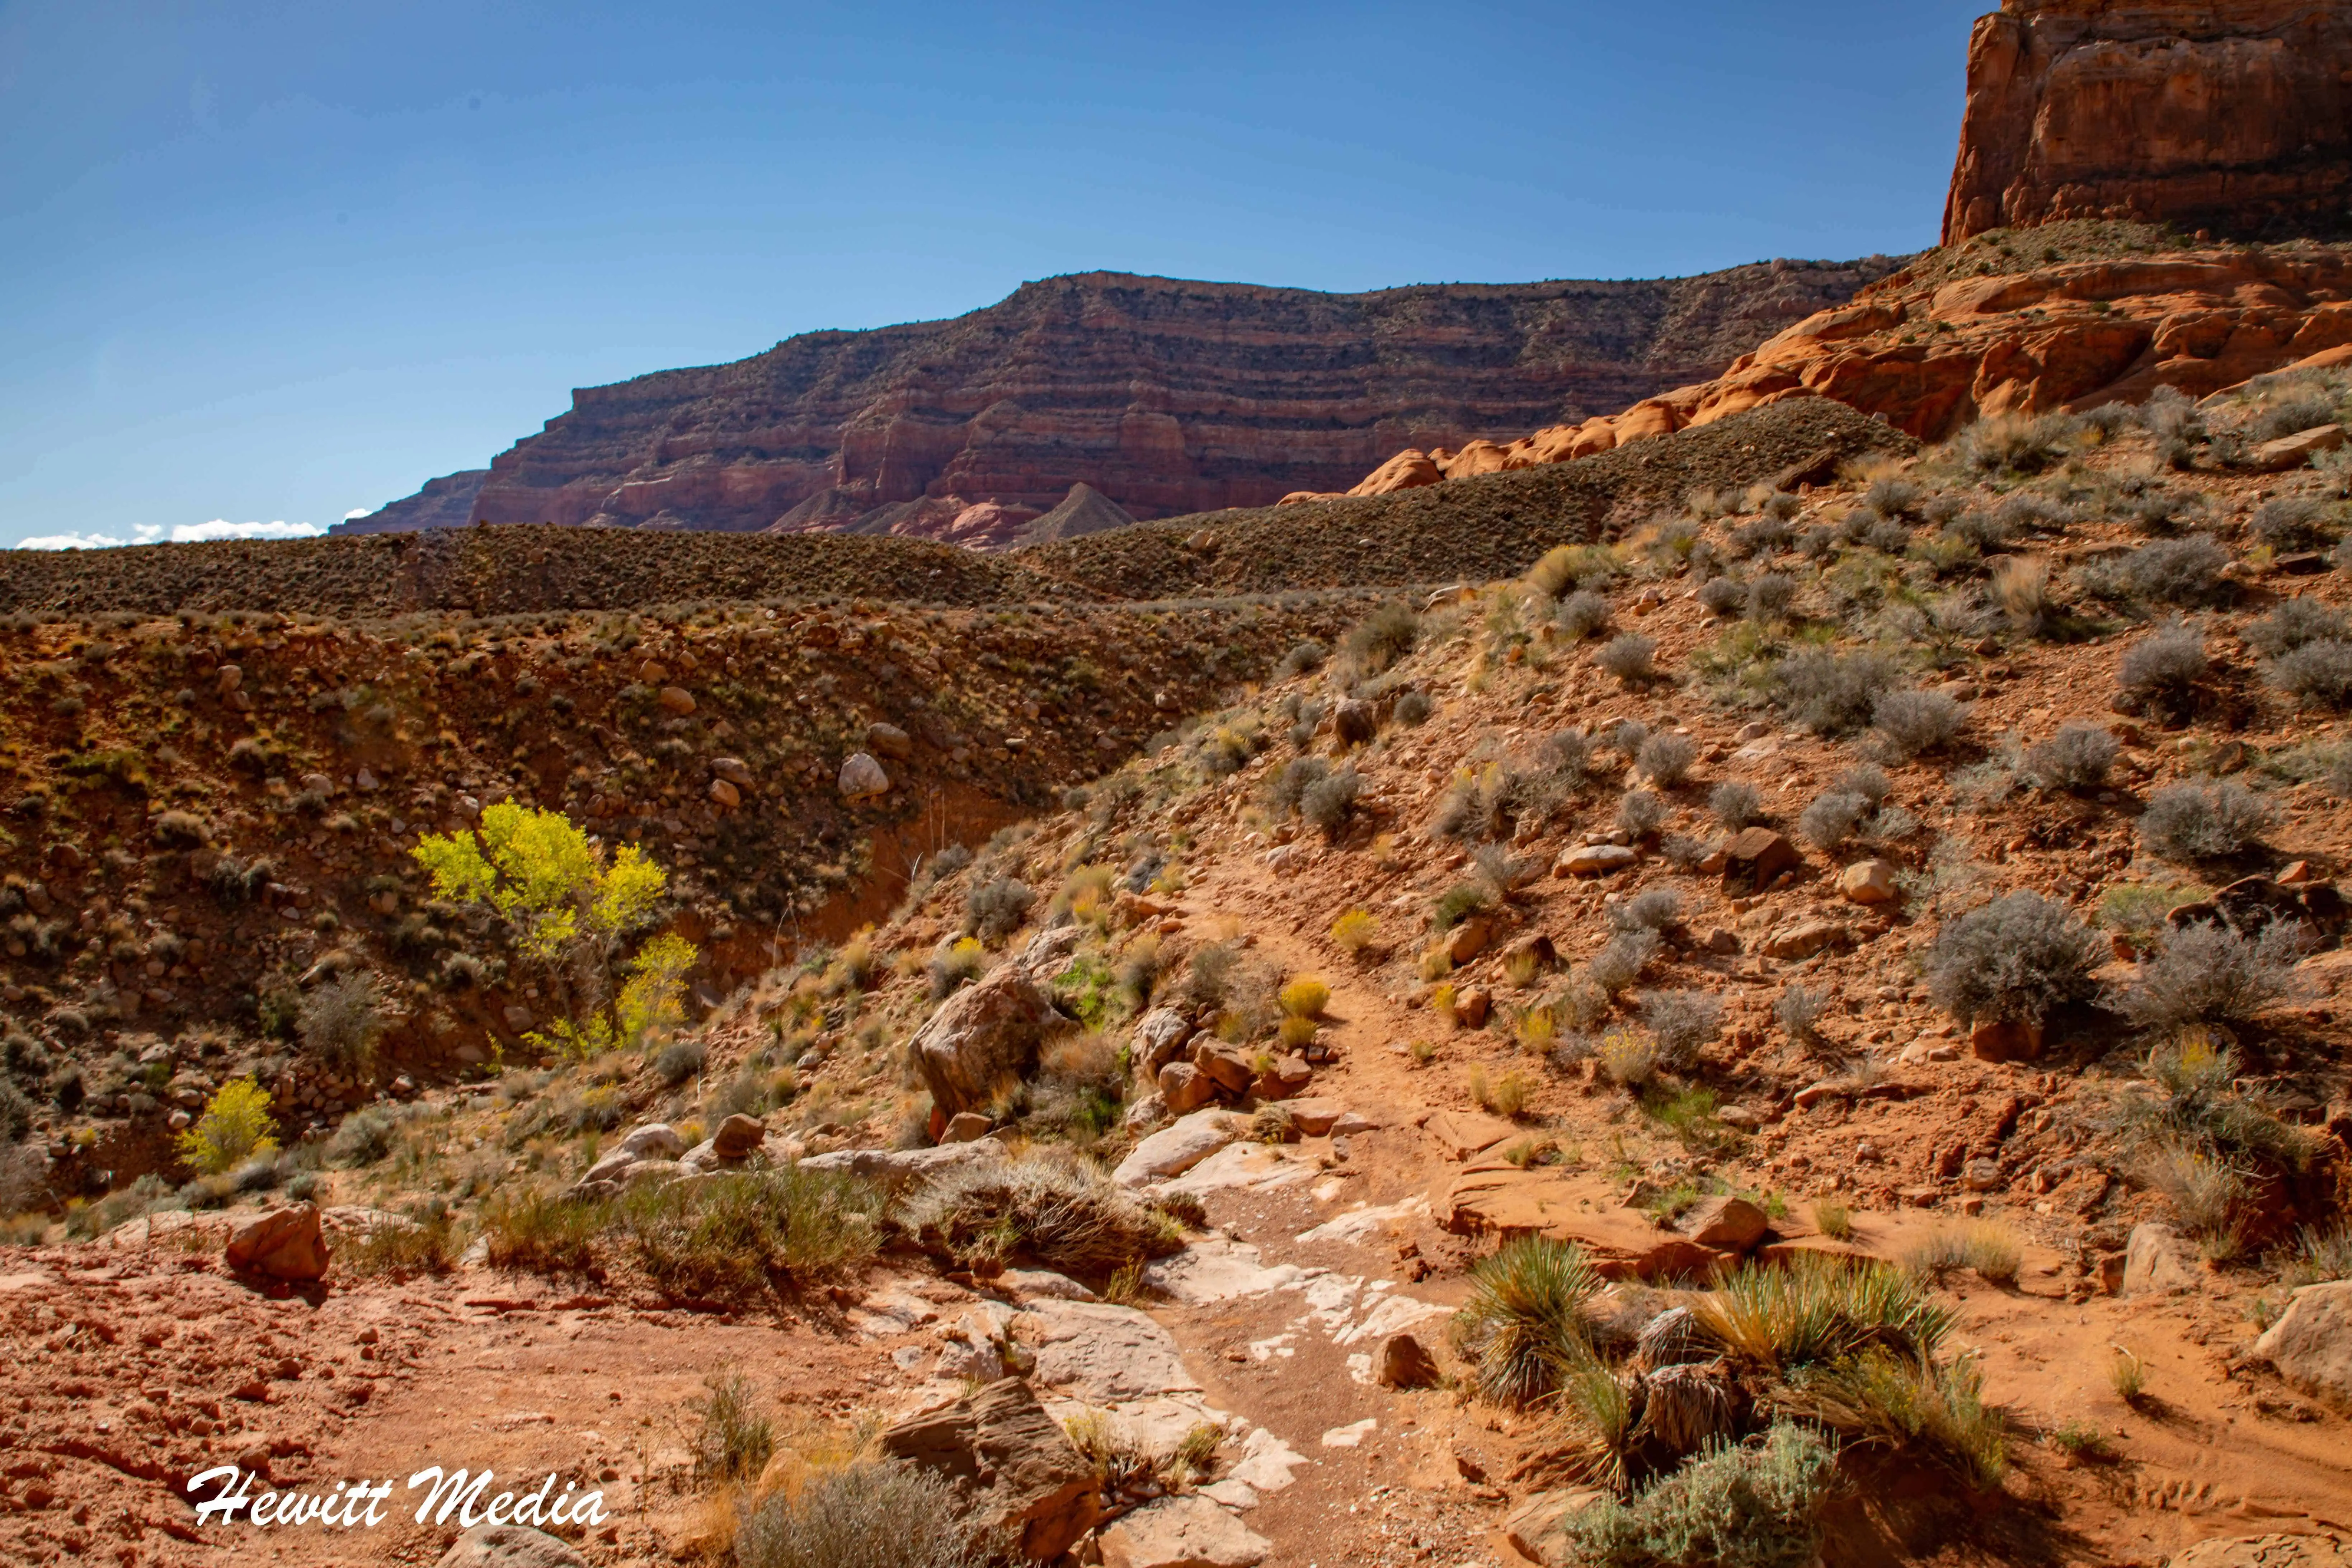
What to Expect on the Reflection Canyon Trail
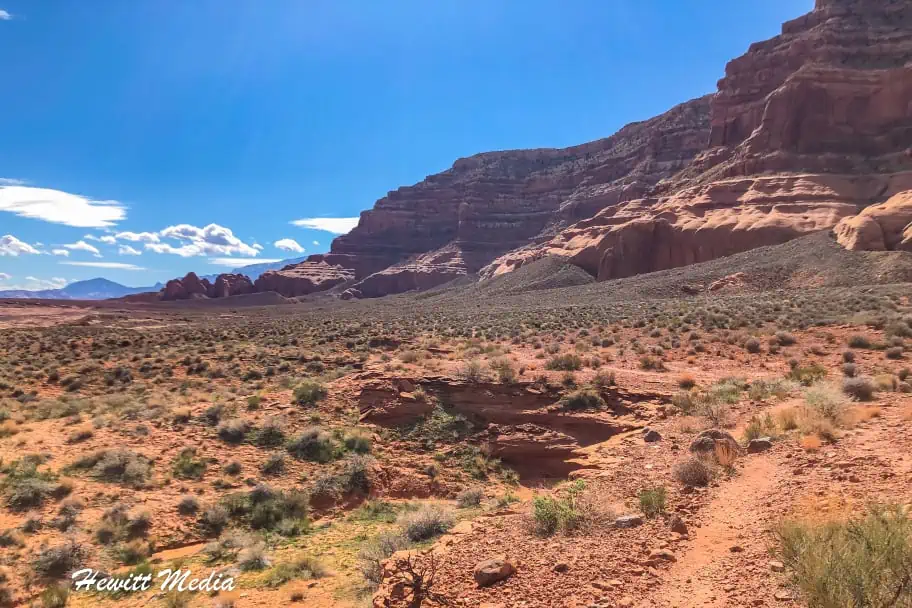
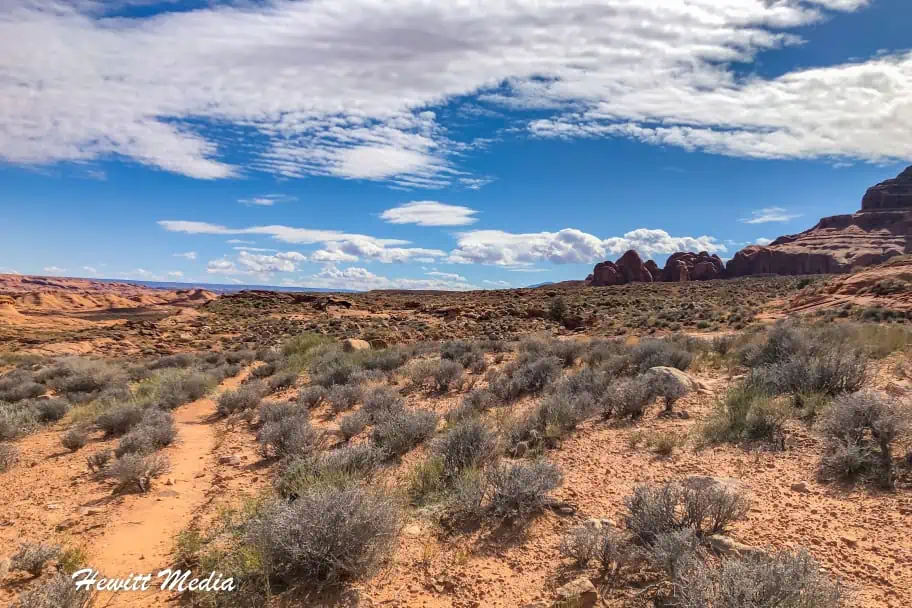
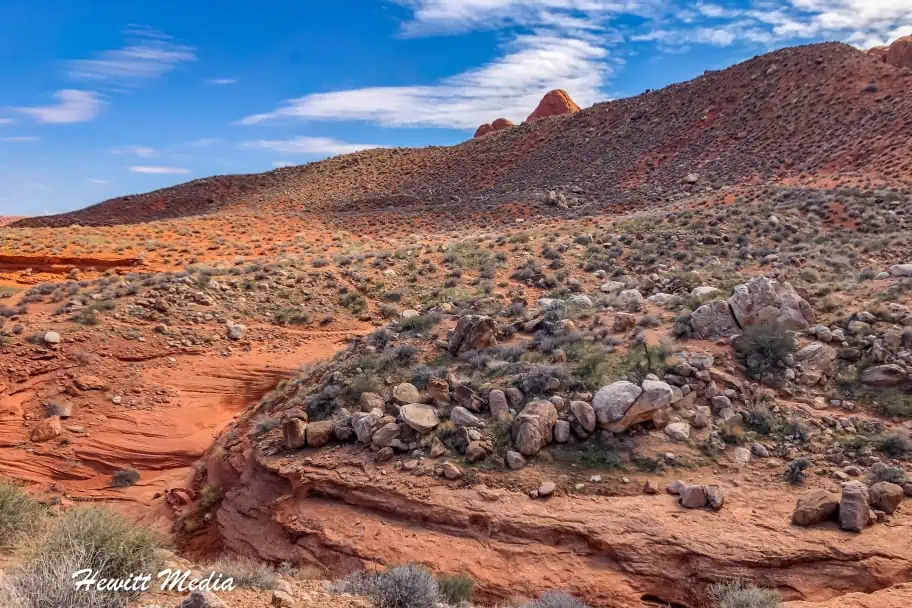
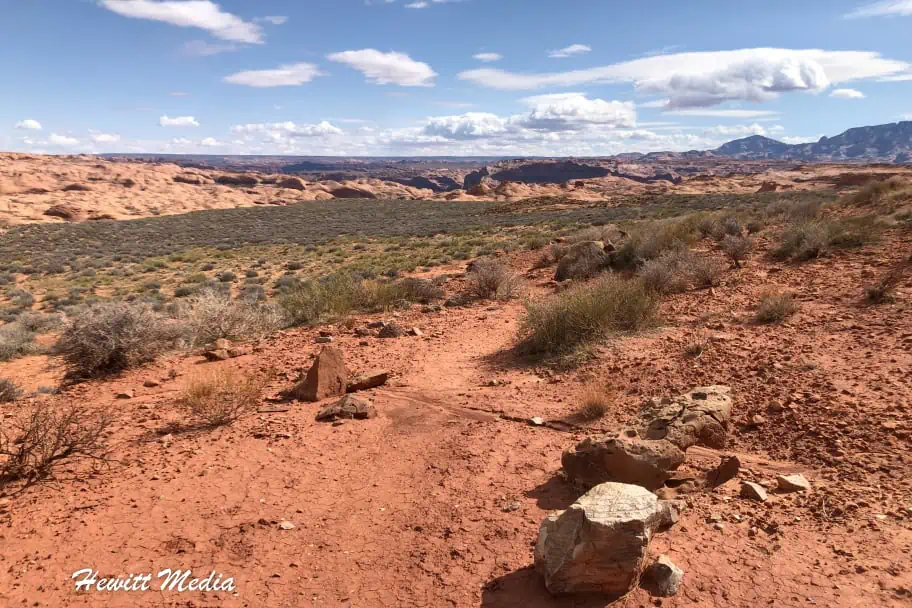
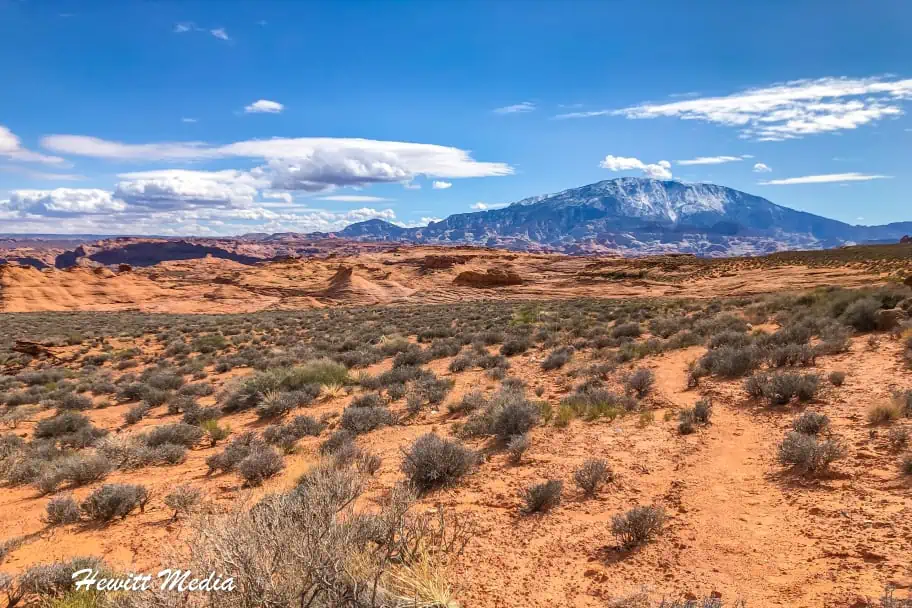
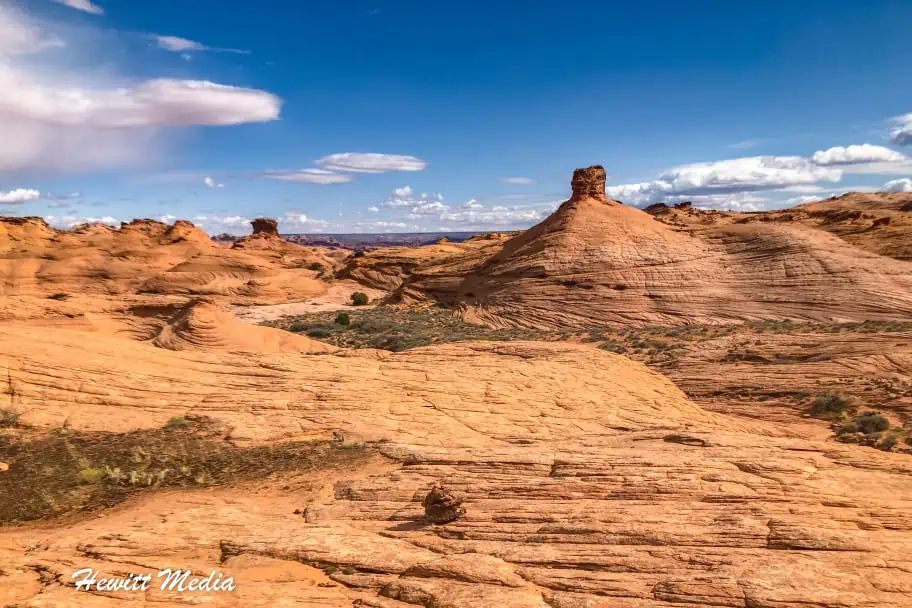
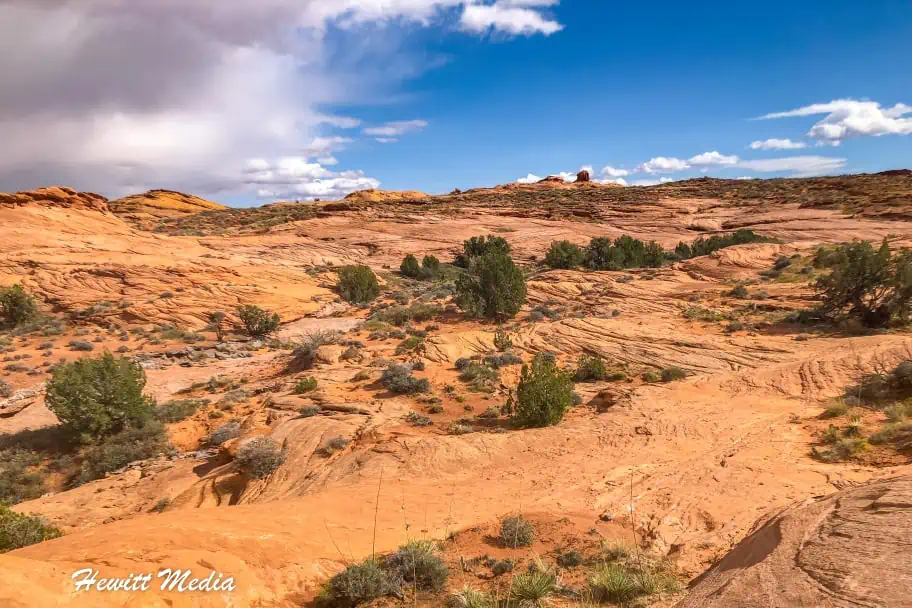
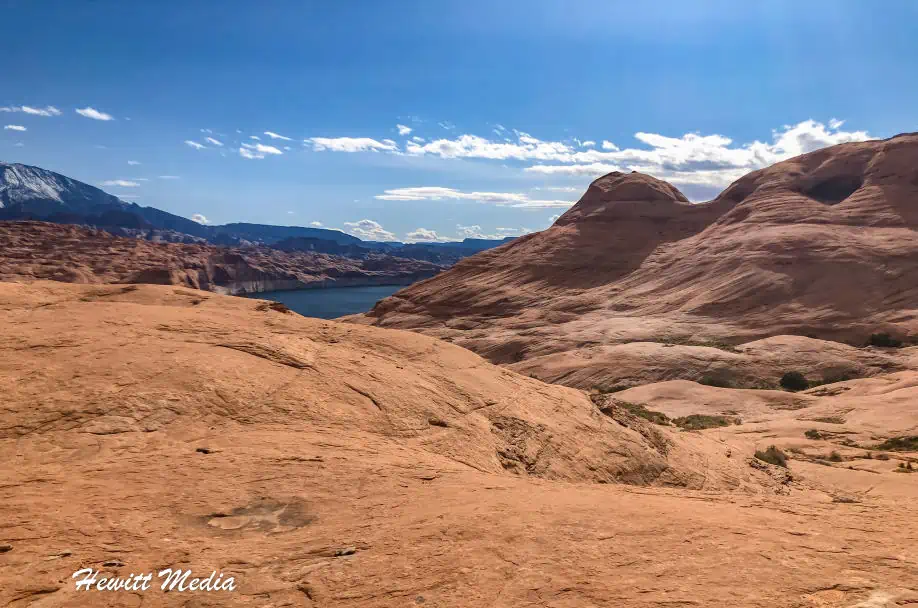
One of the most important steps to preparing for any hike is to understand what to expect while you are on the trail. Understanding the landscape and the obstacles that you will face while on a hike will allow you to better prepare the gear and supplies that you bring with you. To give you a better understanding of what the trail looks like, I have included GPS-tagged pictures on a map in my Reflection Canyon trail guide below to illustrate what you can expect while on this hike.
As you can see in the pictures, for the first two-thirds of the hike, you will be navigating in and out of shallow slot canyons and washes. It is important to stay as close to the base of the mesa as possible, as the canyons and washes will be shallower there. Once you get to the point where you turn East, the landscape you will cover is smooth rock. While this portion of the hike requires much less up-and-down hiking, it is much more difficult to navigate this section. For tips on how to navigate to Reflection Canyon, please refer to the Navigating the Reflection Canyon Trail section of this guide.

 |
 |
||
 |
 |
||
 |
 |
||
 |
 |
||
 |
 |
||
 |
 |
||
 |
 |
||
 |
 |
Navigating the Reflection Canyon Trail

If you ask hikers what makes them the most nervous about hiking in the backcountry, I am guessing a healthy portion of them will mention navigating without marked trails and the fear of getting lost. If you are planning on hiking to Reflection Canyon and this is a fear of yours, then you are definitely going to want to read this section of my Reflection Canyon trail guide closely. While there is no marked trail to the canyon, there are certain geographic features along the route that will significantly make navigation much easier for you.
Navigating the First Two-Thirds of the Hike
As you can see in the navigation map that I have included below, the large mesa that will be on your right-hand side will act as a western boundary to keep you on course. As long as you follow the base of that mesa, it will be difficult for you to get lost for the first two-thirds of the hike. Again, as you are hiking, I would strongly suggest that you stick as close to the base of the mesa as possible.
If you venture too far to the East, you will encounter deep slot canyons and washes that will be very difficult to navigate. Although you will have to climb into and out of these washes while you are close to the base, it will be much safer and more manageable because they will be shallower.
When to Turn East Towards Reflection Canyon
When you get to the section of the mesa with a very large, flat face, that will be your signal to turn to the East towards Reflection Canyon. If you have the pro version of the Alltrails App or a GPS unit, it will be easy for you to set a waypoint and then turn when you get there.
However, if you don’t have one of these tools, you will need to be vigilant and look for a flat face. If you go too far and miss your turn, you will eventually run into Hidden Passage Canyon, which will be far too deep and steep to traverse. This will be your queue to turn around and backtrack. However, I would try not to get to that point, as it will add significant distance and time to your hike.
Navigating the Final Third of the Hike
As you turn to the East to head towards Reflection Canyon, the remainder of your hike will be over smooth rock. This makes trail finding virtually impossible as you won’t be able to see any footsteps from previous hikers. This is the section of the hike that will really put your navigation skills to the test. There are two different routes that you can take to Reflection Canyon. The upper and lower routes are essentially the same distance and are equally as difficult to navigate, in my opinion.
When I hiked to Reflection Canyon, I took the lower route on the way there and the upper route on the way back. If you have the pro version of the Alltrails App or a GPS device with waypoints you’ve set up, it will definitely make your life easier. Otherwise, you will want to make sure you are always navigating towards Navajo Mountain on the horizon. Navajo Mountain sits on the other side of Lake Powell in Arizona, but while you are hiking can be a good directional indicator as it sits just behind Reflection Canyon to the East on the horizon.

Planning a Day Hike to Reflection Canyon

Depending on the time of year, your schedule, and your comfort with backcountry overnights, a day hike to Reflection Canyon may or may not be the right choice. If you’re an experienced hiker visiting during longer daylight months, a day hike is very achievable—many people do it each year.
However, if you’re not a fast hiker or you’re visiting when daylight is limited, you may want to reconsider. A day hike would likely require hiking or driving in the dark, and both the trail and Hole in the Rock Road are difficult to navigate at night. If you’re planning a day hike to Reflection Canyon, I’ve included important information for you in my Reflection Canyon trail guide below.
Things to Know Before You Hike
- You will not need a permit to day hike to Reflection Canyon.
- If you are hiking in the summer months, start as early as possible to avoid the heat and give yourself time. Remember, the drive down the Hole in the Rock Road will take you at least a few hours.
- Bring sun protection with you on the trail. A sun hat and sunscreen are important as the heat is intense.
- Make sure you have enough water. I cannot stress this enough. There is very little shade on the trail, and water is very rarely found along the way. Each hiker should have at least 6 liters of water with them.
- If you think you might have to hike in the dark, make sure you have a headlamp or flashlight with you.
What to Pack for Your Hike
Packing the correct gear is important for any hike, but it is especially important when you are packing for a hike as difficult as the hike to Reflection Canyon. If you don’t have the proper gear and supplies with you, this hike can be especially hard to complete safely. If you are in the beginning stages of planning your hike to see Reflection Canyon and would like some advice on what to pack, I have included a summary of the gear I would suggest below.
The Gear I Suggest You Bring
- Water: Bring at least 6 liters per hiker — there’s no water on the trail.
- Boots: Wear sturdy hiking boots (see Backpackers Packing Guide for details).
- Socks: Use moisture‑wicking hiking socks to prevent blisters.
- Shirt/Base Layer: Choose moisture‑wicking shirts for summer; base layers for cold weather.
- Pants/Shorts: Select hiking pants or shorts based on temperature.
- Jacket/Fleece: Pack a lightweight layer for cooler conditions.
- Poles: Helpful for descents and uneven terrain.
- Sun Hat: Essential for summer hikes.
- Winter Hat: Needed for cold‑weather trips.
- Sunglasses: Protect your eyes, especially in bright summer light.
- Snacks: Keep energy up with trail‑ready food.
- Navigation: Carry a compass and topographical map.
- GPS/Apps: Use the Alltrails App or a GPS device for route tracking.
- Camera: Bring a lightweight camera to capture canyon views.
Planning an Overnight Hike to Reflection Canyon

If you’re visiting Reflection Canyon during months with limited daylight, aren’t comfortable covering all the miles in a single day, or want to photograph sunrise, your best option is to overnight at the canyon. When I visited this past autumn, I camped near the rim, and it was an unforgettable experience—but only because I came prepared.
If you plan to stay overnight, you’ll need the right gear and enough water to cover the extra time you’ll be out there. Keep in mind that good campsites near Reflection Canyon are limited, so arriving early is important. For more guidance on what to bring and how to pack, see the sections below.
Things to Know Before You Hike
- Permit: Get a backcountry permit from the Grand Staircase-Escalante Visitor Center in Escalante. Do it ahead of time or use the self-service drop box if arriving early.
- Timing: In summer, start your hike as early as possible to avoid the heat. The drive down Hole in the Rock Road takes several hours.
- Campsites: Good spots near Reflection Canyon are limited—mostly hard rock. A few sandy areas allow tent stakes, but fill quickly. Arrive early to secure one and avoid high winds.
- Sun Protection: Bring a sun hat and sunscreen; the heat is intense.
- Water: Carry at least 9 liters per hiker. Shade and water sources are scarce.
- Food: Pack pre-prepared meals or food that doesn’t require water—save your supply for drinking.
- Lighting: If hiking in the dark, bring a headlamp or flashlight.
Best Camp Spots

What to Pack for Your Hike
If you plan to spend the night at Reflection Canyon, you’ll need to bring additional gear and supplies. Essentials include a tent, sleeping bag, sleeping mat, and a headlamp. I also strongly recommend packing pre‑made food that doesn’t require water.
This is especially important if you’re hiking during the summer heat. Your water supply is critical for staying hydrated, and using any of it to prepare meals could leave you short. If you’re overnighting at Reflection Canyon, I recommend carrying at least 9 liters of water. For more guidance on the gear you’ll need, review my Backpackers Packing Guide and Checklist linked in my Reflection Canyon trail guide below.
| READ MORE: |
 |
| Backpackers Packing Guide and Checklist |
Photographing Reflection Canyon

Ever since being first photographed by Michael Melford for a National Geographic article in 2006, Reflection Canyon has captivated landscape photographers everywhere. The absolute jaw-dropping beauty of the canyon is almost impossible to put into words. If you are interested in photographing the beauty of the canyon, I have included a few pointers that I can pass on to you in my Reflection Canyon trail guide below.
Reflection Canyon Photography Advice
- Pack light camera gear; mirrorless bodies are ideal. Bring the smallest, lightest tripod you can.
- The sun rises behind Reflection Canyon and sets behind you. Sunrise shots require camping at the canyon—arriving in time on a day hike is unsafe and unrealistic.
- For water‑reflection shots, plan to be there mid‑afternoon with the sun behind you but still high enough to clear the hill.
- Summer: best light 4–6pm
- Spring/Autumn: best light 2–4pm

Reflection Canyon Photo Gallery
Reflection Canyon in the Glen Canyon National Recreation Area is one of the most incredible places that I have been fortunate enough to photograph. It’s not an easy place to get to, so you really have to put in the work to capture this beautiful place in photos. If you are interested in seeing some more of the wonderful shots that I was able to take during my visit to the canyon, please see the photo gallery that I have included in my Reflection Canyon trail guide below.
If you’re interested in exploring more of my travel photography, I’d love for you to join me on Instagram! Creating this blog to share my free guides, itineraries, and travel photography tips takes a lot of effort, and a follow on Instagram would truly mean the world to me. Your support makes it all worthwhile!
FOLLOW ME!


Don’t Forget to Subscribe to My Adventures!

Let Me Help You Save On Your Next Adventure!
‘Start Exploring Today’ Merchandise Available Now!
 |
 |
 |
 |
 |
 |
 |


What a fabulous guide, Josh. Boy, can you work not just a camera, but also computer technology. Very impressive. You are so right to emphasize water, water, water for summertime. We were in Escalante for several days the first summer of the pandemic and it was SO hot. It even made the husband feel ill a few times. I’m so impressed at your skills. Way to go!
Thank you so much for your kind words!! You absolutely made my day! Yeah, the heat there can be a killer in the summer for sure. 🥵
Thanks for this comprehensive guide! It’s awesome.
Thank you so much for the kind words!!