LAST UPDATED: 10/12/26 – Parks Trip to Southern Utah and Arizona
Our Southern Utah and Northern Arizona road trip turned out to be one of our favorite National Parks adventures, and I wanted to share some thoughts on how we planned the journey, what worked well, and what I would recommend to anyone considering a similar itinerary. The trip combined some of the most spectacular landscapes in the American Southwest with memorable hikes, scenic drives, and incredible photography opportunities.
Southern Utah is a destination that continues to draw me back. This was my fourth visit to the region in roughly a decade, and I left with an even greater appreciation for its rugged beauty. There are few places in the continental United States that feel as wild, remote, and untouched as Southern Utah. From towering sandstone cliffs and narrow slot canyons to expansive vistas stretching for miles, the landscape never fails to inspire.
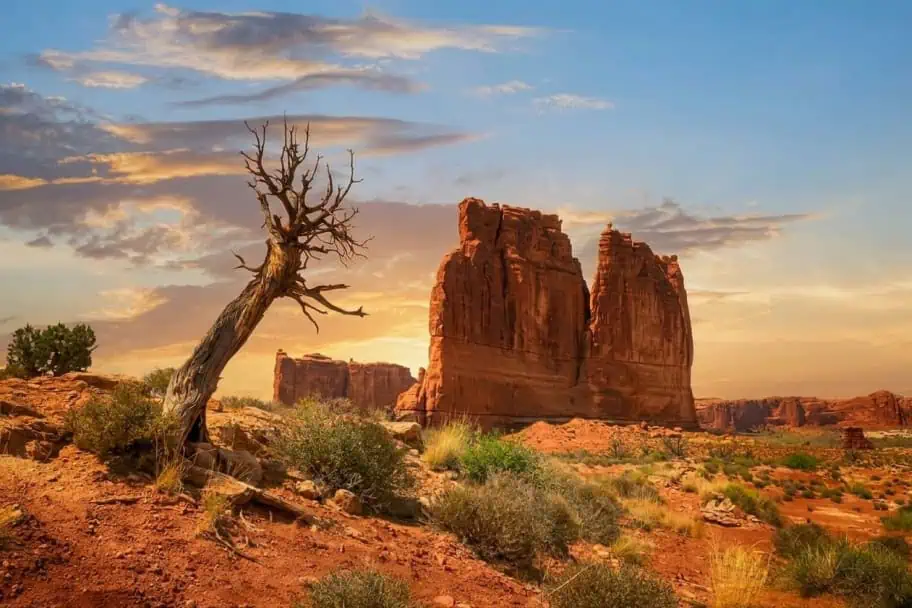
In this article, I will walk through the route we followed and share some of the lessons we learned along the way. If you are planning a road trip through Zion National Park, Bryce Canyon National Park, Grand Staircase-Escalante National Monument, and the Grand Canyon, our experience may help you build a more enjoyable and memorable adventure of your own.
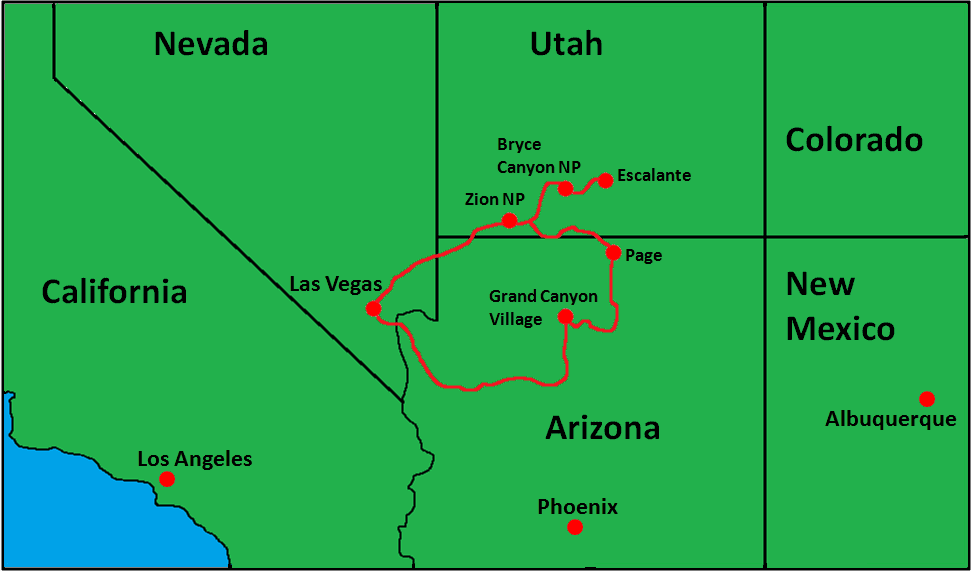
Starting in Las Vegas: The Perfect Gateway
One of the best decisions we made was flying into Las Vegas. The city serves as an ideal gateway for exploring Southern Utah and Northern Arizona because of its frequent flights, competitive rental car rates, and proximity to many of the region’s top destinations.
After arriving, we picked up our rental car and headed directly to Springdale, Utah, the gateway community just outside Zion National Park. We stayed at the Hampton Inn and Suites Springdale/Zion National Park , which proved to be an excellent base for exploring the park. The location allowed us to arrive at the shuttle system early each morning and avoid some of the larger crowds that build throughout the day.
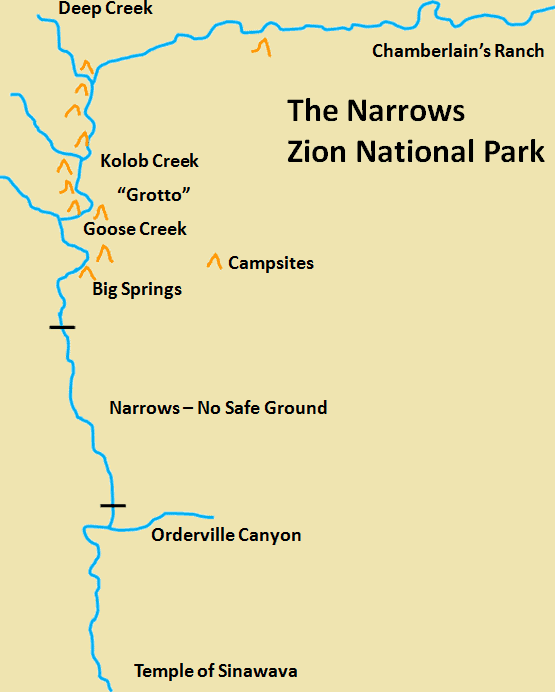
Another valuable planning decision was renting equipment for The Narrows hike from Zion Adventure Company. For spring travel, proper gear is essential since hikers spend much of their time walking directly through the Virgin River. The dry pants, canyon shoes, neoprene socks, and hiking poles we rented made a tremendous difference and allowed us to enjoy the hike comfortably despite the cold water temperatures.
Zion National Park: The Highlight of the Trip
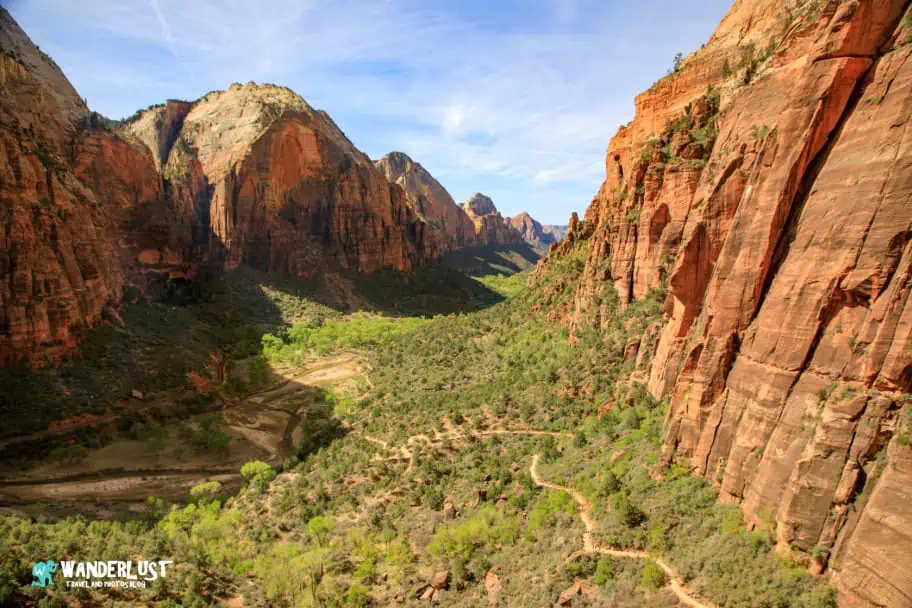
If I had to choose a single highlight from the trip, Zion National Park would probably be it.
The park’s shuttle system can initially seem inconvenient, but after experiencing it firsthand, I appreciated how it reduces traffic and preserves the natural beauty of Zion Canyon. Arriving early allowed us to enjoy several trails before the largest crowds arrived.
| READ MORE: | |
 |
|
| Zion National Park Visitor Guide |
The Narrows Hike (Up to 16 miles)
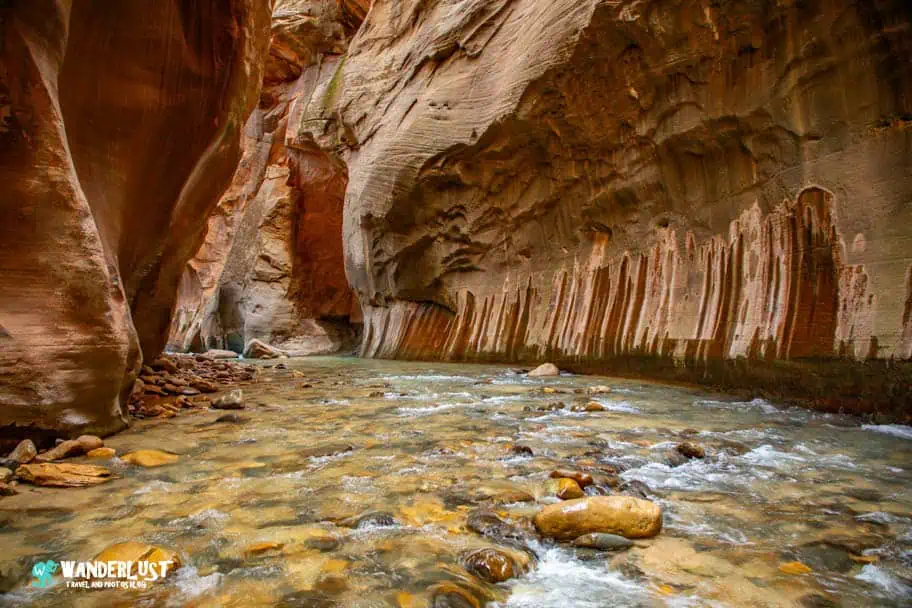
The Narrows hike exceeded our expectations.
Hiking directly through the Virgin River between towering canyon walls created one of the most unique hiking experiences I have ever had. Photos simply don’t convey the scale of the canyon or the beauty of the reflected light bouncing off the sandstone walls. For anyone planning a spring visit, I strongly recommend monitoring water conditions and renting the appropriate gear before attempting the hike.
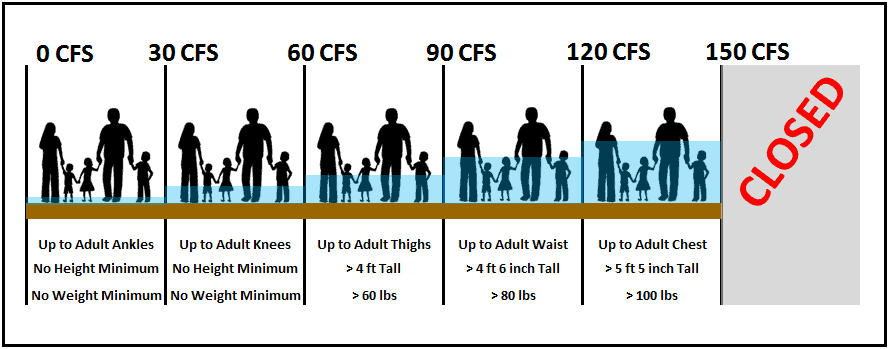
The hike can be made one of two different ways. You can either hike upriver from the Temple of Sinawava, which can be done only as a day hike, and you must turn around at Big Springs. You can also choose to do a top-down hike, which starts at Chamberlain’s Ranch. This is a strenuous hike that requires a permit, so if you plan on doing the top-down hike, make sure you are capable of completing the hike and plan ahead to make sure you get a permit.
Angels Landing and the West Rim Trail (5 miles)
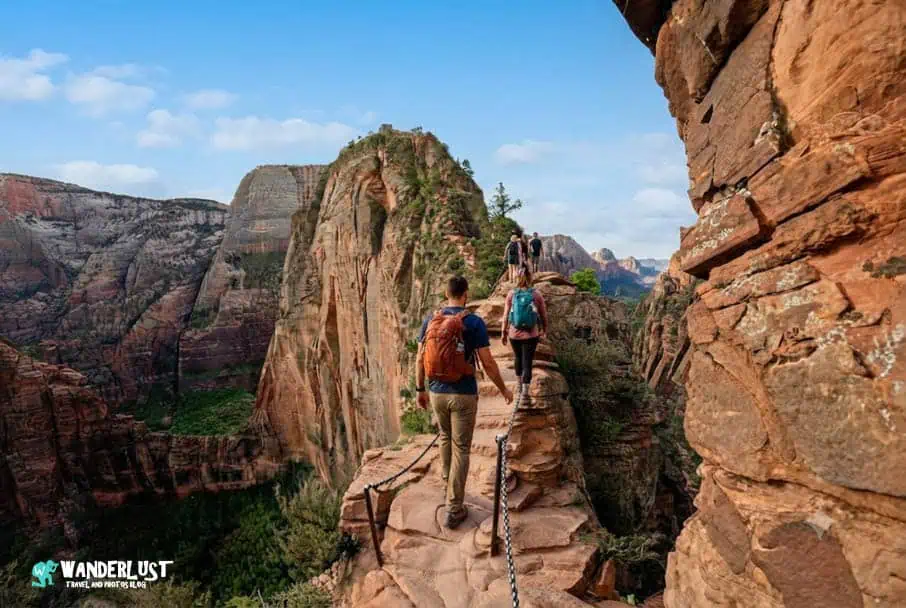
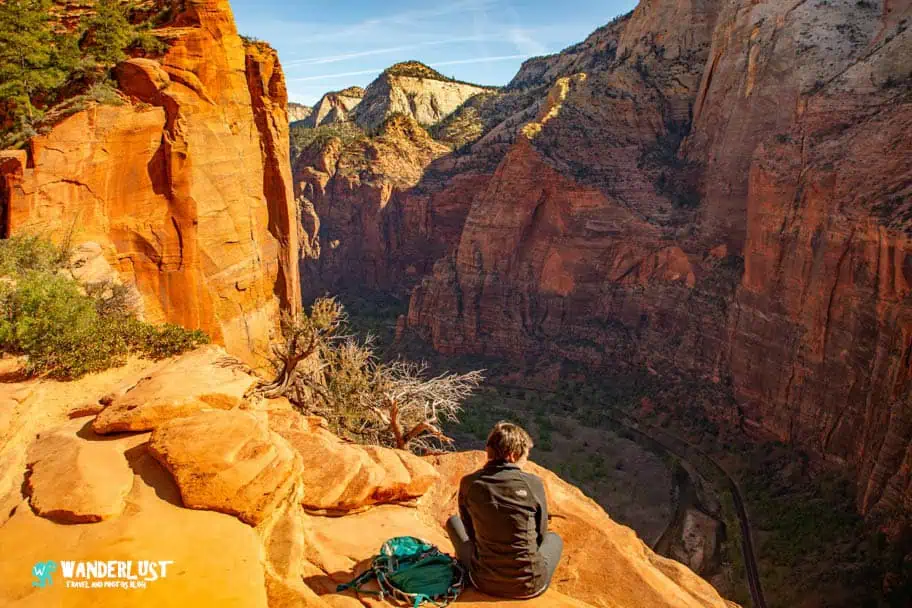
The Angel’s Landing hike is one of the more infamous and dangerous hikes in the entire National Park System in the United States. Since 2004, it is estimated that roughly 15 people have lost their lives attempting to complete this hike. The Angel’s Landing hike involves scaling the spine of a rock fin that juts out into Zion Canyon. You are confronted with narrow paths that only allow one-way traffic, with jaw-dropping 1,000-1,500-foot drops (sometimes on both sides).
The Park Service has done its best over the years to make this hike less perilous by installing chains and carving footholds into the rock, but the hike is still quite treacherous and not for the faint of heart. I did this hike when I was much younger, and the views from the top of Angel’s Landing are quite stunning. However, I do not know that I will have the nerve to try this hike again when we visit in a few weeks. It almost seems like I would be tempting fate.
The following guidelines should be strictly followed if you are going to attempt this hike:
IMPORTANT NOTE: Since this post was first published, Zion National Park has implemented a permit requirement for the Angel’s Landing hike. This will hopefully make the trail safer, as it will reduce the traffic on the trail, but will require pre-planning to get a permit if you want to hike the trail.
- Wear proper clothing and foot gear – If you are going to attempt to do the Angel’s Landing hike, make sure you are dressed properly. This means no jeans, no restricting clothing, and no extra loose-fitting clothing that can get caught up on branches or rocks. Most importantly, make sure you are wearing proper hiking shoes. This does not include tennis shoes or athletic shoes. You should be wearing proper hiking shoes that are designed to grip and not slip on rocks.
- Do not bring young children on this hike – This should go without saying, but just this year a 13-year-old girl fell from the Angel’s Landing hike to her death. Personally, I don’t think this hike should be attempted by anyone who isn’t old enough to understand the true danger and consequences of the hike. However, if you are bringing your children on the hike, make sure you stay with them at all times. There is no shame in turning around.
- Do not attempt this hike if you are afraid of heights – I am not overly afraid of heights, but this hike really scared the crap out of me. You are walking on a very narrow trail, up-and-over rocks, with 1,000+ foot drops on both sides of you. If you are afraid of heights, I would not attempt this hike.
- Do not attempt this hike if you are ill, tired, or not feeling 100% – If you aren’t at your full capacity, you should not attempt this hike. There is literally zero room for error on certain parts of this trail. One slip, one stumble, or one momentary lapse of concentration and you will die. Again, there is absolutely no shame in not doing this hike.
- Always follow proper trail etiquette – You should always use trail etiquette when hiking on any trail, but it is especially important on this trail. Some spots on the trail are only wide enough for one person, and the trail is used by people heading to the summit and returning from the summit. So make sure you step aside when possible to allow hikers coming from the opposite direction to pass. One accidental bump could prove fatal on this trail.
- Always stay on the trail – It should go without saying, but ALWAYS stay on the trail. Again, this is something you should be doing on any trail, but it is especially important on the Angel’s Landing hike. The Park Service has installed safety chains along the trail for good reason, so use them.
- Do not attempt this hike if you don’t have enough daylight or the conditions are bad. This hike is dangerous enough during the day and under perfect conditions, and it can be downright lethal at night or in poor conditions. Make sure you check the trail for ice and refrain from hiking on this trail if the rock is wet (which can make the trail slippery). And if you don’t have enough time to make it to the summit and back during the daylight (with time to spare), then wait to do the hike another day.
If you want to see some great views, but don’t feel up to doing the Angel’s Landing hike, then the West Rim Trail is a great alternative. The West Rim Trail is the trail you take from the Grotto on the canyon floor up to the Angel’s Landing Trailhead at Scout’s Lookout. If you don’t feel up to doing the Angel’s Landing hike, you can continue on the West Rim Trail to the rim of the canyon. While the views might not be 360 degrees like they are on the Angel’s Landing summit, they are still quite breathtaking.
| Trail Stats | |
|---|---|
| Trail Type: | Out-and-Back |
| Distance: | 4.8 miles/7.7 kilometers |
| Elevation Gain: | 1,699 feet/518 meters |
| Time to Complete: | 3 to 5 hours |
| Difficulty Level: | Very Difficult |
| Trail Map |
|---|
Emerald Pools Hike (1.2 to 3 miles)
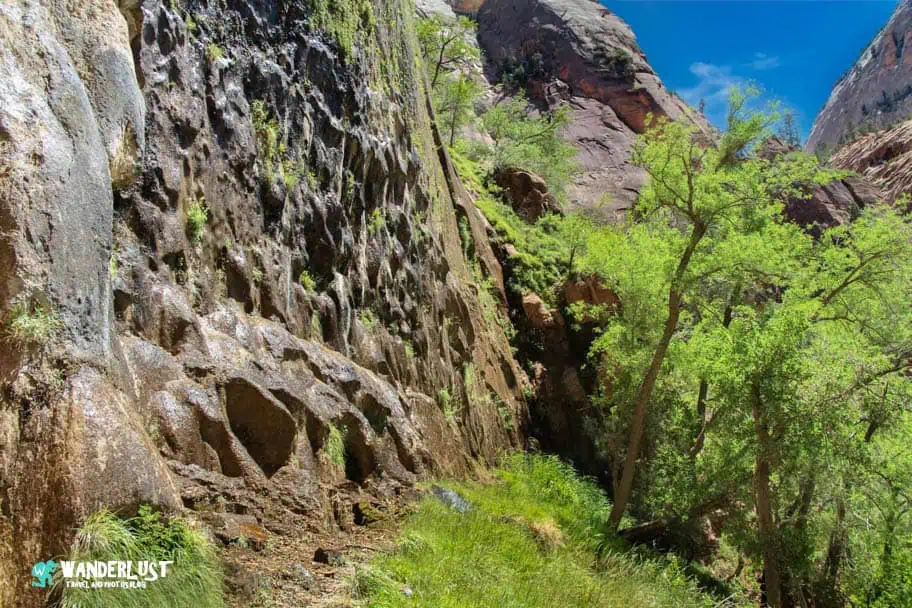
The Emerald Pools hike is one of the most popular hikes in Zion National Park. The hike takes you up past three pools that collect water that is cascading down the canyon. The lower pool can be found at the end of a short hike from the canyon floor. From there, a further ascent up the Emerald Pools Trail will take you to the Middle Pool and Upper Pools.
While the name of this trail might make it sound harmless, don’t be mistaken. Many people have lost their lives while hiking on this trail. Although the fall from this trail might not be as high as the fall from Angel’s Landing, it is more than high enough to kill a person.
Thankfully, the Park Service has chained off some of the more dangerous areas of the trail and the trail has become much safer in recent years. However, you should still exercise caution when hiking on any trail that involves exposed cliffs.
| Trail Stats | |
|---|---|
| Trail Type: | Loop |
| Distance: | 3 miles/4.8 kilometers |
| Elevation Gain: | 406 feet/124 meters |
| Time to Complete: | 1 to 1.5 hours |
| Difficulty Level: | Moderate |
| Trail Map |
|---|
Grand Staircase-Escalante: Southern Utah’s Hidden Gem
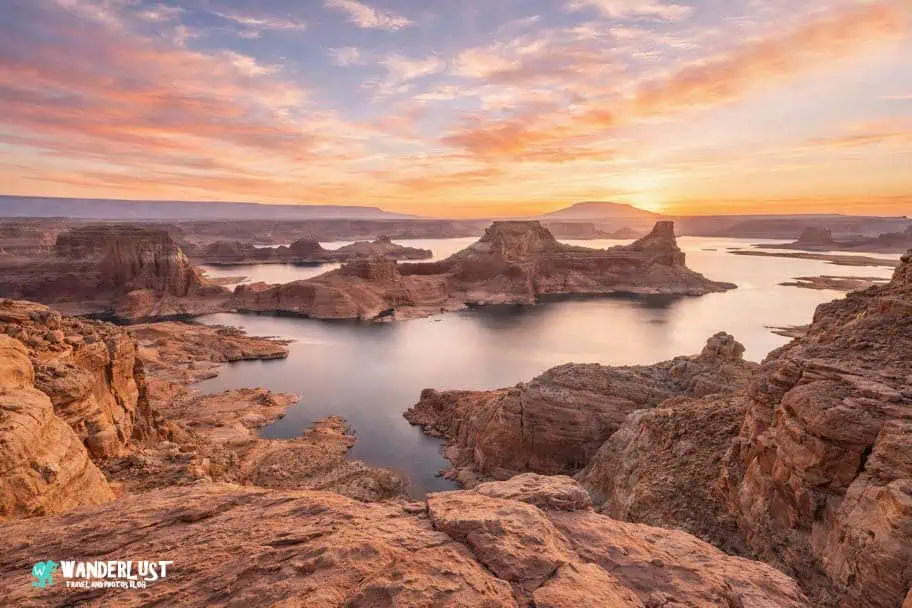
After Zion, we headed toward Bryce Canyon, using the area around Bryce as a base for exploring portions of Grand Staircase-Escalante National Monument. We stayed at the Best Western Plus Ruby’s Inn, which is one of my favorite places to stay in Southern Utah. If you haven’t read the history of Ruby’s Inn, I suggest you do so. It is absolutely fascinating.
Looking back, I wish we had allocated even more time here.
While Zion and Bryce often receive the majority of visitors, Grand Staircase-Escalante contains some of the most fascinating geology in the Southwest. The monument’s remote nature helps preserve a sense of adventure that can be difficult to find in more heavily visited parks.
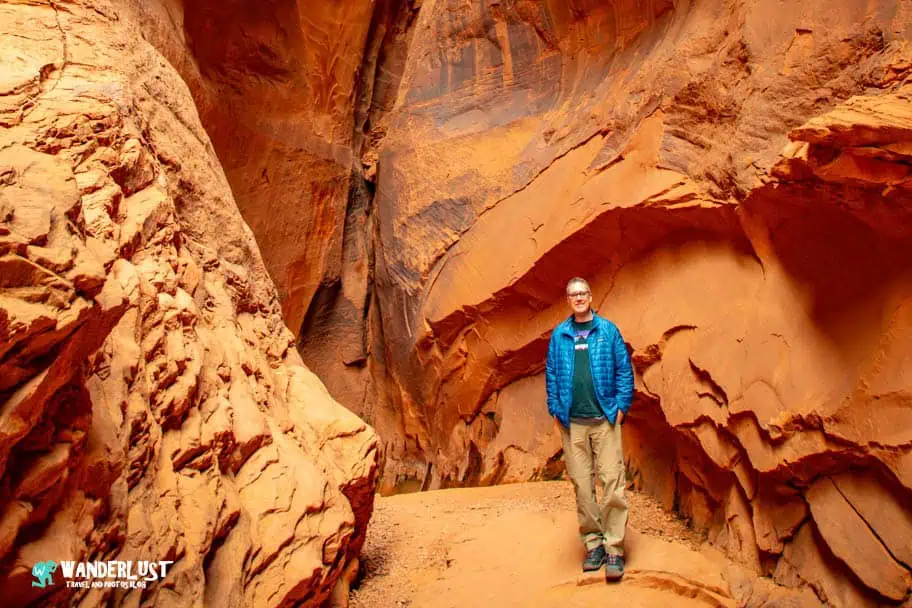
Zebra and Tunnel Slots (5.3 to 7.2 miles)
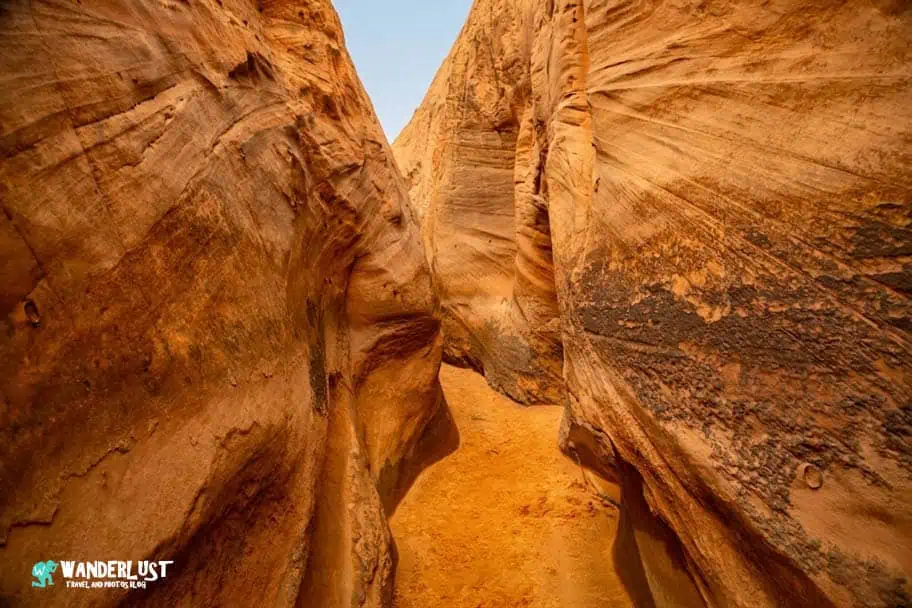
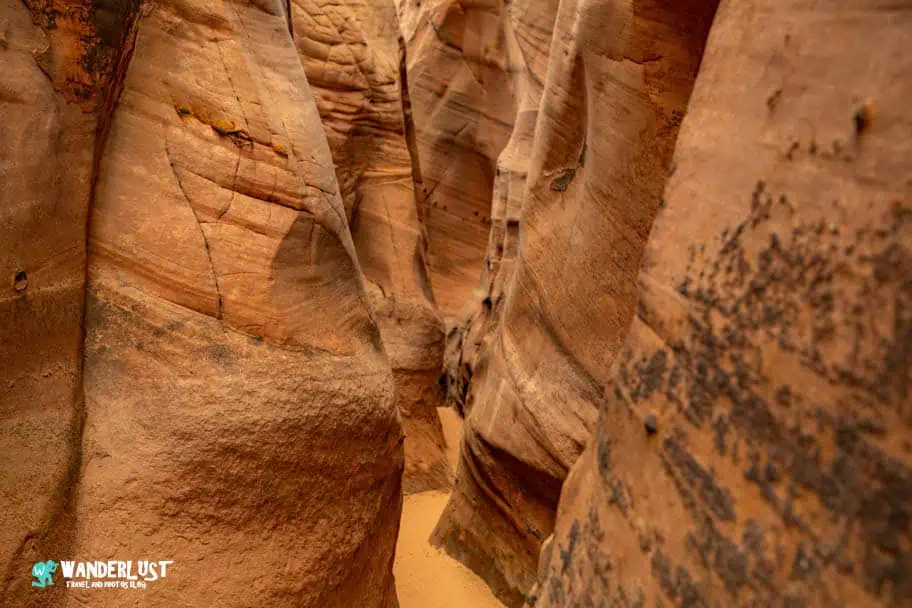
The Zebra and Tunnel Slot Canyons were among the most unique hikes of the trip.
The narrow sandstone corridors, constantly changing colors, and dramatic formations made the hike feel like exploring another world. Anyone considering this hike should be comfortable navigating tight spaces, as some sections become extremely narrow.
| READ MORE: |
 |
| Ultimate Guide to the Zebra Slot Canyon |
| Trail Stats | |
|---|---|
| Trail Type: | Loop |
| Distance: | 6.6 miles/10.6 kilometers |
| Elevation Gain: | 429 feet/131 meters |
| Time to Complete: | 3 to 5 hours |
| Difficulty Level: | Moderate |
| Trail Map |
|---|
Spooky and Peek-a-Boo Slots (2.9 miles)
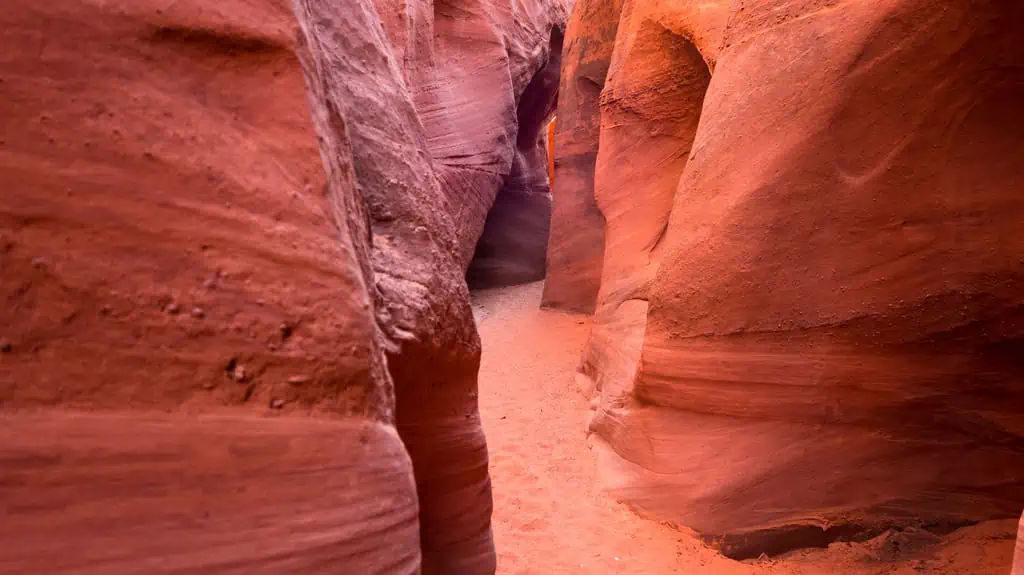
These slot canyons provided another memorable adventure. The route involves some scrambling and maneuvering through narrow passages, but it was one of the most enjoyable hikes we completed.
IMPORTANT NOTE: Make sure to go up Peekaboo first and then down Spooky second. Attempting the loop in the reverse can be very difficult and will cause jams in Spooky when hikers try to go against the flow of traffic.
| Trail Stats | |
|---|---|
| Trail Type: | Loop |
| Distance: | 4.9 miles/7.9 kilometers |
| Elevation Gain: | 429 feet/131 meters |
| Time to Complete: | 3 to 5 hours |
| Difficulty Level: | Difficult |
| Trail Map |
|---|
Bryce Canyon National Park: Small Park, Big Rewards
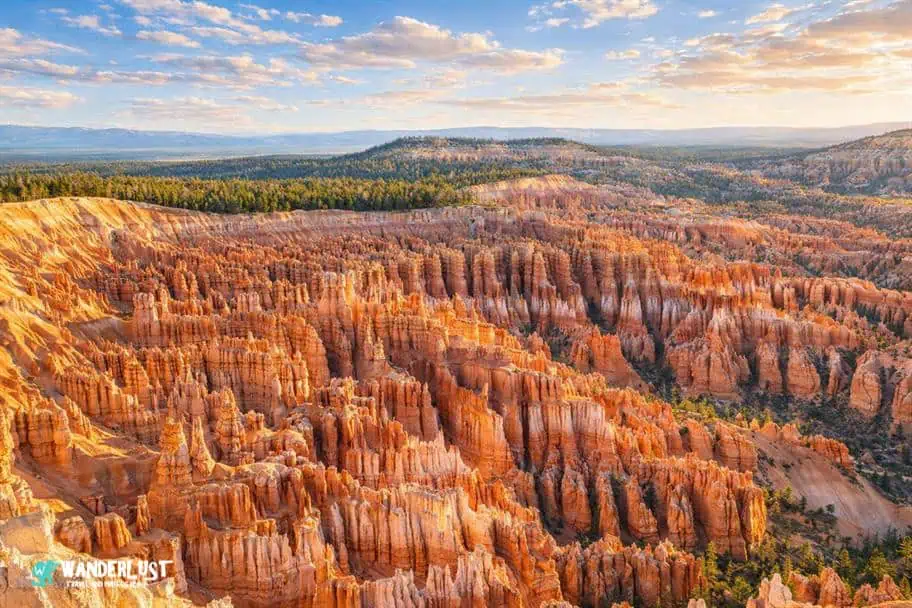
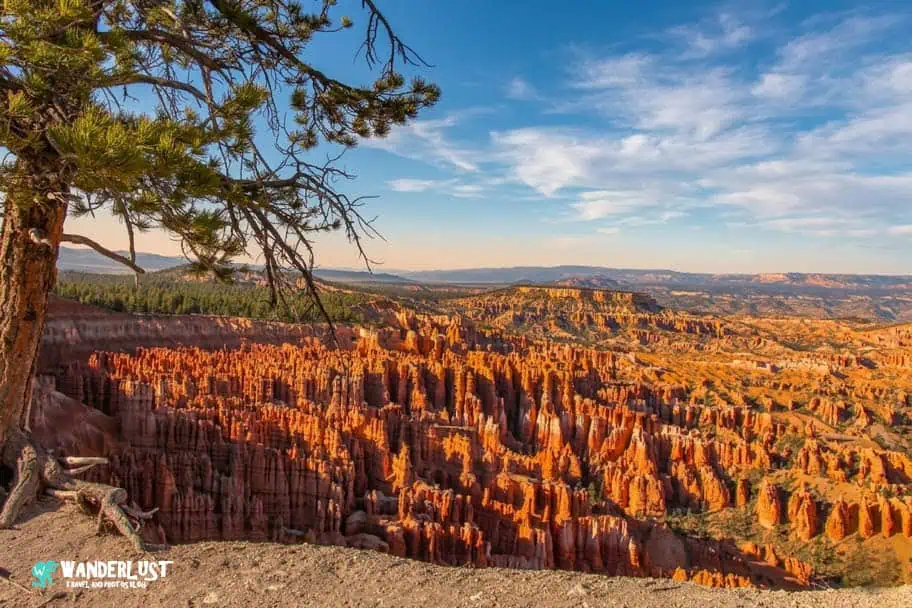
Bryce Canyon may be one of the smaller national parks we visited on this trip, but it delivers an incredible amount of scenery within a relatively compact area.
One of the advantages of Bryce is that many of the best viewpoints and hiking trails are concentrated near one another, allowing visitors to experience a lot in a short amount of time.
| READ MORE: | |
 |
|
| Bryce Canyon National Park Visitor Guide |
Navajo Loop Trail (1.3 miles)

I’ve hiked the Navajo Loop multiple times over the years, and it remains my favorite trail in Bryce Canyon.
Descending among the famous hoodoos and towering rock formations never gets old. The switchbacks and elevation changes can be challenging, but the scenery more than justifies the effort.
| Trail Stats | |
|---|---|
| Trail Type: | Loop |
| Distance: | 1.6 miles/2.6 kilometers |
| Elevation Gain: | 508 feet/155 meters |
| Time to Complete: | 1 to 1.5 hours |
| Difficulty Level: | Moderate |
| Trail Map |
|---|
Queen’s Garden Loop Trail (1.8 miles)
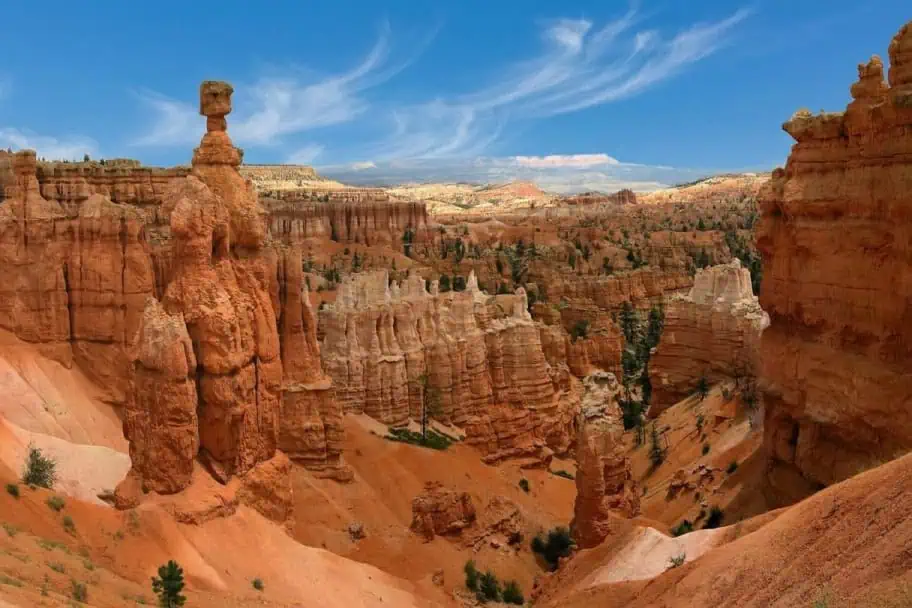
The Queen’s Garden Loop Trail is another fantastic loop trail within Bryce Canyon National Park that is worth exploring. If you are looking for a longer hike through some of Bryce Canyon’s prettiest areas, you can do the Queen’s Garden Loop Trail instead of the Navajo Loop Trail.
The Queen’s Garden Loop follows the Navajo Loop Trail going out into the canyon. However, instead of heading back towards Sunset Point, the Queen’s Garden Trail heads North towards Sunrise Point before looping back. It is another fantastic hike that isn’t too technically challenging.
| Trail Stats | |
|---|---|
| Trail Type: | Loop |
| Distance: | 3.3 miles/5.3 kilometers |
| Elevation Gain: | 643 feet/196 meters |
| Time to Complete: | 1.5 to 2 hours |
| Difficulty Level: | Moderate |
| Trail Map |
|---|
Fairyland Loop Trail (8 miles)
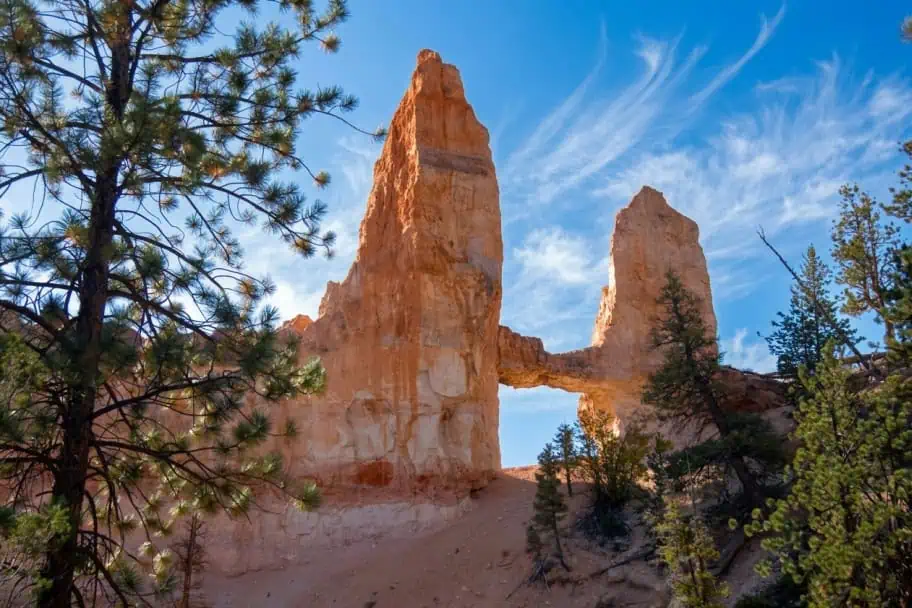
One of the goals of this trip was finally hiking the Fairyland Loop Trail, and it did not disappoint.
Although significantly longer than Bryce’s other popular hikes, the trail offers outstanding scenery and fewer crowds. If you have the time and physical ability, this trail provides a much deeper appreciation for Bryce Canyon’s remarkable landscape.
| Trail Stats | |
|---|---|
| Trail Type: | Loop |
| Distance: | 8.1 miles/13 kilometers |
| Elevation Gain: | 1,538 feet/469 meters |
| Time to Complete: | 4 to 4.5 hours |
| Difficulty Level: | Moderate |
| Trail Map |
|---|
Northern Arizona and the Grand Canyon
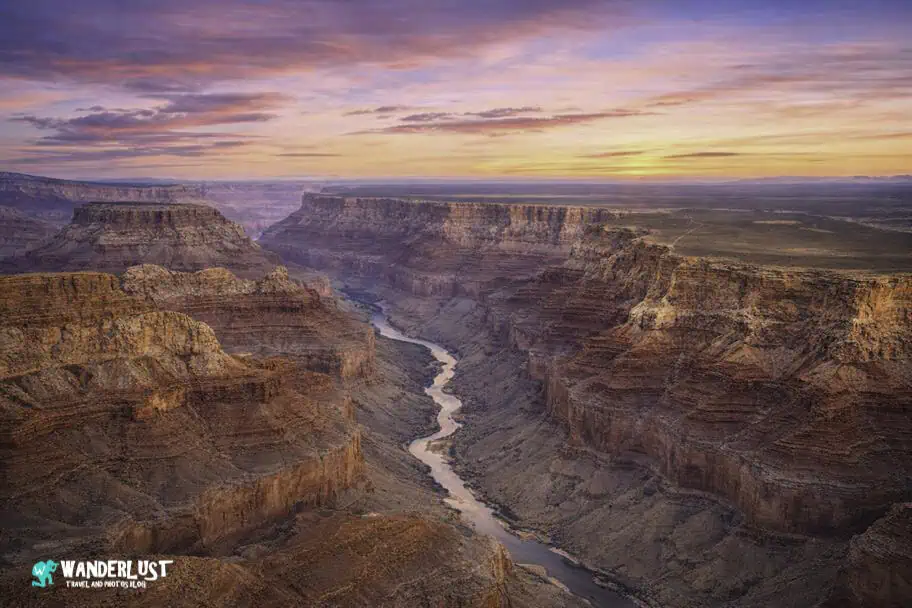
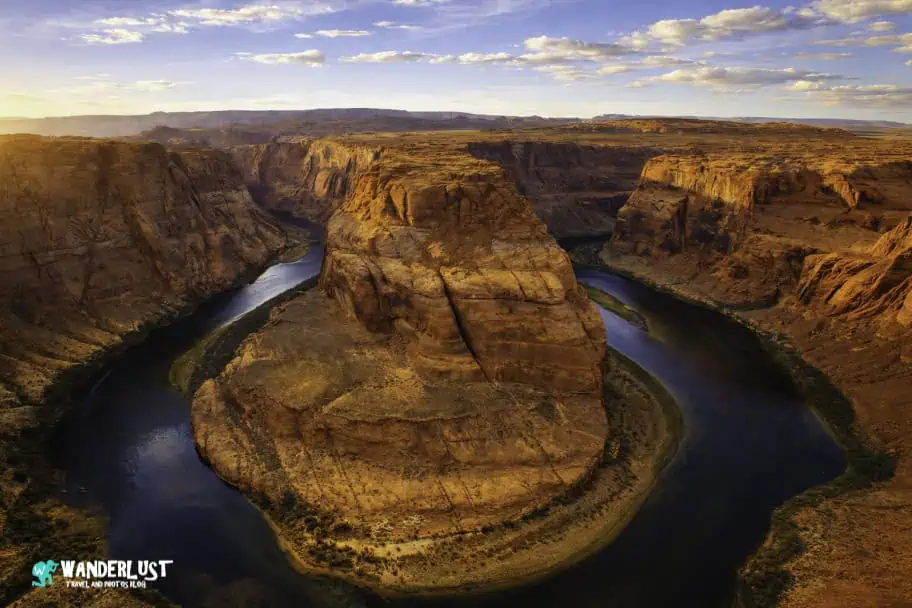
After leaving Bryce Canyon, we continued south through Page, Arizona, before making our way to Grand Canyon National Park. Looking back, this was a great addition to the itinerary because it allowed us to experience some of Northern Arizona’s most iconic landscapes while breaking up the drive between Bryce Canyon and the Grand Canyon. Along the way, we stopped at Horseshoe Bend and enjoyed some incredible scenery before continuing on to one of the most famous natural wonders in the world.
This portion of the trip provided a perfect transition from the red rock landscapes of Southern Utah to the immense scale and grandeur of the Grand Canyon. We ended up staying at the Hampton Inn and Suites Page-Lake Powell, which was another great choice because of its great location and wonderful ammenities.
Horseshoe Bend (1 mile)
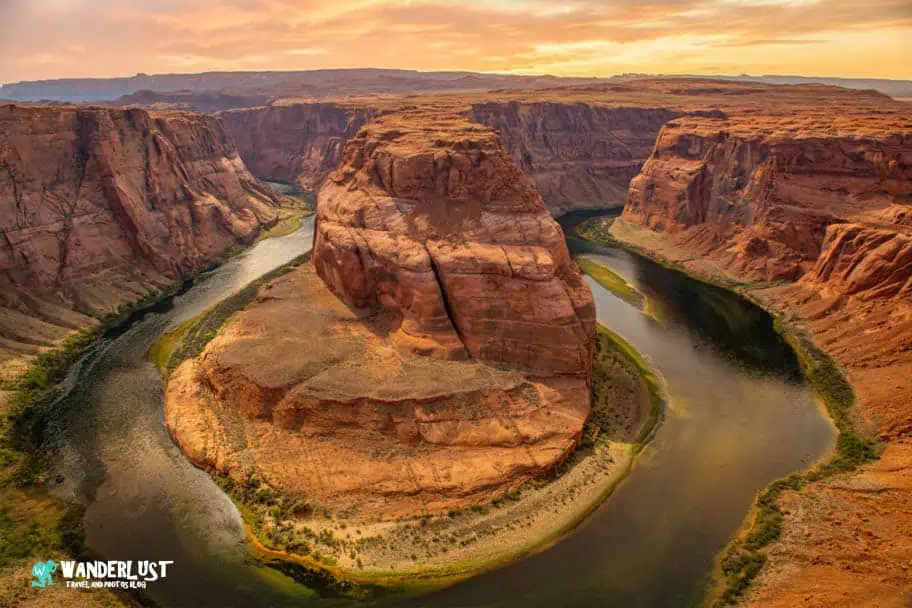
Created by a sharp 180-degree turn of the Colorado River, Horseshoe Bend is one of the more stunning pieces of landscape created by the river. There is a viewpoint trailhead that is located just outside of Page, Arizona. From the trailhead, a short hike of a little over a mile will bring you to the Horseshoe Bend Scenic Overlook. You will want to make sure you plan enough time because this is a view you will want to take your time enjoying.
| READ MORE: |
 |
| The Ultimate Horseshoe Bend Guide |
| Trail Stats | |
|---|---|
| Trail Type: | Out-and-Back |
| Distance: | 1.6 miles/2.6 kilometers |
| Elevation Gain: | 193 feet/59 meters |
| Time to Complete: | 0.5 to 1 hours |
| Difficulty Level: | Easy |
| Trail Map |
|---|
South Kaibab Trail (Up to 6 miles for a Day Hike)
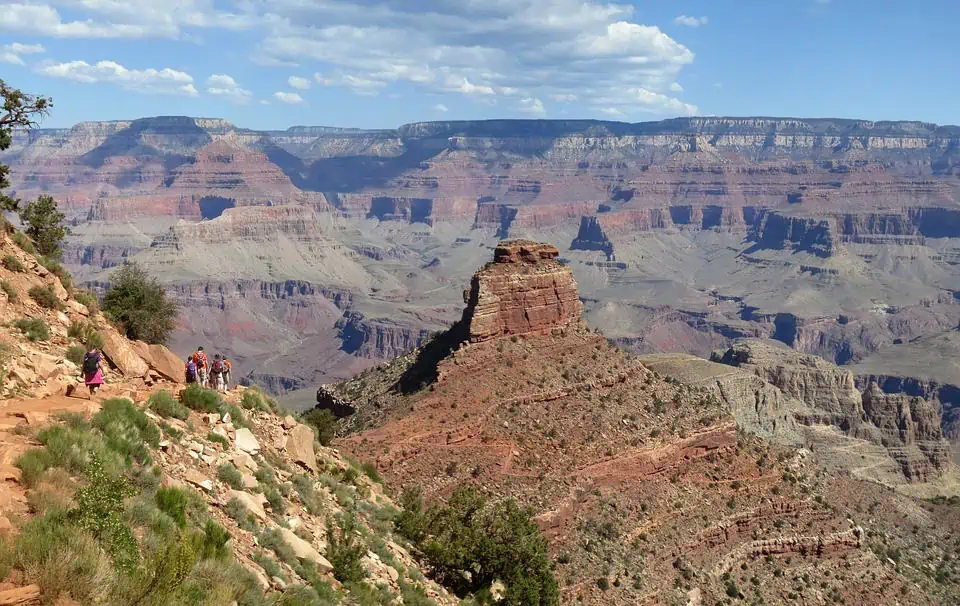
The South Kaibab Trail was our introduction to hiking below the rim of the Grand Canyon, and it quickly demonstrated just how vast the canyon truly is.
From the rim, distances inside the canyon can be deceiving. Once we started descending, it became clear how demanding even relatively short hikes can be. Our goal was to reach Skeleton Point, where hikers are rewarded with one of the first views of the Colorado River from the trail.
For anyone planning a similar hike, remember that every step downhill must eventually be climbed back up. Carry plenty of water, pace yourself, and account for the strenuous return ascent.
| Trail Stats | |
|---|---|
| Trail Type: | Out-and-Back |
| Distance: | 6 miles/9.7 kilometers |
| Elevation Gain: | 2,017 feet/615 meters |
| Time to Complete: | 4 to 6 hours |
| Difficulty Level: | Difficult |
| Trail Map |
|---|
Final Thoughts and Trip Planning Advice
Looking back, this Southern Utah and Northern Arizona road trip turned out to be everything we hoped it would be and more. The combination of Zion National Park, Bryce Canyon National Park, Grand Staircase-Escalante National Monument, Horseshoe Bend, and the Grand Canyon created an unforgettable week filled with incredible scenery and outdoor adventure.
If I were planning the trip again, I would still follow a very similar route. The biggest change I would make would be adding extra days in Grand Staircase-Escalante and Zion, as both destinations offer enough hiking and exploration opportunities to easily fill several additional days.
For anyone considering a similar itinerary, my biggest advice is to start early each day, make lodging reservations well in advance, research trail conditions before arriving, and leave enough flexibility in your schedule to explore unexpected discoveries along the way. Some of our favorite moments weren’t necessarily the items on our itinerary, but the scenic overlooks, quiet trails, and hidden corners we encountered along the journey.
Most importantly, take your time. Southern Utah and Northern Arizona are places that reward those who slow down, soak in the scenery, and fully appreciate some of the most spectacular landscapes in North America.
Don’t Forget to Subscribe to My Adventures!

Let Me Help You Save On Your Next Adventure!
‘Start Exploring Today’ Merchandise Available Now!
 |
 |
 |
 |
 |
 |
 |

















Stunning photos. Such beautiful colours and curves in the stone. Thanks, Mel
Thank you so much!
We are going to be in the Zion/Bryce Canyon area in late May. I have done some great hiking in my life (including 4 days in the Grand Canyon when I was 16), but now balance and heart problems preclude our being able to do long hikes. I hope to find some easy hikes in Zion (in my 20s, I did part of The Narrows) and Bryce Canyon. My husband gets discounts at Best Western so I will keep your recommendation of Best Western Ruby Plus hotel in mind!
You are going to absolutely love it!! The emerald pools hike is pretty easy going in Zion. Bryce Canyon has a ton of great hikes that aren’t too strenuous. Ruby’s Inn (Best Western) by Bryce is amazing!!! Have a great trip!! 😀
Breathtaking photos it looks magical. Enjoy the hike👍
Thank you so much!
Can’t wait to see the photos! Looks like you have some exciting hikes planned 🙂
I’m hoping to do many of the sites on this post! Great descriptions and ideas.
Reblogged this on Vietnam Travel & Trade Portal .
What a post! Nat Geo has nothing on you. We took this route in some fashion about 5 years ago in July , staying in Kanab and making day trips (at 85 MPH on US 89 you can cover some distance. ) This makes us want to give it another try.
Thank you so much Doug!
Sounds like a fascinating trip. Looking forward to following along.
Thanks LuAnn!
Ive been to most of these places, and you captured them perfectly! thanks for sharing!
Thank you so much Erik!! 😀👍
You got it man! Been following you for a bit and the content is always great! Thank you!
Thanks Erik! That means a lot man! 👍