LAST UPDATED – 3/28/26 – New Zealand South Island Itinerary
This New Zealand South Island Itinerary contains references to products on my Amazon Store site. I may receive a commission when you purchase these products from my store, though at no additional cost to you. I hand-pick and recommend only the products that I am either familiar with or comfortable recommending.
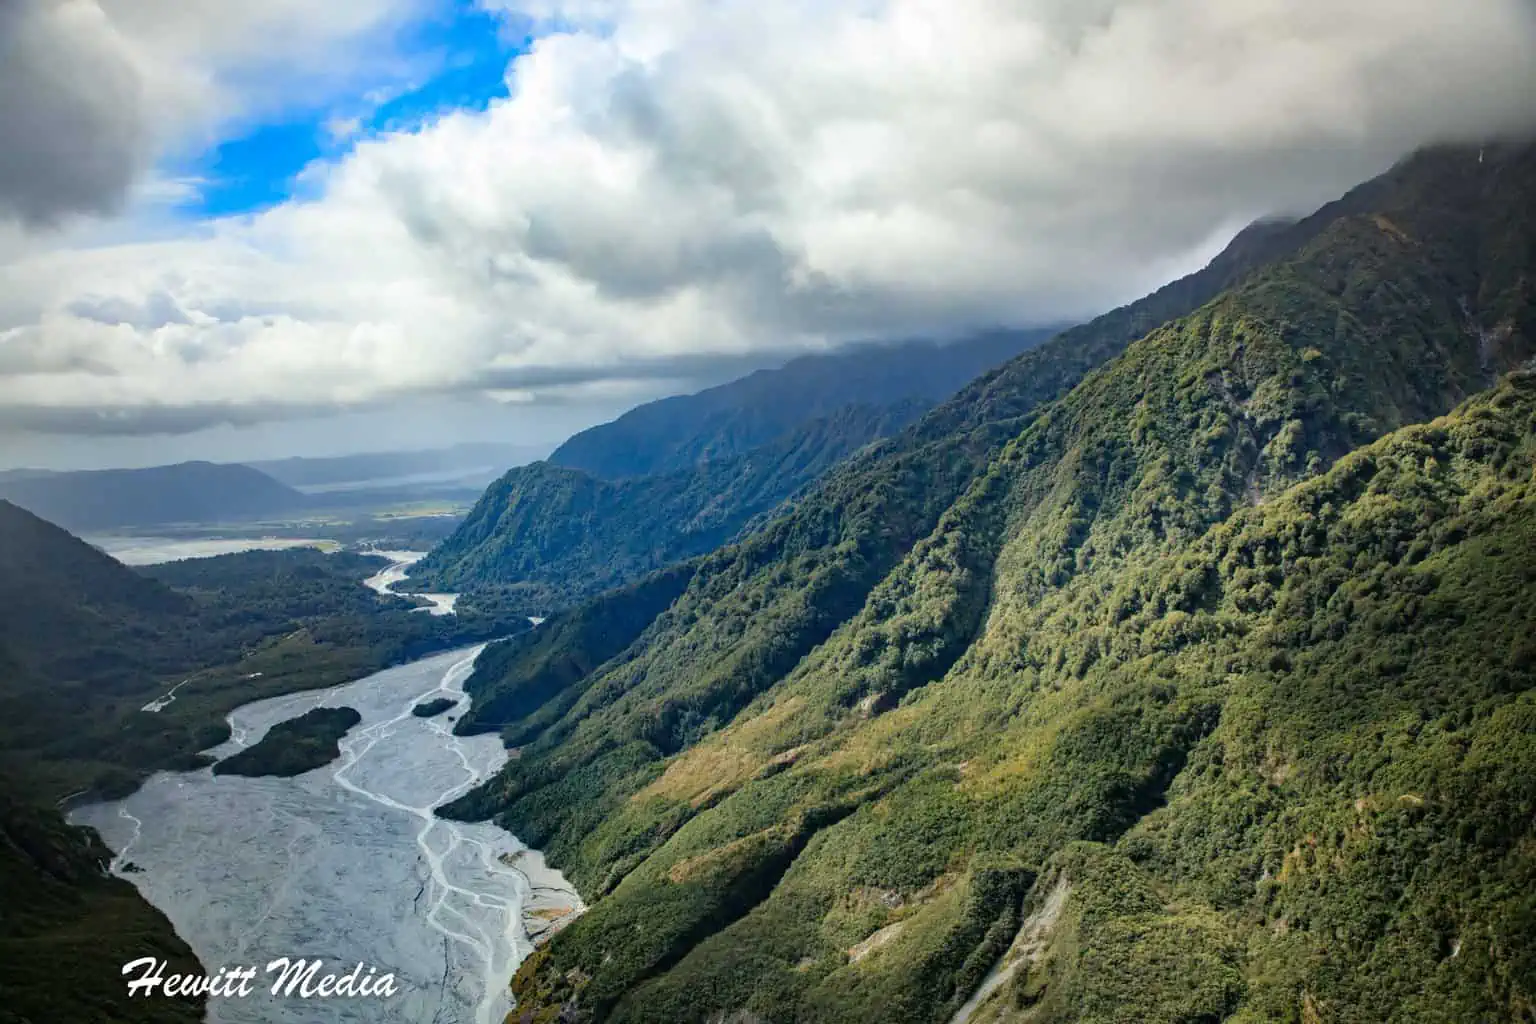
When you travel to New Zealand’s South Island, you’ll quickly realize there’s no shortage of incredible things to see and do. That abundance can make planning feel overwhelming—no one wants to return home wishing they’d missed a must‑see experience. I’ve felt that regret before, which is exactly why this South Island itinerary is here to guide you.

An All-You-Need 14-Day South Island Itinerary
In this South Island itinerary, I outline a fourteen‑day dream trip packed with the best sights, experiences, and logistics you need in one place. You won’t have to worry about choosing destinations—I’ve mapped out the full route, along with options to extend or shorten the trip to fit your schedule.
I’ve also included recommended tours, excursions, and activities at every stop, plus an overview of the two main ways to explore New Zealand so you can choose the style that suits you. When it’s time to book accommodations or find great places to eat, you’ll find links to detailed visitor guides for each location. Feel free to read straight through for the full picture or use the links below to jump to the sections you want to explore in more detail.
South Island Itinerary Navigation Menu
The South Island Itinerary

Two weeks may sound like plenty of time, but with so many incredible things to see and do on New Zealand’s South Island, it helps to focus on the can’t‑miss regions. I’ve designed this South Island itinerary as a loop beginning and ending in Christchurch, though you can easily start or finish in Queenstown—both cities have major international airports.
Below, you’ll find the full structure of the route. You can read it straight through for an overview of each stop and the daily flow, or use the links to jump directly to the sections you want to revisit. For every destination, I outline how many nights to stay, the activities I recommend, and detailed guides to help you get to know the area. These guides highlight top sights, suggested hotels and hostels, great restaurants, and popular tours so you can plan with confidence.
New Zealand South Island Itinerary Map
Tours to Book for Your Itinerary

The South Island is known for its thrilling outdoor adventure opportunities, so it would be a real shame to visit New Zealand’s South Island without any adventures. However, there are so many amazing adventures that you can have that it can be quite intimidating to decide which adventures to go on and where to book them. To help you make those decisions, I have laid out some recommendations for you to review in my New Zealand South Island itinerary below.
For each day of the New Zealand South Island itinerary, I have recommended a tour, excursion, or activity. Not only have I recommended these adventures at the locations where I think they would be best experienced, but I have also scheduled them on the days when I think you will have the most time to enjoy them.
By all means, don’t feel like you need to use every one of my recommendations or even book this many excursions for your trip. These are just my recommendations that you should use as you see fit as you start to plan your trip.
DAY 1: Lake Tekapo Star Gazing
DAY 2: Lake Tekapo Springs Hot Pools
DAY 3: Hiking Inside Aoraki\Mount Cook National Park
DAY 4: Skyline Luge and Ben Lomond or Queenstown Hill Hike
DAY 5: Queenstown Skydive, Bungy Jump, or Jet Boat Ride
DAY 6: Queenstown White Water Rafting or ATV Tour
DAY 7: Glow Worm Cave Tour
DAY 8: Milford Sound or Doubtful Sound Tour
DAY 10: Roy’s Peak or Isthmus Peak Hike
DAY 11: Central Otago Wine Valleys Tour
DAY 12: Lake Wanaka Kayaking or Other Tour
DAY 13: Franz Josef Glacier Helicopter Hike Tour
What to Know Before You Go On Your Trip

Passport, Visa, and Immunization Requirements

As you begin planning your trip, make sure to review New Zealand’s passport, visa, customs, and immunization requirements to confirm you’re eligible to visit. I’ve linked my comprehensive guide below to help you prepare. It’s important to read this information right away—you don’t want to discover an issue at the last minute when there’s little time to fix it.

Packing Recommendations

Outside of taking care of the passport, visa, and immunization requirements so that you can get into the countries and don’t get sick, there is no more important pre-travel planning task than making sure you pack the right clothing and gear for your trip. To help make sure you are properly packed and prepared, I have included links to some of my packing resources in my New Zealand South Island itinerary guide below for you to review.
| READ MORE: | |
 |
|
| The Ultimate Travel Packing Check List |
| READ MORE: | |
 |
|
| The Essential Carry-On Checklist |
| READ MORE: |
 |
| 10 Packing Tips That Every Traveler Should Follow |
| READ MORE: |
 |
| The Top 20 Airport Travel Hacks |
Additional Packing Advice for the South Island of New Zealand
Chances are, you will be taking part in some outdoor adventure activities while in New Zealand. This may include hiking, kayaking, paddleboarding, rock climbing, rafting, jet boat riding, skydiving, bungy jumping, canyon swinging, or several other activities.
Performing many of these activities requires you to pack additional gear for your trip, and this is especially true when you are participating in these outdoor activities in an alpine region such as New Zealand’s South Island. To ensure that you are prepared for all the adventures you have on your trip, I have included some additional gear recommendations (above and beyond what is outlined in my packing guides linked above) below for you to review.
This New Zealand South Island itinerary post contains references to products on my Amazon Store site. I may receive a commission when you purchase these products from my store, though at no additional cost to you. I hand-pick and recommend only the products that I am either familiar with or comfortable recommending.
Hiking Boots (1 Pair)
 |
You are going to be doing a ton of hiking on the South Island of New Zealand, so you are going to want to make sure you take really good care of your feet. One of the best ways you can do that is to invest in a pair of really good hiking boots. A good set of hiking boots will not only keep your feet comfortable, but they are vital to keeping you safe. You are going to be in some fairly remote areas when on the trail, so hiking in uncomfortable boots, getting bad blisters, or slipping and severely hurting yourself can be a big deal. If you are going to overspend on one item on your trip, this would be near the top of the list. |
| View Recommendations on Amazon | |
Choosing the Right Hiking Boots
Choosing the right hiking boots is important because you are going to be spending a lot of time hiking, and much of that will be on slippery and uneven trails. When looking for a good set of hiking boots for this trip, please keep the following characteristics in mind:
- The boots should be lightweight. The last thing you will want to have is heavy boots when you are doing as much hiking as you will be doing. It is said that each pound of weight on your feet equates to roughly five pounds on your back, so your boot weight really matters. Look for boots that weigh between 2.2lbs (1kg) and 3.3 lbs (1.5kg). Anything more than that is too heavy.
- Look for boots that have a rubber sole with deep lugs. This will give you the best traction and ensure that you don’t slip on wet trails.
- Look for a mid-to-high height boot to give you good ankle support. You are going to be hiking on some uneven surfaces, and you don’t want to twist an ankle while on a trail. For added support, look for boots that have speed hooks or D Strings.
- Make sure the boots you purchase are waterproof. Hiking in wet boots can be a miserable experience, and keeping your feet dry can be difficult without the proper boots.
Hiking Pants (1 Pair for every Two Days)
 |
Because you will be doing a lot of hiking and exploring on the South Island, you are going to want to make sure that you have the right pants to wear. Wearing the wrong pants can make hiking uncomfortable, especially when you get wet, and the last thing you will want is to be uncomfortable with many days of long hiking in front of you. The pants you choose should be lightweight, moisture-wicking, and comfortable. Under no circumstances should you pack denim jeans to wear. They don’t wick moisture, take a long time to dry, and will leave you freezing cold if they get wet. I strongly suggest that you bring pants that wick moisture and sweat. This way you won’t be cold if you work up a sweat hiking during the day. |
| View Recommendations on Amazon | |
Breathable T-Shirts (1 Per Day)
 |
When you hike the number of miles that you are going to be hiking on the South Island, you are going to build up a sweat. The last thing you want is to be left with a soaking wet shirt when you are finished hiking and be freezing cold because of it. That is why I strongly recommend that you bring with you a breathable dry fast shirt for each day you will be hiking. They will keep you cool when working up a sweat hiking and then dry quickly so that you won’t freeze when you settle in for the night. There are some great brands you can buy that I have tried out including Under Armour, Columbia, North Face, and Patagonia. I have included some recommendations you can find on Amazon.com below if you would like some ideas. |
| View Recommendations on Amazon | |
Base Layer (Top and Bottom)
 |
A good base layer is critically important to keep you warm when the temperature starts to fall. A good base layer will wick away moisture and keep you warm even when wet. I would recommend bringing a medium to heavy base layer if you get cold easily and a light base layer if you tend to get warm easily when hiking. I like to use a lighter base layer bottom and a heavier base layer top when I hike, but what you decide to bring is up to you. If you are interested, I have included a number of base layers that I recommend for you to review. |
| View Recommendations on Amazon | |
Fleece or Nano Puff Down Jacket (One Jacket)
 |
When you are hiking on the South Island, you are going to be dealing with quickly fluctuating temperatures. It could be rather warm one minute and then quite cold the next. You are going to want to have a warm jacket with you that is light and easy to pack. I have found that one of the best options is a nano puff down jacket. These jackets are not only warm, but they are also very light and easy to pack in your backpack. I have listed some recommendations on Amazon below if you are interested in getting a new jacket for your trip. |
| View Recommendations on Amazon | |
Rain Jacket and Rain Pants (One Pair)
 |
Parts of the South Island get a ton of rain each year. In fact, it rains in the Fiordland National Park roughly 50% of the days each year. That means that it is very likely to be raining on at least some of the days of your trip. The last thing you want is to get soaking wet when hiking as you will quickly get cold and be at risk of becoming hypothermic. Because of this, I would strongly recommend bringing a good hardshell (not softshell) rain jacket and pants with you when you go hiking on New Zealand’s South Island. If you aren’t quite sure about what type of rain gear to bring, REI has a great article about backpacking in the rain with some recommendations in it that you can review. I have included some rain jackets and pants that I really like that are available on Amazon.com for you to browse thru below. |
| View Recommendations on Amazon | |
Hat and Gloves (1 Hat and 1 Pair of Gloves)
 |
Because the temperature can fluctuate so much when you are on New Zeland’s South Island, I would strongly recommend that you pack a pair of warm gloves and a winter hat with you. If the temperature drops, they can really go a long way in keeping you warm, especially at night. If you are looking for some suggestions on what type of gloves or hat to bring, I have included some of my recommendations below. |
| View Recommendations on Amazon | |
Underwear (One Per Day and Two Sports Bras for Women)
 |
Having the right underwear when you go on this hike can be the difference between comfort and miserableness. For that reason, I would suggest that you think carefully about what type of underwear you pack. I would recommend something designed for sports or workout use. There are some really great products out there that are designed to wick moisture and keep you cool. Obviously, you are going to want to bring a pair for each day of your trip, so the underwear should be lightweight as well. For the ladies, I have been told to recommend bringing at least a few sports bras with you as well. |
| View Recommendations on Amazon | |
Multiple Swimsuits
 |
Chances are, you will be spending some time in or near the water while you are touring New Zealand’s South Island. You may go jet boat riding, kayaking, or do a snorkel adventure in Milford Sound. These are all amazing activities to participate in if you have the time. However, even if you aren’t participating in outdoor water adventures, chances are you will be spending some time in the hot pools in Lake Tekapo or Franz Josef Glacier. You will want to make sure you have a few swimsuits with you on your trip so that you are ready. If you would like some recommendations on some good suits, I have included some recommendations on my Amazon store linked below. |
| View Recommendations on Amazon | |
Hiking Socks (Pair for Each Day)
 |
Taking care of your feet is extremely important when you are taking long hikes, and the first layer of defense is the socks that you wear. You are going to want to have socks that are designed for hiking, as these socks are designed to keep your feet warm, even when they are wet. You are going to want to avoid bringing cotton socks, as these will do the opposite of keeping your feet warm when they are sweaty or wet. I would suggest bringing a pair of quality hiking socks for each day of your hike. If you are interested in some good recommendations, I have included some below. |
| View Recommendations on Amazon | |
Hiking Gaiters (Optional)
 |
For certain hikes, a good pair of gaiters is an optional luxury item that you might consider bringing with you. When you are hiking on New Zealand’s South Island, I would say that a good pair of gaiters is closer to a necessity than a luxury. With so much moisture in parts of the island, a good pair of gaiters can really go a long way in keeping your hiking boots dry and keep you warm. For that reason alone, I would strongly recommend packing a pair. If you are interested in looking at a pair, I listed a pair I recommend below. |
| View Recommendations on Amazon | |
Micro Spikes (Optional)
 |
If you are planning on hiking at high altitude or during the early spring, late autumn, or winter seasons, then you are going to want to make sure you bring some extra foot traction with you. If you plan on doing glacier hiking with a guide, they will provide crampons for you to wear. However, if you are doing some hiking on your own, you’ll need to have your own gear. For a majority of the hikes you do alone, microspikes should be adequate for additional traction. If you are looking for a recommendation on which pair of microspikes to purchase, I have included a link to the pair I use and love for you to review below. |
| View Recommendations on Amazon | |
Hiking Backpack (1 Backpack)
 |
Choosing the right backpack to bring on your trip to New Zealand’s South Island is critically important because it will be used to carry all of the gear that you will need. Not only is it important to pick the right size bag to fit your gear, but the design and quality of the bag will be important as well. If you don’t bring a bag that is properly weather resistant and comfortable, it can make your hike a miserable experience. You will essentially be living out of this bag, so if it becomes a burden to carry or the gear inside of the bag gets wet, then you are immediately at a disadvantage. Below I have provided some general guidelines for choosing the right backpack, as well as some of my recommendations. I love Osprey’s backpacks as they are really well designed and durable. |
| View Recommendations on Amazon | |
Choosing the Right Hiking Backpack
Choosing the right backpack to take on your trip is a very important decision. This is what you will be carrying and what you aren’t wearing. Having a bag that can fit what you need and is comfortable and durable is important. Here are some general guidelines for what you should look for in a backpack to bring.
Bag Size
- If you are planning on doing multi-day hikes on your own, then you are going to need to carry your own food and some additional water with you. For that reason, you are going to need to bring a bigger bag. For the typical hiker, a 30-35L bag should be sufficient. This should be big enough to fit around 22lbs (or 10kg) of gear. Remember, you will typically be wearing around 6-10lbs of gear each day as well.
- If you are only planning on doing the day hikes I recommend, then you don’t need to worry about carrying your food. Therefore, you can afford to bring a smaller backpack. Your average hiker’s backpack that can be used to carry your personal gear that you aren’t wearing should be sufficient.
Bag Design
- You should pay close attention when purchasing a hiking backpack to make sure that they are both durable and weather-resistant. Pay attention to the material the bags are made out of, whether they have a weather-resistant coating, and whether the bags come with rain covers.
- Your bag should be comfortable to wear. Good bags will be adjustable with ample padding on the shoulder straps and waist belt, and include a well-designed suspension system that evenly distributes the weight of the bag among the muscles used to carry the load. I would suggest trying on various bags at REI or another outdoor gear retailer before purchasing your bag.
- For ladies, I would suggest looking at a backpack specially designed for women. Most well-designed women’s bags also have reshaped waist belts designed for women’s bodies, which can be important because the waist belt is critical for transferring weight off your back.
Sunglasses
 |
You are going to want to have sunglasses with you when you go hiking, kayaking, climbing, or perform any other outdoor adventure activity on your trip. Not only will they protect your eyes from the sun, but a good pair of glasses can also help shield your eyes from the rain when the weather turns bad. I would advise that you bring a pair of sunglasses that don’t come off your face easily because the last thing you want to have to worry about when on the trail is losing your glasses or other gear. |
| View Recommendations on Amazon | |
Planning Your Water Needs Appropriately
Staying hydrated is always important when you are performing outdoor adventure activities. Getting dehydrated can be dangerous, so you should always make sure you have enough water with you. To assist you in planning your water needs for the outdoor activities you participate in on your trip, I have included some general guidelines below.
- Make sure you drink at least 2-3 liters of water each day, as it is critically important that you stay hydrated when hiking.
- If you prefer to bring water bottles, you will need to be able to carry either two 1-liter bottles or one 1.5-liter bottle, and make sure that you drink at least 1 liter of water before starting each day.
- If you prefer to carry a hydration bladder in your backpack, there are some good 2-5 liter bladders available on Amazon.com that I recommend.
Headlamp or Flashlight
 |
When it gets dark at night, you are going to need something to assist you in getting around the huts. I recommend that you invest in bringing a travel headlamp or travel flashlight with you on the trail. A travel headlamp is ideal because you don’t need to hold it, but a small flashlight will do as well. There are some really slick waterproof headlamps on the market and I have a few of those on my recommended list below. Whichever option you choose to go with, I would make sure that it is lightweight so that you aren’t adding too much weight to your pack. |
| View Recommendations on Amazon | |
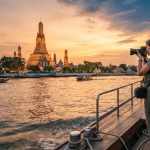
Camera Gear
 |
On top of being one of the premier mountain destinations in this world, the South Island of New Zealand has some absolutely stunning scenery. For this reason, you will want to make sure you have a camera with you on your trip. If you are interested in taking high-resolution photos, you can bring your DSLR. However, I would ultimately recommend a mirrorless camera if you are in the market for a camera for this trip. A mirrorless camera will give you the quality of a DSLR, but they are much lighter to carry. Some mirrorless cameras that I recommend include Sony’s Alpha A7 III, Nikon’s Z7, Fujifilm’s X-T3, and Panasonic’s Lumix G9. I have included these cameras in my recommendations on Amazon.com, which can be found below. |
| View Recommendations on Amazon | |
50%-100% Deet Insect Repellent
 |
When you plan on doing outdoor activities anywhere in the world, it is always a good idea to bring insect repellant with you. Even though you aren’t in a Malaria, Dengue fever, or Yellow Fever hot spot in New Zealand, it still makes sense to have some DEET insect repellant with you when you do participate in an outdoor activity on this trip. At the very least, it will keep insects from becoming a nuisance and bothering you as you hike. If you would like some additional guidance on what type of mosquito repellant to bring with you, I would suggest referring to the CDC recommendations on avoiding bug bites on their website. |
| View Recommendations on Amazon | |
Sun Screen
 |
Because much of the South Island of New Zealand is an alpine region and parts get a lot of rain, people often overlook the need to bring sunscreen with them when they visit the South Island. However, if the sun does come out, a bad sunburn can really make hiking, kayaking, climbing, and other activities uncomfortable. I would recommend bringing an SPF 30-50 sunscreen with you when you to New Zealand. If you would like to purchase some before your trip, I have included a link to some of my recommendations for you to review below. |
| View Recommendations on Amazon | |
Motion Sickness Pills
 |
Motion sickness pills aren’t something that you will need for much of your time in New Zealand, but chances are you will be on a boat at least a few times. One time for certain in Milford Sound, but you may also decide to take a jetboat ride in Queenstown or a boat ride on Lake Wanaka. If you get motion sickness easily, you will probably want to be prepared for that by bringing motion sickness pills or prescription patches with you. If you would like some recommendations on motion sickness pills to purchase for your trip, I have included several recommendations on my Amazon store linked below. |
| View Recommendations on Amazon | |
Additional Items
In addition to the items I recommended above, here are some additional pieces of equipment, medication, and medical supplies that you might want to consider bringing with you.
- Hang-up Toiletry Bag
- Portable Charger
- Dry Bag or Zip Lock Bags
- Travel First Aid Kit
- Blister Pads or Mole Skin
- Tylenol or Ibuprofen
- Ear Plugs
- Pee Bottle (For Women)
Choosing How to Tour the South Island

Outside of determining when you would like to visit and which flights you will book to get there, I would contend that the biggest decision you will have to make when planning your trip to New Zealand’s South Island is how you plan on getting around. Unlike Europe, there isn’t a rail system that gets you from one place to another on the South Island. To get around, you are going to need to drive yourself.
When it comes to transportation and accommodations, you can either elect to rent a car and then choose to stay at hotels, hostels, and house rentals (think Airbnb or VRBO), or you can choose to rent an RV (campervan or motorhome). There are pros and cons to each option, which I outline in my New Zealand South Island itinerary guide below so that you can choose the option that is best for your trip.
Staying in Hotels or Hostels

If you are looking for a hot shower, room service, and other amenities, then a hotel or hostel might be the best choice for you. In all of the cities that I outline on this itinerary, there is a selection of hotel and hostel options at various price points for you to choose from. Most of these locations also have house and room rentals on sites like Airbnb and VRBO available as well.
If you are looking for some advice on which hotels or hostels to book, I would recommend you take a look at my individual visitor guides for each city. In those guides, I provide hotel and hostel recommendations at different price levels for you to review. If you are trying to determine if choosing the hotel\hostel\Airbnb route is best for you, I have included the pros and cons of choosing this option for you to review in my New Zealand South Island itinerary guide below.
The Pros
- Running water and most likely hot water in your room.
- At many locations, there is a free continental breakfast or breakfast available to purchase.
- You have more space to spread out.
- Most hotels and hostels will have a concierge service that you can use.
The Cons
- Staying at a hotel or hostel is typically more expensive.
- You have less flexibility in changing your travel plans.
- You don’t need to unpack and repack your suitcase between hotels and hostels.
- Preparing your own meals is a lot more difficult.
Renting an RV

If you would prefer not to stay in hotels, hostels, or rental homes, the other way that you can choose to tour the South Island of New Zealand is to rent an RV (campervan or motorhome) to stay in. Choosing to rent an RV can be an extremely liberating way of touring the island because you aren’t locked into a schedule because of hotel bookings.
On the other hand, they can also be a little more cramped than your typical hotel room and may not have all of the amenities that you are used to. If you are trying to determine whether renting an RV is the right approach for your trip, I have included a list of important factors to take into account before renting an RV in New Zealand in my New Zealand South Island itinerary guide below.
Factors to Consider Before Renting an RV
- Prices May Vary – Depending on when you are visiting New Zealand, there may be a lot of demand for RVs. During the busy season, renting an RV may not be much cheaper than a hostel or a cheap hotel.
- Age Restrictions – Depending on which company you choose to rent from, there may be age restrictions. You only need a valid home driver’s license (in English) to be able to drive in New Zealand, but don’t be surprised if you aren’t able to rent an RV if you are under the age of 25.
- Look Out for One-Way Fees – If you are planning on picking up your RV from a different location than you are dropping it off at, you will likely be charged a one-way fee. For instance, if you are flying into Christchurch and then home from Queenstown to save time, you will likely be charged extra for that.
- Lots of Inclusions – Most RV rental companies will include several amenities standard with your RV. This includes towels, bedding, pots and pans, plates and cutlery, and other gear.
- You Can’t Park and Sleep Anywhere – While renting an RV does afford you a great deal of flexibility, it does not permit you to just pull over and sleep anywhere you’d like. Make sure you only pull over and park for the night in designated camping areas.
- Campervans Versus Motorhomes – While both typically include a bathroom and a kitchen, motorhomes are typically larger and more spacious than campervans. Campervans are typically more compact and designed to sleep only 2-3 people, whereas motorhomes will sleep anywhere between 2-6 people comfortably.
Recommended RV Rental Companies
If you decide that you would like to rent an RV while in New Zealand, I have included a number of the highest-rated RV rental companies below for you to review, along with the type of RV that they have available and where they have locations. Remember, campervans typically fit between 2-3 people, and motorhomes typically sleep between 2-6 people.
| Company Name | Campervans Available | Motorhomes Available | Christchurch Location | Queenstown Location | Picton Ferry Location |
|---|---|---|---|---|---|
| Apollo New Zealand | Yes | Yes | Yes | No | No |
| Britz New Zealand | Yes | Yes | Yes | Yes | No |
| Cheapa Campa New Zealand | Yes | Yes | Yes | No | No |
| Escape Rentals New Zealand | Yes | No | Yes | No | No |
| JUCY New Zealand | Yes | No | Yes | Yes | No |
| Kiwi Campers/Happy Campers | Yes | Yes | Yes | No | No |
| Mad Campers New Zealand | Yes | No | Yes | No | No |
| Maui New Zealand | Yes | Yes | Yes | Yes | No |
| Mighty Campers New Zealand | Yes | Yes | Yes | Yes | No |
| Spaceships New Zealand | Yes | No | Yes | No | No |
| Travellers Autobarn | Yes | No | Yes | No | No |
| Tui Campers New Zealand | Yes | Yes | No | Yes | Yes |
| Wilderness Motorhomes | No | Yes | Yes | No | No |
DAY 1: Arrive in Christchurch

On Day 1 of your adventure, you’ll arrive at Christchurch International Airport (CHC) to begin the trip. For this itinerary, I assume you’re flying in and out of Christchurch, though you can also start in Queenstown via Queenstown Airport (ZQN). If you’re visiting the North Island before or after, simply fold this plan into your broader schedule.
After landing, pick up your rental car or collect your campervan or motorhome. If you’re still deciding between the two, review the section on Choosing How to Tour the Island, where I break down both options.
Once you have your transportation, head west toward your first stop: Lake Tekapo. You’ll spend part of two days and one night exploring the region. If your flight arrives early enough, consider booking a stargazing tour—it’s a relaxing way to ease into the trip. For recommendations on lodging, restaurants, and things to do, see my Lake Tekapo, New Zealand Visitor Guide linked below.
Day 1 Details
| Driving Time From Christchurch to Lake Tekapo: | 2 Hours 52 Minutes |
| Nights Staying in Lake Tekapo: | 1 Night |
| Tours, Excursions, or Activities for Day 1: | Lake Tekapo Star Gazing |
Day 1 Driving Map
| READ MORE: | |
 |
|
| Lake Tekapo, New Zealand Visitor Guide |
DAY 2: Explore Lake Tekapo

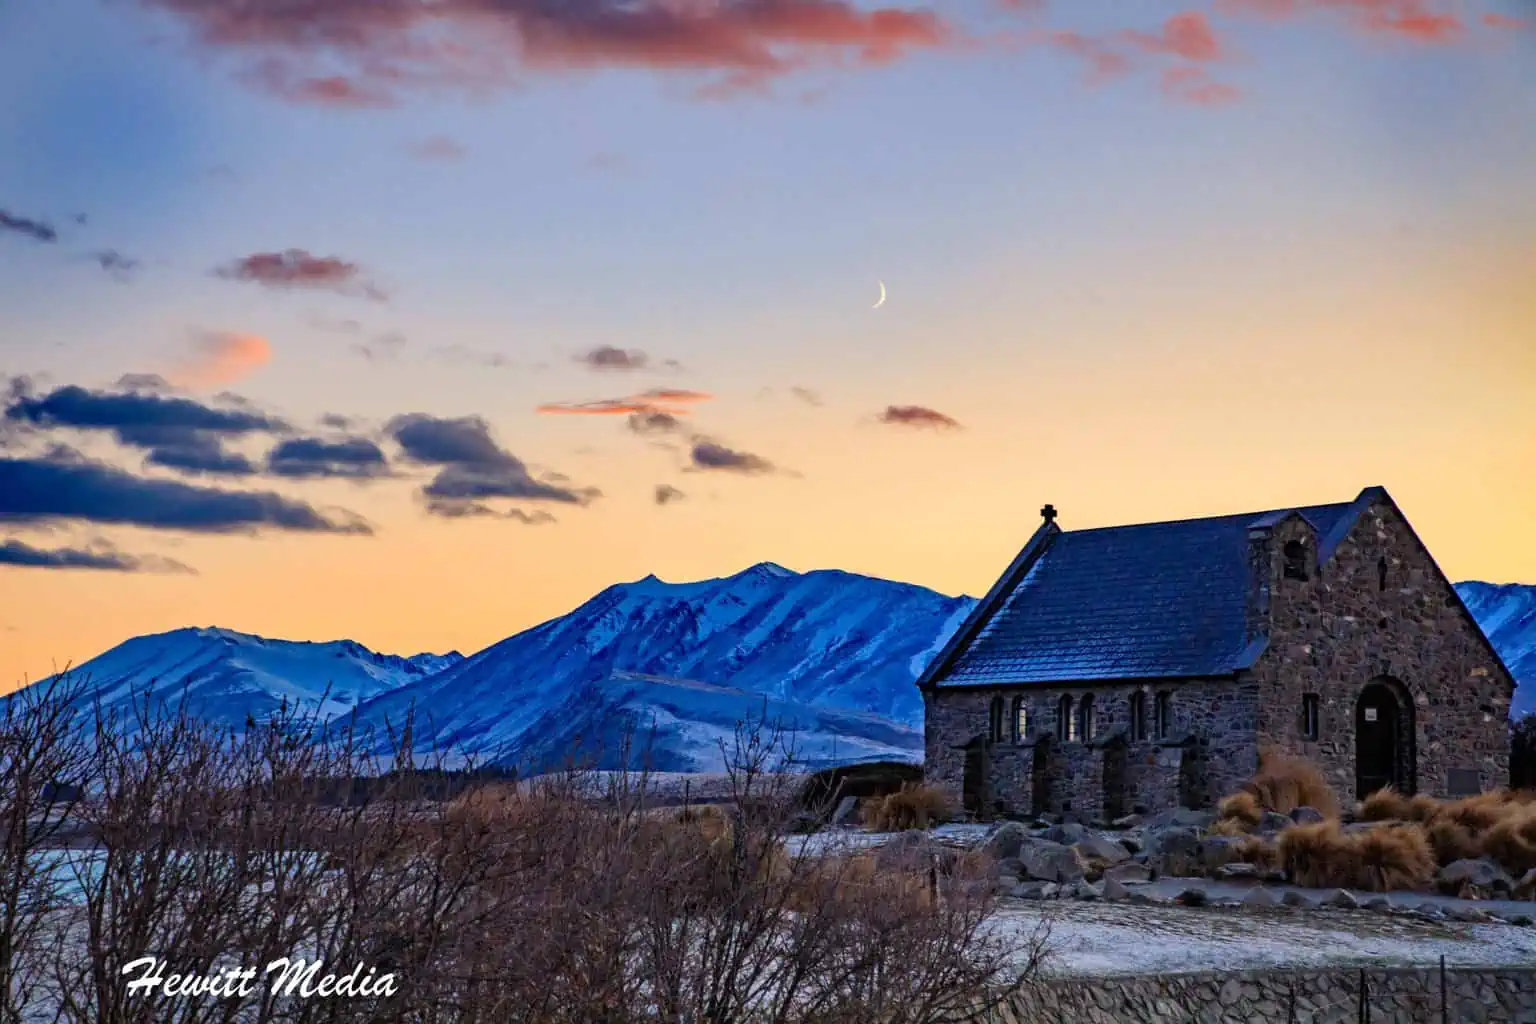
After waking up on the second day of your New Zealand South Island itinerary, you will want to spend a portion of the day doing some more exploration of the Lake Tekapo area before making the very short drive to Mount Cook Village. I would recommend doing some hiking by the lake, checking out the Church of the Good Shepherd at sunrise or sunset, and enjoying the Lake Tekapo Hot Springs before leaving town.
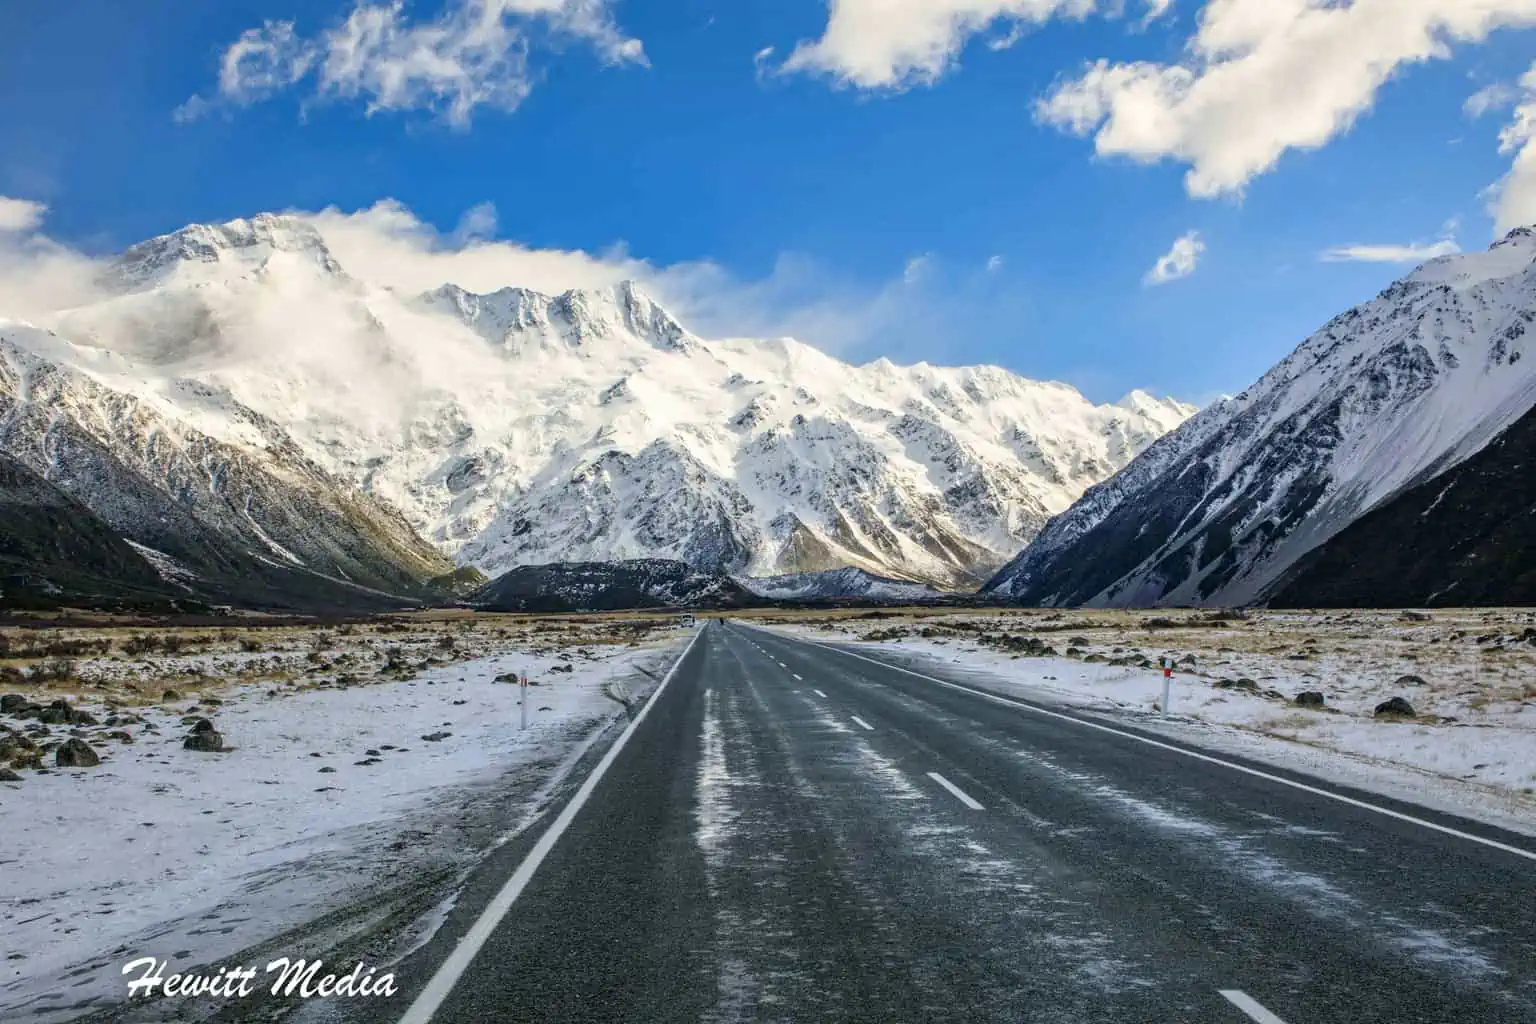
The drive from Lake Tekapo to Mount Cook Village is absolutely breathtaking. The views as you drive along Lake Pukaki are absolutely breathtaking. Make sure you leave yourself some time to do this drive in daylight, as you will want to pull over at a number of the scenic pullouts to take some pictures and enjoy the incredible views.
When you arrive in Mount Cook Village, you can unpack your stuff and get some good food after a long day of exploration. For recommendations on where to stay, where to eat, and what there is to do in the Aoraki\Mount Cook National Park area, please refer to my Aoraki Mount Cook National Park Visitor Guide linked below.
Day 2 Details
| Driving Time From Lake Tekapo to Mt. Cook Village: | 1 Hour 14 Minutes |
| Nights Staying in Mt. Cook Village: | 2 Nights |
| Tours, Excursions, or Activities for Day 2: | Lake Tekapo Hot Springs |
Day 2 Driving Map
DAY 3: Explore Aoraki\Mount Cook National Park

Using this New Zealand South Island itinerary, you will be spending a portion of three days and two nights in the Aoraki\Mount Cook National Park area. This should give you plenty of time to hike in one of the best parks on New Zealand’s South Island for hiking.
The Hooker Valley Track, the Sealy Tarns Track, the Mueller Hut Track, and the Blue Lake and Tasman Glacier View Track are all hikes that I would recommend within the park. If you are looking for other things to do in the area, I would suggest checking out my Aoraki\Mount Cook National Park Visitor Guide linked below.
If you are planning on following my condensed New Zealand South Island itinerary and plan to skip the Franz Josef Glacier area because you are flying into Christchurch and flying out of Queenstown, then I would recommend exploring a tour of the Tasman Glacier while in Mount Cook National Park.
Some amazing helicopter tours will give you a great close-up view of the glacier. No matter which itinerary you are following, I would plan on getting most of your sightseeing around Aoraki\Mount Cook National Park done on days 2 and 3, as you will want to head to Queenstown fairly early on Day 4 so that you can fully explore that area.
Day 3 Details
| Tours, Excursions, or Activities for Day 3: | Hiking in Park |
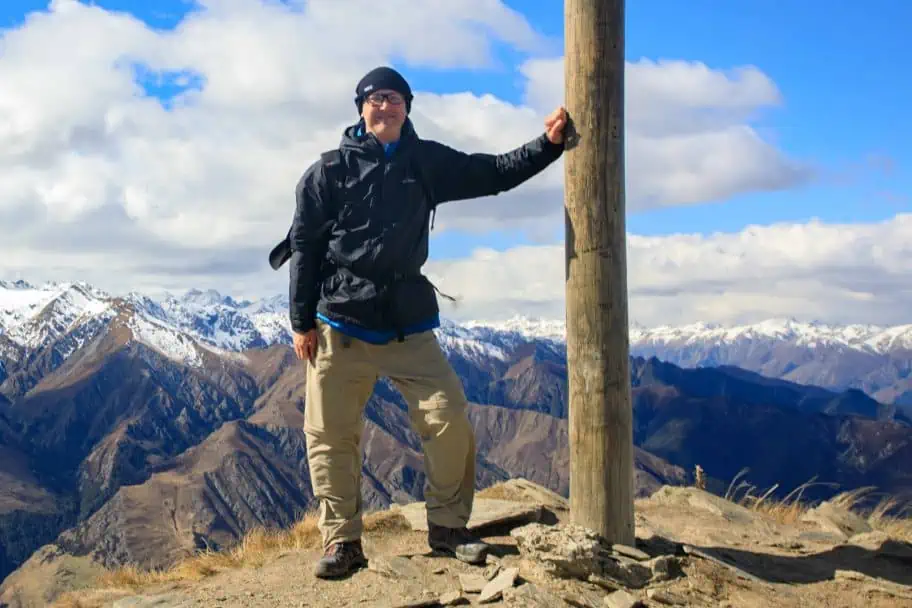
DAYS 4-6: Explore Queenstown

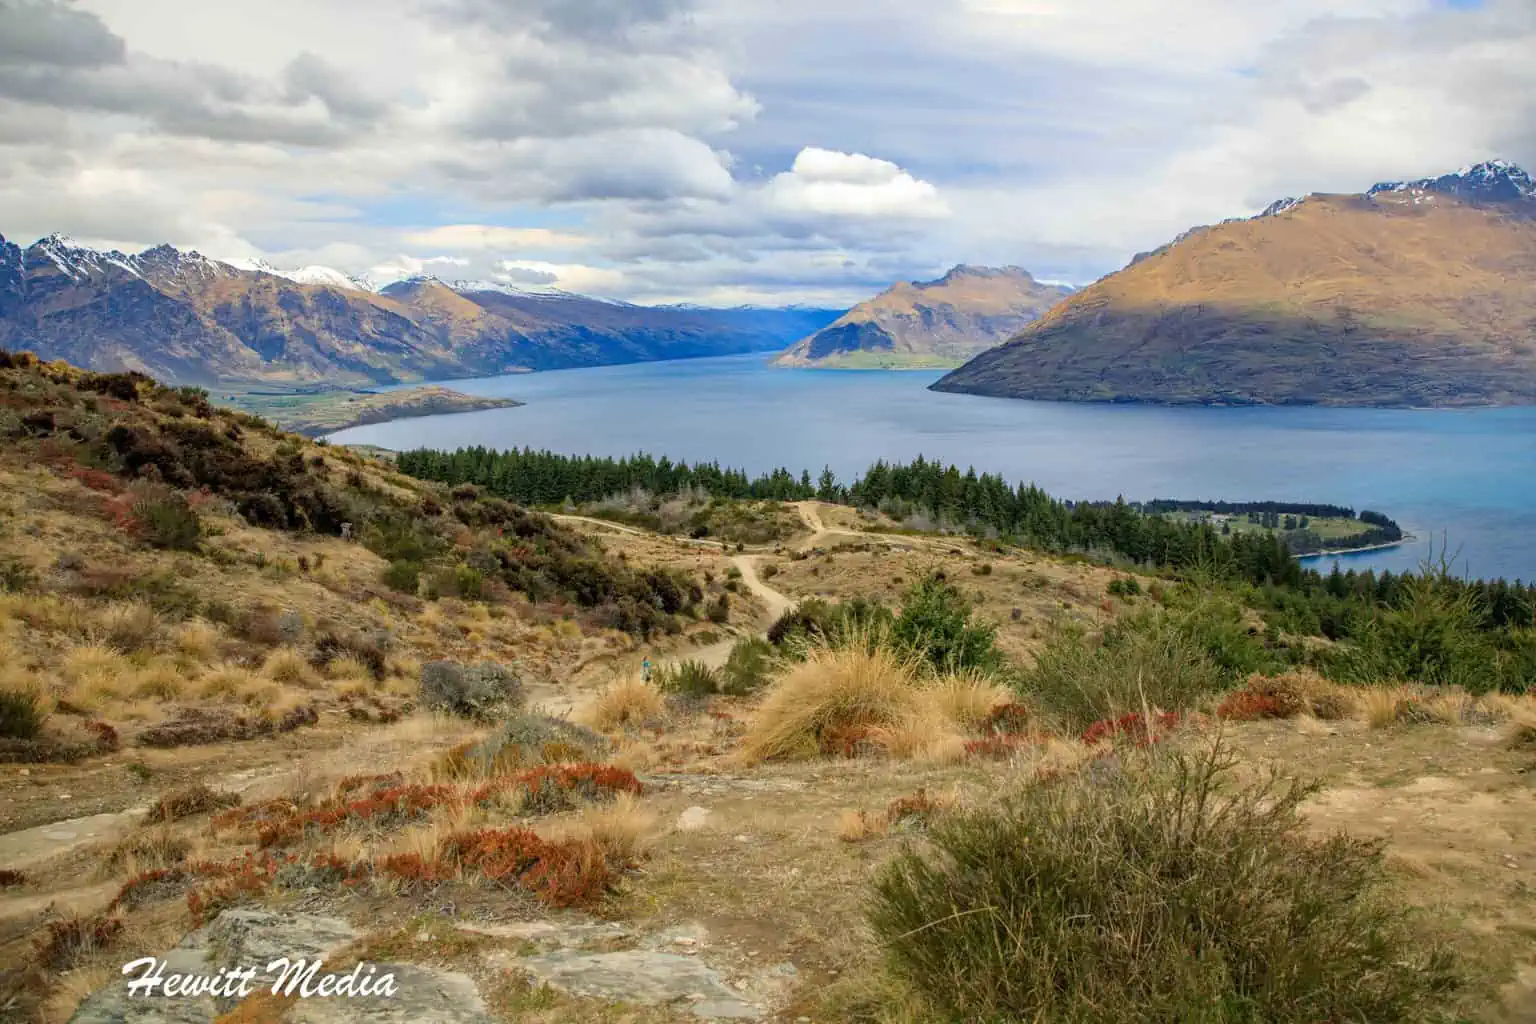
On days four through six, you’ll be based in Queenstown—one of my favorite places on the South Island and widely known as the Outdoor Adventure Capital of the World. If you love adrenaline or outdoor activities, this is where the trip really takes off. Beyond world‑class hiking and the Remarkables ski area, Queenstown is packed with operators offering skydiving, bungee jumping, jet boating, canyon swinging, and more.
When you arrive on Day 4, settle in and take it easy. A great first outing is riding the Skyline Gondola and trying the luge. You can buy packages that include multiple luge runs and even lunch or dinner at the Stratosphere Restaurant.
On Days 5 and 6, dive into the adventure activities that interest you, and make time to explore Queenstown’s excellent shops and restaurants. For recommendations on where to stay, eat, and what else to do, check out my Essential Queenstown, New Zealand Travel Guide linked below.
NOTE: Depending on your schedule and availability, you will also be able to find skydiving opportunities in the Wanaka area. So if you aren’t able to get up in Queenstown, you should have other opportunities later in the trip. Please refer to my guide on Everything You Need to Know About Skydiving in New Zealand linked below, for more information. You can also choose to take a Central Otago Wine Tour from Queenstown instead of Wanaka, in case you need to move things around to make more time later in your trip.
Days 4-6 Details
| Driving Time From Mt. Cook Village to Queenstown: | 3 Hours 13 Minutes |
| Nights Staying in Queenstown: | 3 Nights |
| Tours, Excursions, or Activities for Day 4: | Skyline Luge and Hiking |
| Tours, Excursions, or Activities for Day 5: | Skydive, Bungy, or Jet Boat |
| Tours, Excursions, or Activities for Day 6: | Whitewater Rafting or ATV Tour |
Day 4 Driving Map
| READ MORE: | |
 |
|
| The Essential Queenstown, New Zealand Travel Guide | |
| READ MORE: | |
 |
|
| Everything You Need to Know About Skydiving in New Zealand |
DAYS 7-8: Explore Te Anau and Fiordland National Park

On Day 7, you’ll wrap up your time in Queenstown and drive south to Te Anau, your base for exploring Fiordland National Park. Since you’ll only have part of the day, skip full‑day tours and opt for something shorter—like the glowworm cave tour, a fascinating experience found in only a few places in New Zealand.
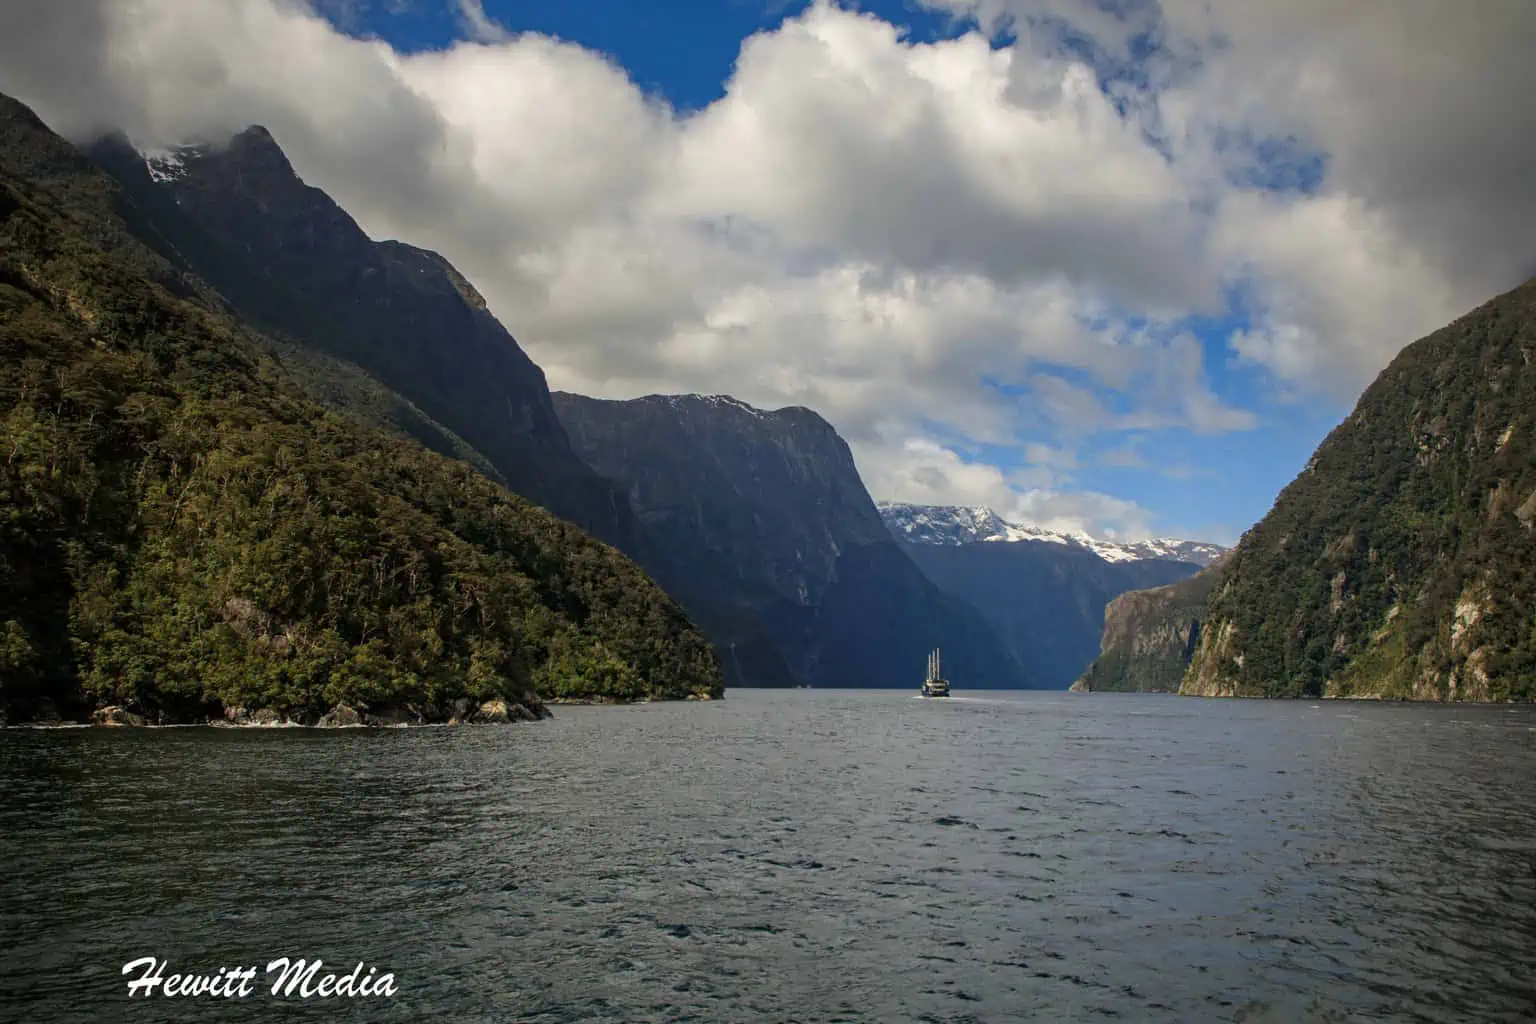
Day 8 is your one full day in Fiordland, and I highly recommend booking a Milford Sound tour. You can choose a combined hiking‑and‑boat experience, which includes guided stops and short walks through the park, or simply take a boat cruise. Milford Sound is one of the most breathtaking coastal landscapes in the world, and a cruise here is truly essential. For more details, see my Milford Sound Visitor Guide linked below.
Many travelers also come to hike the famous Milford Track, one of the world’s great multi‑day wilderness routes. It doesn’t fit into this itinerary, but if you have extra time and want to add it, check out my Ultimate Guide for Hiking the Milford Track.
NOTE: Weather is the biggest challenge when visiting Milford Sound—the area gets huge amounts of rain, and the only access road is prone to avalanches, especially in winter and spring, which can lead to sudden closures. Because of this, it’s smart to have a backup plan, and the most common alternative is switching to a Doubtful Sound tour, which is equally stunning but more remote and operated by a single company. Start checking the Milford Sound forecast as soon as you arrive in New Zealand, and if conditions look poor the night before your tour, consider switching, while keeping in mind that the weather can change quickly in either direction.
Days 7-8 Details
| Driving Time From Queenstown to Te Anau: | 2 Hours 3 Minutes |
| Nights Staying in Te Anau: | 2 Nights |
| Tours, Excursions, or Activities for Day 7: | Glow Worm Cave Tour |
| Tours, Excursions, or Activities for Day 8: | Milford Sound or Doubtful Sound Tour |
Day 7 Driving Map
| READ MORE: | |
 |
|
| Milford Sound Visitor Guide | |
| READ MORE: | |
 |
|
| The Ultimate Milford Track Hiking Guide |
DAYS 9-12: Explore Wanaka

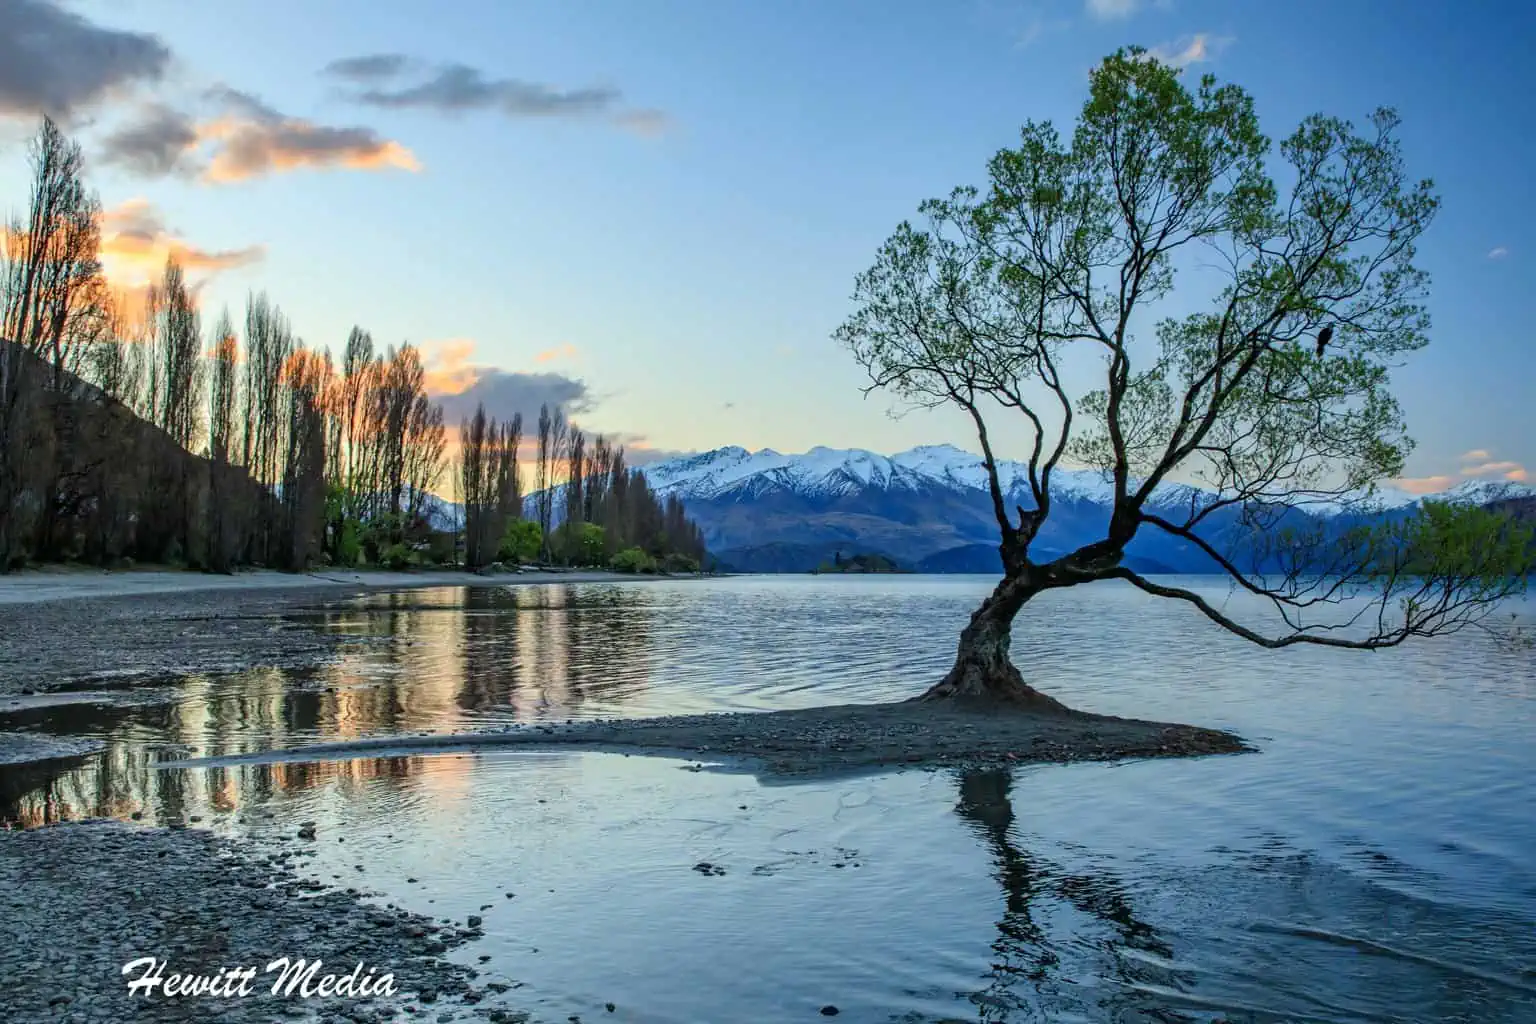
On days nine through twelve, you’ll explore my second‑favorite region on the South Island: Wanaka. While Queenstown is famous for adrenaline sports, Wanaka is all about world‑class hiking. After arriving on Day 9, get settled and head into town—don’t miss the iconic Wanaka Tree just offshore in Lake Wanaka. For tips on lodging, dining, and local highlights, see my Wanaka, New Zealand Visitor’s Guide linked below.
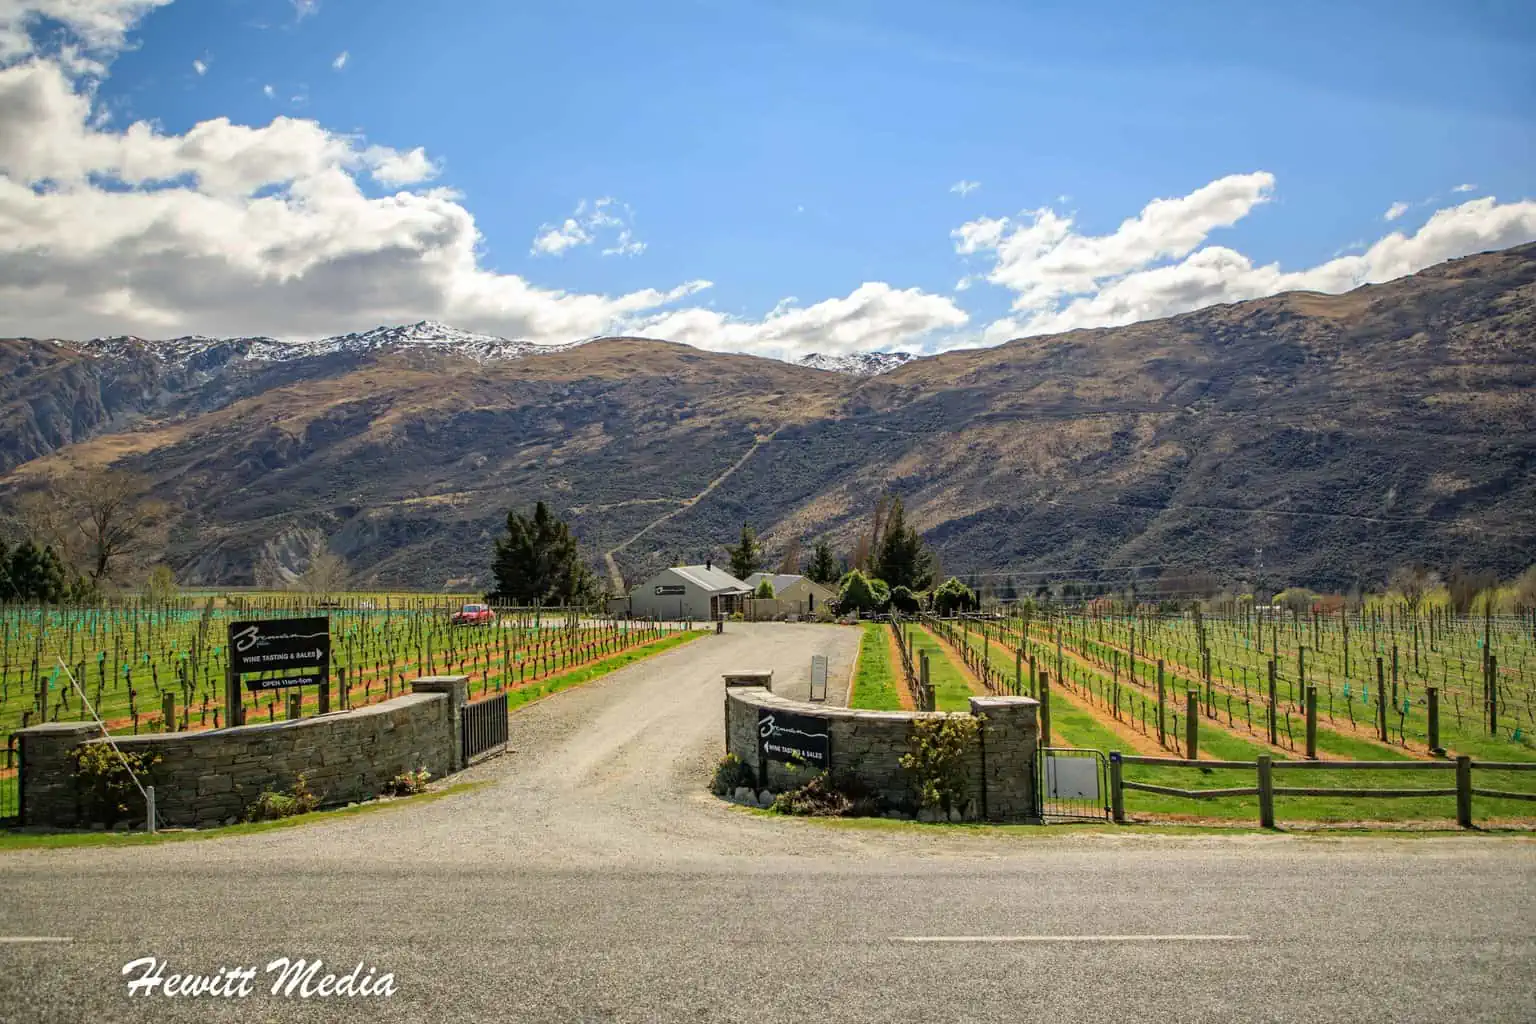
Day 10 is your first full day in the area, and I recommend taking a wine tour in the Central Otago Valley. This region is the heart of South Island wine country and one of the world’s rising wine destinations. It’s a relaxed way to enjoy the area before the final stretch of adventures. For more details, refer to my Guide to Wine Tours in New Zealand’s Central Otago Valley.
NOTE: If you would prefer, you can take the same wine tours in the Central Otago Valley from the Queenstown area. Depending on your itinerary, this may work out better for you.
After your low‑key day, the adventure ramps back up on Day 11 with some of Wanaka’s most iconic hikes. The most famous is the Roy’s Peak Track—a long, steep, and challenging route best suited for experienced hikers, but the summit views are absolutely worth the effort. Its sister hike, the Isthmus Peak Track, offers a similar level of difficulty and equally stunning vistas. For more details on these routes, see my Guide to Hiking the Isthmus Peak Track linked below.
NOTE: Be aware that the Roy’s Peak Track is closed annually from October 1st until November 10th each year for lambing season. Likewise, the Isthmus Peak Track is closed each year from November 20th through December 20th for the fawning season. If you would like to hike either of these tracks, please keep this in mind as you plan your trip.
Day 12 will be your final day in the Wanaka area, as you will want to head North towards Franz Josef Glacier by noon that day. This will ensure that you can arrive in Franz Josef at a decent time, get settled, and be prepared for your glacier experience the next day. A good activity for your final day in Wanaka is to rent kayaks and get out on Lake Wanaka. You will really experience the beauty of the lake and the area from out on the water.
Days 9-12 Details
| Driving Time From Te Anau to Wanaka: | 2 Hours 46 Minutes |
| Nights Staying in Wanaka: | 3 Nights |
| Tours, Excursions, or Activities for Day 9: | No Planned Excursions |
| Tours, Excursions, or Activities for Day 10: | Central Otago Wine Tour |
| Tours, Excursions, or Activities for Day 11: | Roy’s or Isthmus Peak Hike |
| Tours, Excursions, or Activities for Day 12: | Lake Wanaka Kayaking |
Day 9 Driving Map
| READ MORE: | |
 |
|
| Wanaka, New Zealand Visitor’s Guide | |
| READ MORE: | |
 |
|
| Guide to Hiking the Isthmus Peak Track | |
| READ MORE: | |
 |
|
| Guide to Wine Tours in New Zealand’s Central Otago Valley |
DAY 12-13: Explore Franz Josef Glacier

Your last stop before heading back to Christchurch to return home will be to the Franz Josef or Fox Glacier area on the eastern coast of New Zealand’s South Island. Here you will get to see and explore some of the largest glaciers in the Southern Alps. There are a lot of different tours that you can take to see the glaciers, but I would recommend that you take a tour that gets you on one of the glaciers to do some exploration with a guide.
It is such a surreal experience to be on a glacier and experience it first-hand. If you aren’t up for hiking, there are plenty of helicopter sightseeing tours available as well. For more information on how to tour the Franz Josef or Fox Glacier, please refer to my Guide to Franz Josef and Fox Glacier Helicopter Sightseeing and Hikes linked below.
NOTE: Some glacier tours include access to the Franz Josef Glacier hot springs, but you can also visit the hot springs on your own. In fact, it may fit your schedule better to enjoy them when you arrive on Day 12. I strongly recommend booking your glacier tour early on Day 13—booking it on Day 12 will leave you rushed leaving Wanaka, and booking it late on Day 13 will make it difficult to get back to Christchurch in time for your flight home.
Day 13 Details
| Driving Time From Wanaka to Franz Josef Glacier: | 3 Hours 52 Minutes |
| Nights Staying in Franz Josef Glacier: | 1 Night |
| Tours, Excursions, or Activities for Day 13: | Franz Josef Glacier Heli-Hike |
Day 12 Driving Map
DAY 13-14: Return to Christchurch (Fly Home)

After your tour of the Franz Josef or Fox Glacier on day 13 of your trip, you will start making your way back to Christchurch. This will be the longest drive of your trip, so make sure you leave yourself enough time. You can either choose to drive back to Christchurch on day 13 and then spend a night by the airport, or you can choose to drive halfway back to Christchurch and spend the night before driving the remainder of the way on the morning of day 14. Ultimately, that will all depend on when you book your return flight from Christchurch on day 14.
NOTE: If you are visiting in the winter, early spring, or late autumn months, be aware that snowfall can lead to road closures, especially near the Franz Josef, Fox Glacier, and Arthur’s Pass areas. You need to account for this and build some flexibility into your schedule for your drive back to Christchurch so that you don’t miss a flight.
Day 14 Details
| Driving Time From Franz Josef to Christchurch: | 5 Hours 1 Minute |
| Nights Staying in Christchurch: | 1 Night |
| Tours, Excursions, or Activities for Day 14: | No Planned Excursions |
Day 13 Driving Map
Options If You Have More Time

If you have more than two weeks to tour the South Island of New Zealand, then you might want to plan to see more of the island. In that case, I have outlined three options below on how you can extend your visit to the South Island and see some additional landscapes that are absolutely amazing. Obviously, you can also extend your trip to see some of the sights on the North Island of New Zealand. I do not cover the North Island in this guide, but there are definitely sights that are worthy of seeing on the North Island as well.
Adding Stop at Abel Tasman National Park

On the North end of the South Island of New Zealand is the Abel Tasman National Park. The Abel Tasman is well known for its breathtaking coastline and amazing marine wildlife. If this park weren’t so far away from the rest of the locations on my itinerary, I would have loved to have worked it into my standard itinerary.
However, it is quite a drive to the North. If you would like to visit the Abel Tasman National Park on your trip to the South Island, I would recommend adding at least three additional days to your trip.
NOTE: The best way to fit a stop at Abel Tasman National Park into the agenda that I provided is to continue up the Eastern Coast of the South Island after your stop at Franz Josef Glacier. Then, after touring Abel Tasman, you can make your way back down south to Christchurch to head home.
Extra Time Recommended: 3-4 Days

Adding Stop at Mount Aspiring National Park

Another worthwhile addition to your itinerary, if you have time, is to make a stop at Mount Aspiring National Park. This is another beautiful national park on the South Island of New Zealand that is worthwhile exploring if you have the time.
You will see more of the breathtaking Southern Alps and some of the most beautiful waterfalls on the South Island. Because Mount Aspiring National Park isn’t that far out of the way, you will only need to add a day or two to your trip (depending on how much time you want to spend exploring the park) to see it.
NOTE: The best place to fit a stop at Mount Aspiring National Park into my provided agenda is after you visit Wanaka and on your way to Franz Josef Glacier. The stop will take you a little bit out of your way, but it is worth it if you have the extra time to add to your trip.
Extra Time Recommended: 1-2 Days

Adding a stop at Arthur’s Pass National Park

The final suggestion that I have for adding some additional time to your itinerary would be to make a stop at Arthur’s Pass National Park. Known to be one of the most breathtaking mountain passes in the Southern Alps, Arthur’s Pass National Park is well worth the visit if you have the time. In addition to seeing the beautiful scenery, there are some amazing hikes that you can take within the park.
Because the park is on the route you would be taking for my standard itinerary, the only time you would need to add to your trip is the extra time that you would like to spend exploring this park. If you want to do some hiking and see the park right, I would suggest adding a day or two to your trip.
NOTE: Arthur’s Pass is on your route from Franz Josef Glacier to Christchurch, so you don’t need to go out of your way at all to add this park to your itinerary. You would just need to add a stop at the end of your trip.
Extra Time Recommended: 1-2 Days

Option If You Have Less Time

If you don’t have two weeks to explore the South Island of New Zealand, I have a recommendation on how you can cut 2 or 3 days off of my standard itinerary and not really miss that much. Here is a summary of how I would recommend that you modify my standard itinerary:
- Instead of arriving and departing from Christchurch, I would suggest arriving at Christchurch and then booking your return flight from Queenstown. This will save you a considerable amount of driving time, but it may mean a more expensive flight and a more expensive campervan or motorhome rental (because of the one-way rental) if that is how you plan to explore the South Island.
- Eliminate the stop at Franz Josef or Fox Glacier from my standard itinerary. Instead, I recommend that you take a tour of the Tasman Glacier while in Aoraki\Mount Cook National Park instead. This will mean less time to hike in Aoraki\Mount Cook, but if you plan your time wisely, you should have time to do some of both.
- After finishing the sightseeing portion of your trip in the Wanaka area, you will make the short drive back to Queenstown to catch your flight home. If you are traveling in the winter, early spring, or late autumn months, I would suggest leaving yourself extra time to get back to Queenstown in case of weather.
Time Saved Versus Full Itinerary: 2-3 Days

Don’t Forget to Subscribe to My Adventures!

Let Me Help You Save On Your Next Adventure!
‘Start Exploring Today’ Merchandise Available Now!
 |
 |
 |
 |
 |
 |
 |


What an amazing two weeks this would be! I hope you have a lot of Australian followers who see this because I just read about a possible Australia/NZ “travel bubble” opening up.
We must both have great minds because we think alike: tomorrow I’m publishing a post about RVing!
Wonderful post!
Thank you so much!!! I really, really hope countries don’t start isolating themselves. It would be incredibly unfortunate.
Can’t wait to read your post!!! 😀👍